If you want a vendor to address a risk that's been found, there are a number of options:
Select Request remediation from the Remediation section in Vendor Risk.

Or, select Request remediation from the vendor's Risk Profile.
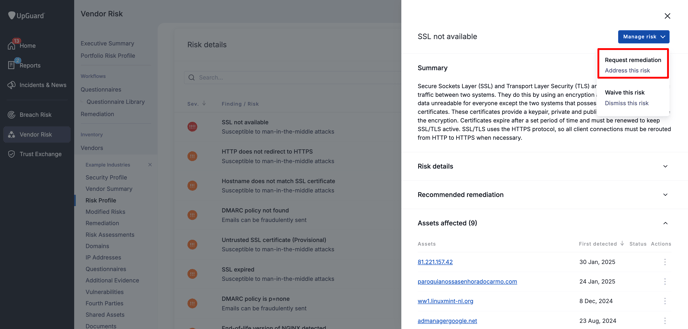
Or, select a specific risk in the Risk details section and Request remediation that way.
You can also request a remediation on specific risks wherever they are shown throughout the platform, for example, questionnaire risks from the questionnaire detail page, or additional evidence document risks from from the additional evidence detail screen.
A step-by-step guide to the remediation workflow
If you don't already have a specific vendor selected, navigate to Vendor Risk > Remediation > Request remediation to choose the vendor you want to request remediation from, then select Next.
Now you're on the Select risks and assets step. Here you can add the risks and assets you want to associate with the remediation request. You can select from automated scanning risks, questionnaire risks and additional evidence risks.
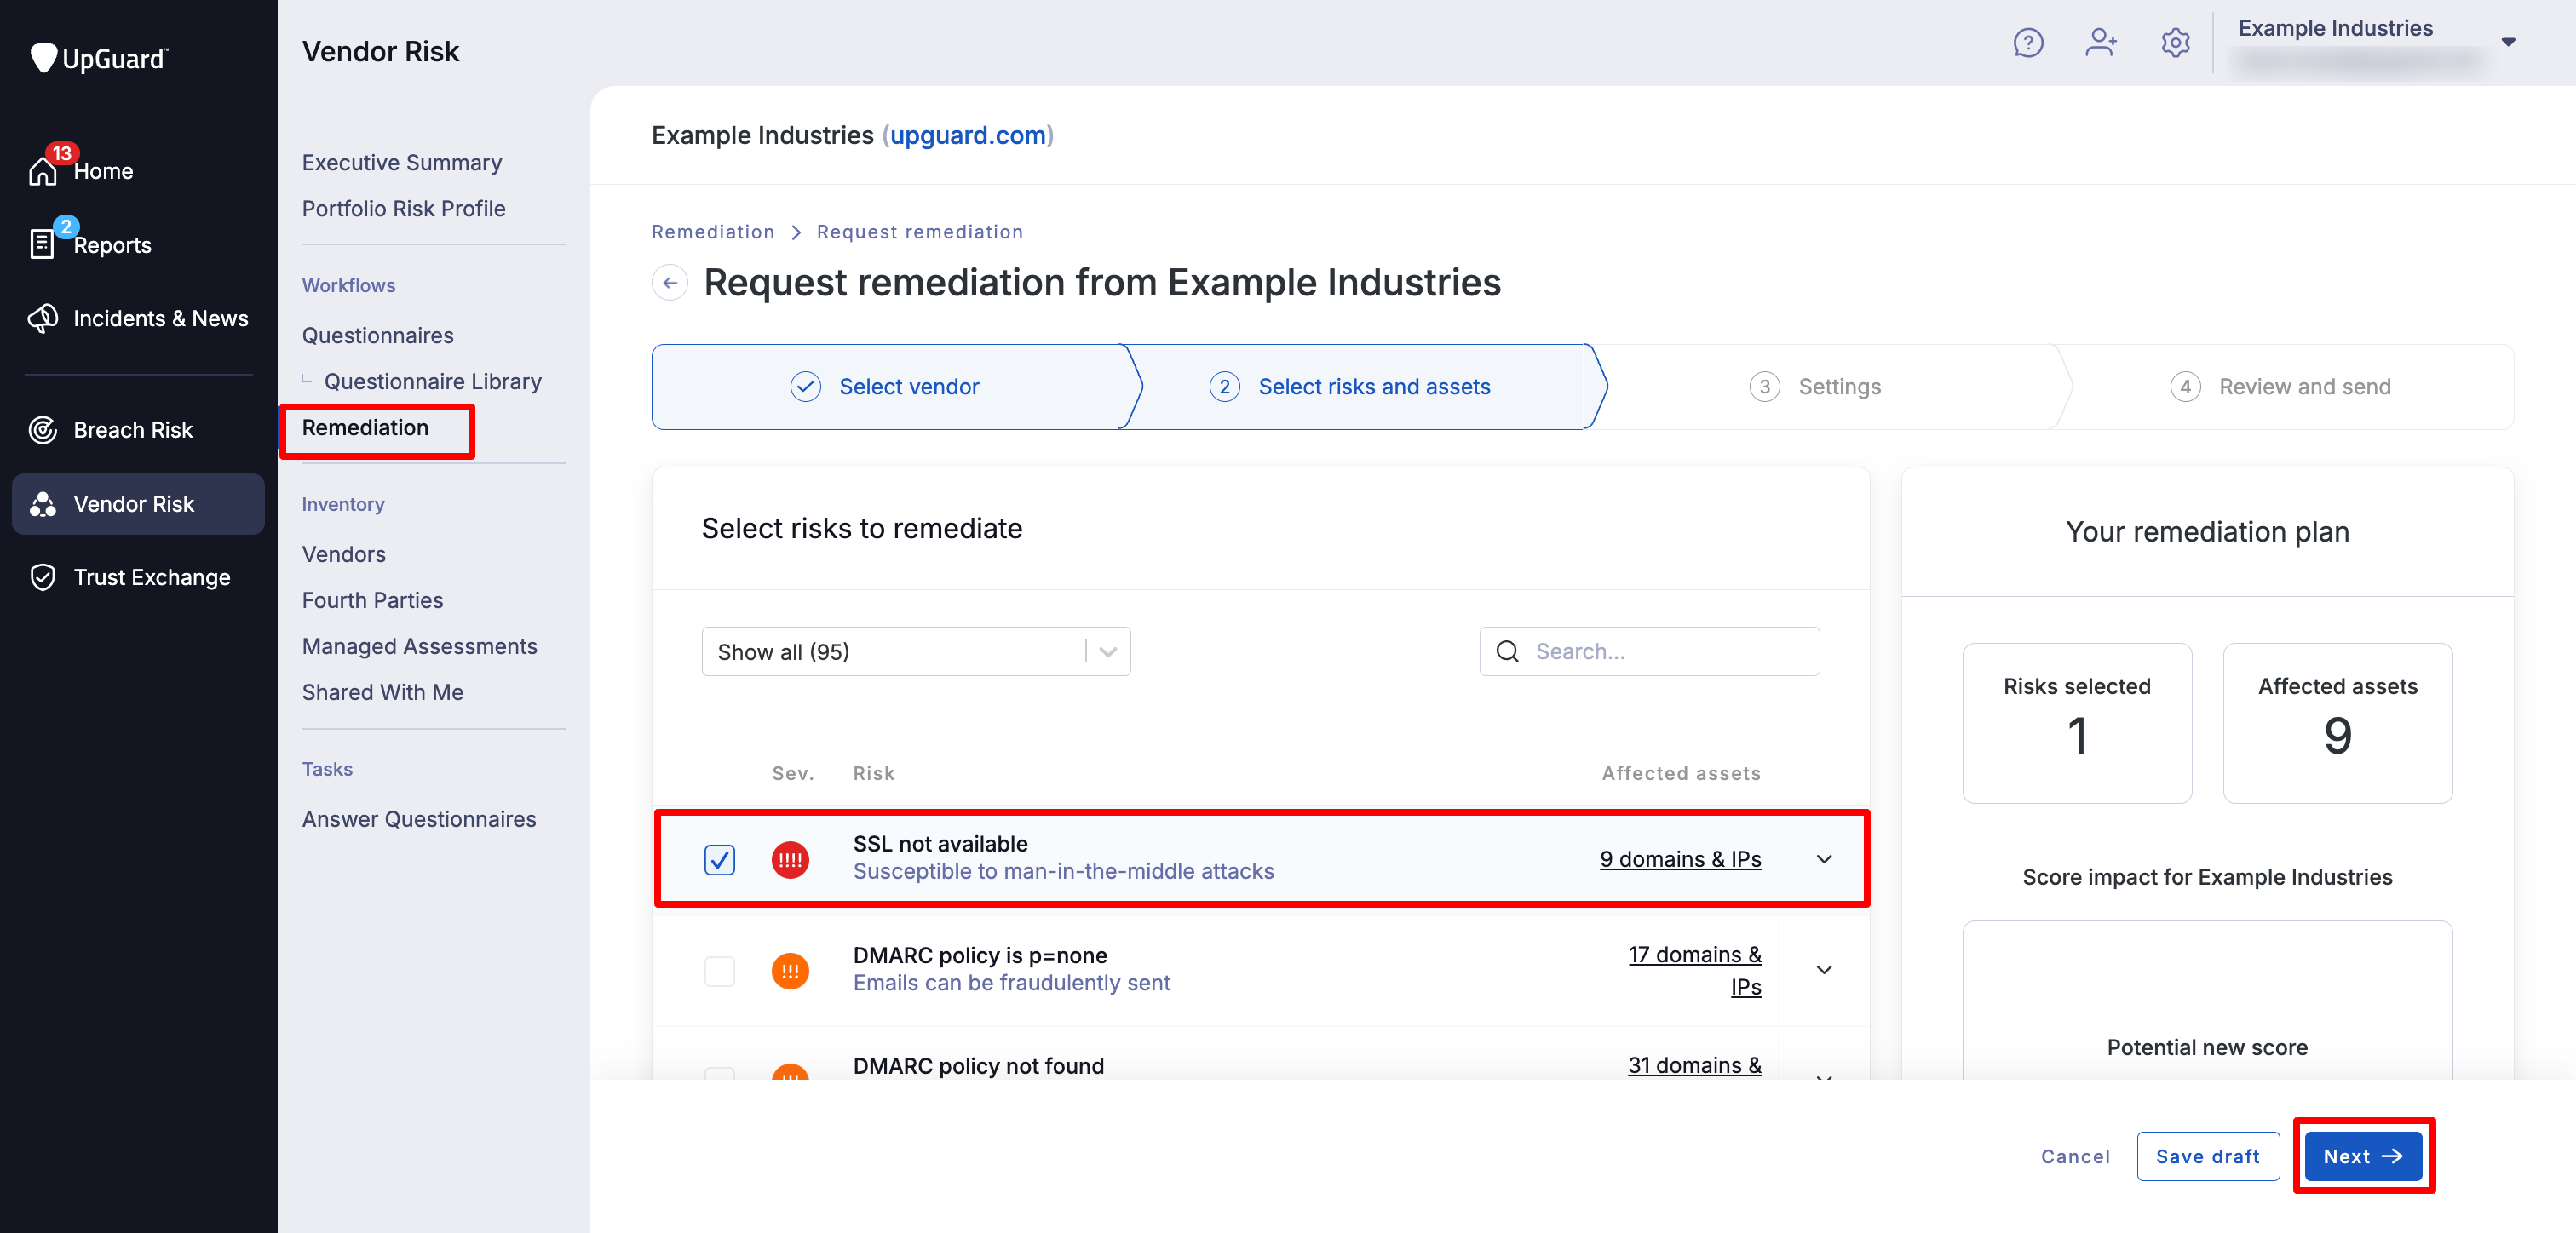
If you would like to remediate a risk at a specific domain, click on the corresponding row to expand it. This will display all the domains that have the risk where you can select the relevant domain. You can select the all domains for a given risk, or up to 50 individual domains.

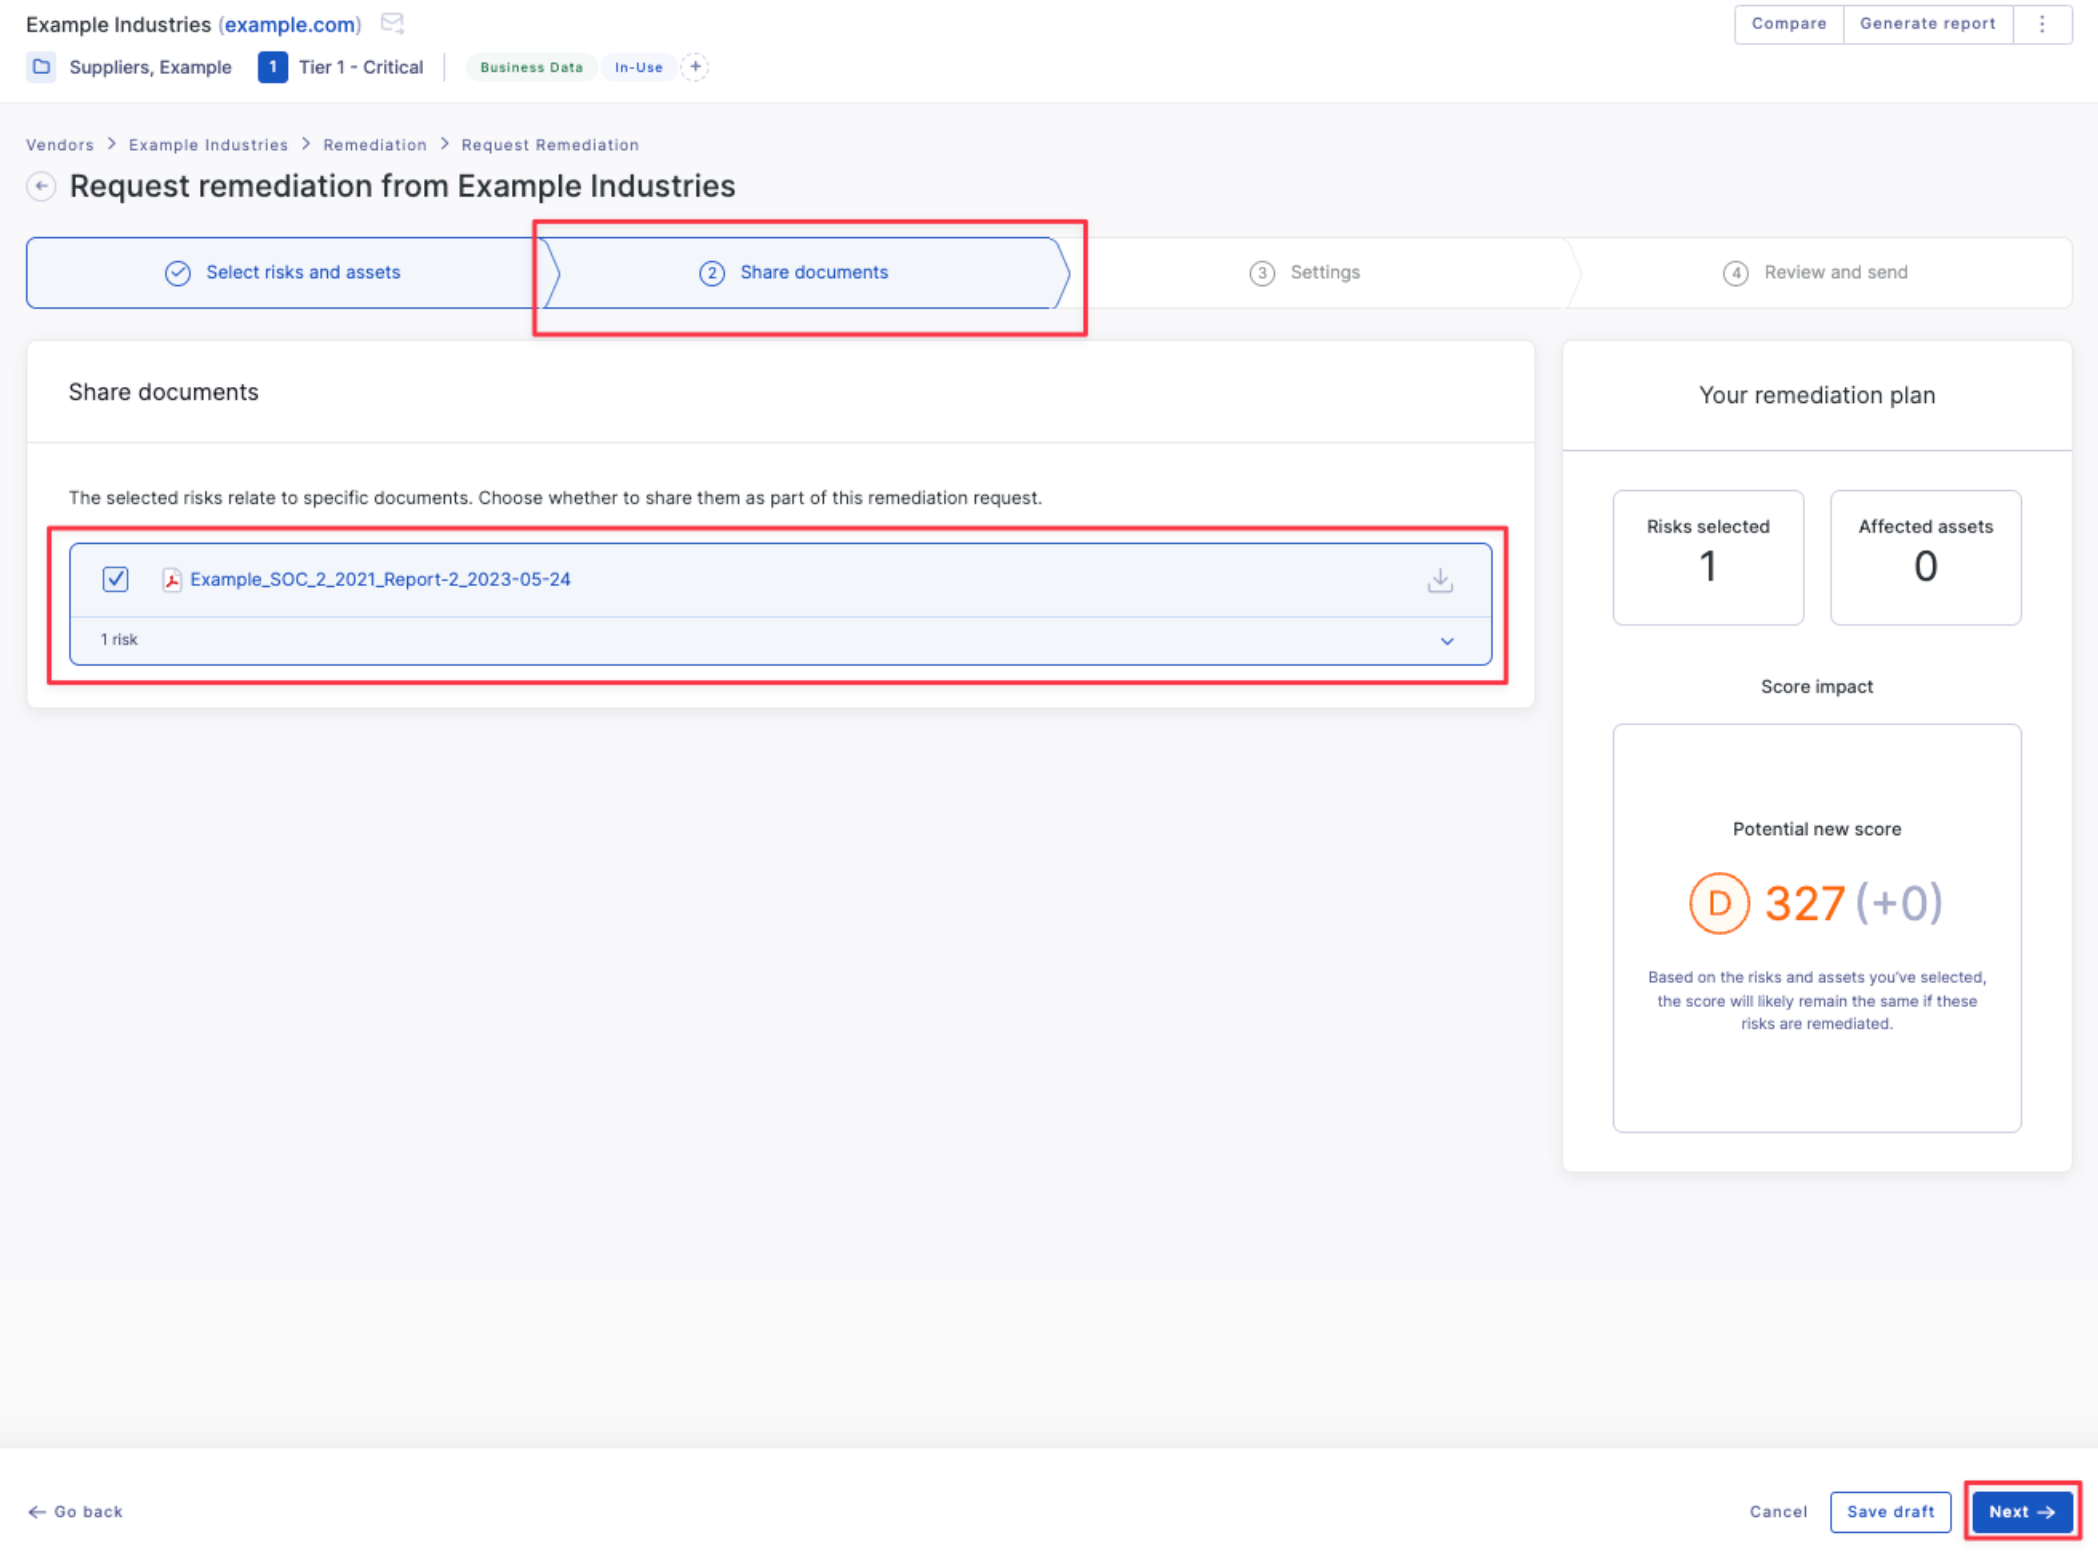
If you select an additional evidence risk the second step will give you the option to share the document that the risk was identified in with the vendor to help them assess and remediate the risk. For other types of risks, this step will be skipped.
Next, enter the details of who to send it to. You can also set a due date, reminder, or edit the message sent to the recipient(s) with your request. When you’re ready, select Next.

The final step is to review the request. Once you are happy with everything, select Submit request.

Now that the request has been created, you’ll be able to track its progress in the remediation requests table.

You can also add or remove items from a remediation request instead of cancelling and creating a new one by editing the existing one. Just select the request to see the options available.
See also: