While one user can evaluate your organization's security posture, working as a team ensures consistency of coverage as your needs scale. Adding users can be part of your business continuity plan to ensure ongoing risk assessment and vendor management. For accountability with your security team, you can have multiple users in the UpGuard platform to perform continuous monitoring of your attack surface and facilitate your vendor risk management.
Note: six paid user can access the UpGuard platform with a Basic plan.
UpGuard provides a streamlined process to support your organization's accelerated growth. With UpGuard's automated processes to streamline your attack surface and vendor risk management needs, your security team can focus on making remediation and security updates based on the information provided within the UpGuard platform. Having a team of users will accelerate your risk management practices and scale with your organization.
In this guide, you will add a new user and set their permissions in the UpGuard platform.
Adding a user
Ensure that you have set up access to your company's account within the UpGuard platform and that you are logged in as an administrator.
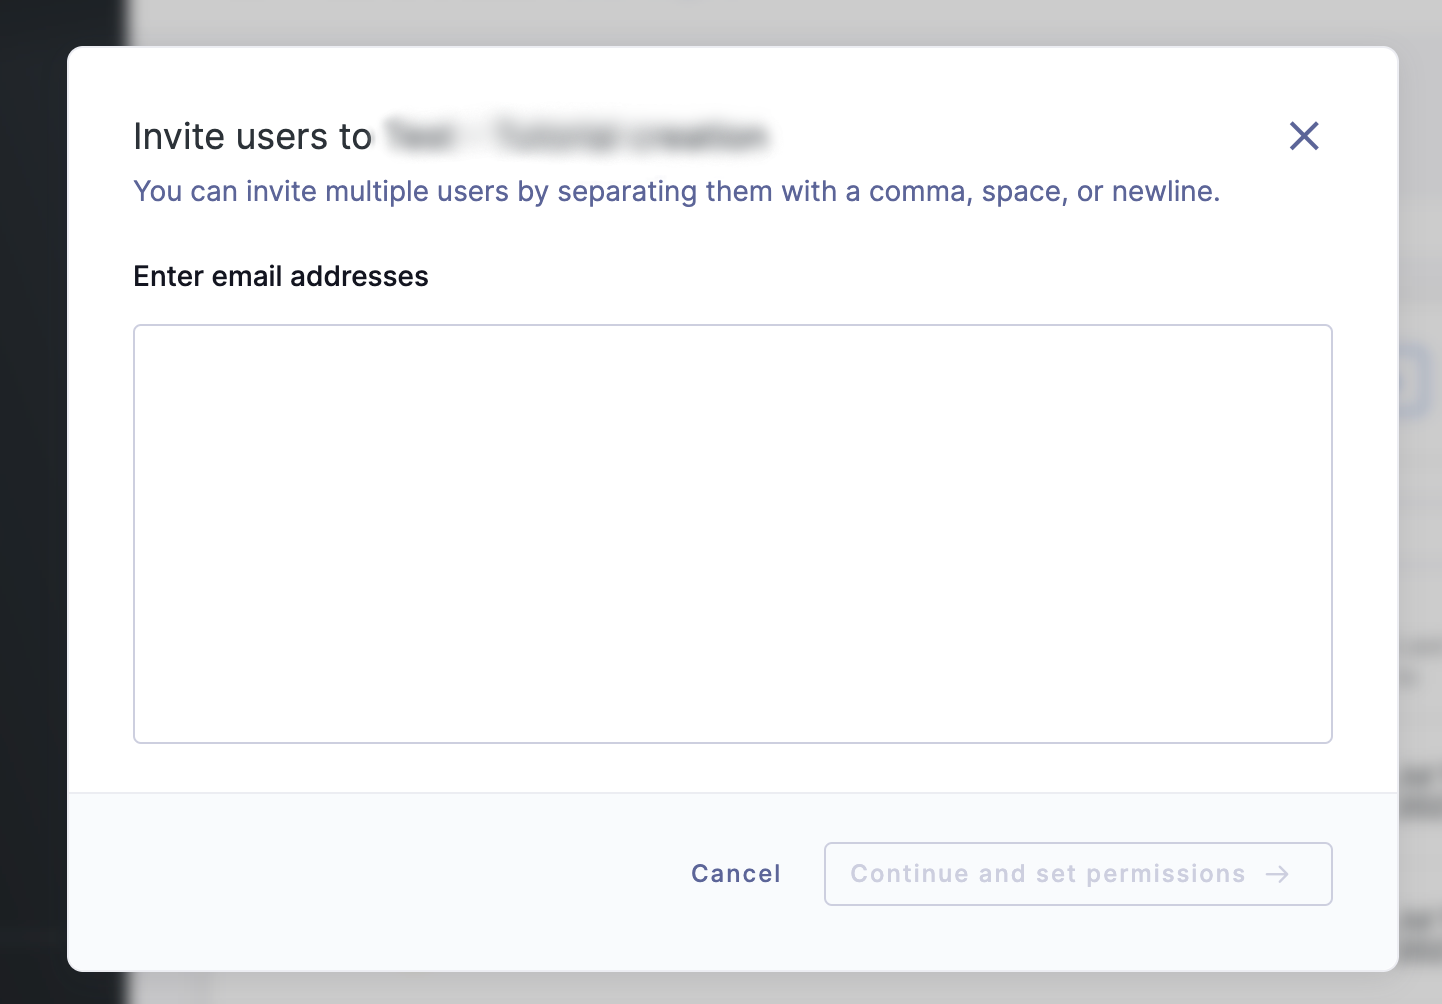
Select the Invite users button in the top menu.

Add as many users as needed and available for your plan by email. You can separate email addresses with a comma, space, or new line. Once you have added all the new users' email addresses, press Continue and set permissions.
Setting permissions for new users
Administrators for your organization's account can assign custom roles and permissions to a single user or set of users. This approach to provisioning access reduces risk because any specified account only has access to those materials that they most need to access in accordance with your access control policies.
Setting permissions for new users occurs in the same workflow as adding new users. Once you have added all the new users' email addresses, press Continue and set permissions. This action will load the Set Permissions page, where you can assign the role and permissions for these users. When you set permissions for new users on this page, those permissions will be applied to all users you just added. If you need to assign different roles to sets of users, add new users in groups according to shared role.
Note: Role-based access control with custom permissions is only available for certain plans.
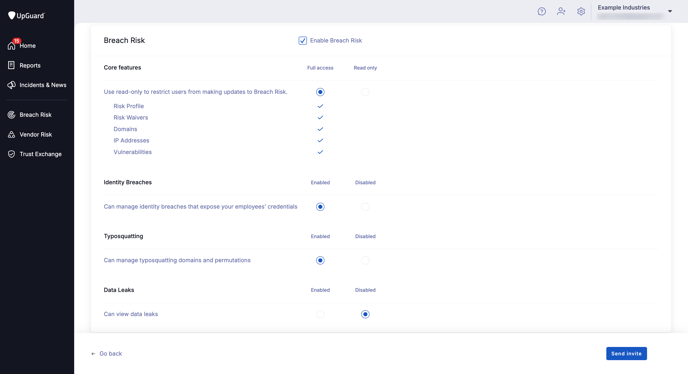
You can decide between full access and read-only access for specific features. Full access enables users to make changes to your organization's profile and features, whereas users with read-only access can view your organization's materials but cannot make changes to it. For more details on user permissions, you can read our article, What user permissions does UpGuard have.
When you check the Enable Breach Risk option, you can grant standard or restricted access to Breach Risk's core features for your new users. You can also enable or disable the Identity Breaches, Typosquatting, and Data Leaks features if those modules are available in your plan.
When you check the Enable Vendor Risk option, you can grant standard or restricted access to Vendor Risk's core features for your new users. You can also enable or disable the Risk Assessment, Questionnaire Builder, and Managed Vendors features (if available to your plan).
When you have finalized the user settings, press the Send invite button.
Adding restricted users
Any user with administrative-level access can create an unlimited number of restricted users with restricted permissions. This type of user has restricted access, so they can only view data in limited modules and they cannot make updates to an account in the UpGuard platform.
Note: Restricted users do not occupy a paid user license. For more information on user permissions, What user permissions does UpGuard have?
If you wish to use the risk assessment tools, the questionnaire builder, and other managed services (such as Managed Vendors and Data Leaks), you may need to upgrade your plan to enable additional users with full access permissions.
Using single sign-on (SSO) and multi-factor authentication (MFA)
Single sign-on (SSO) enables users to use a single set of credentials to access the apps and services they need. SSO is often paired with multi-factor authentication (MFA), which requires multiple types of verification to gain access (such as the SSO login and an authentication app).
UpGuard supports SSO for any Identity Provider (IdP) using Security Assertion Markup Language (SAML) 2.0. For all other identity providers, contact us to understand what is needed to integrate with your tool of choice.
To enable SSO, an administrator for your account can contact UpGuard's support team at support@upguard.com or using the chat widget in UpGuard.
If the administrator for your organization's use of UpGuard has enabled SSO, all new users must be added to the SSO provider group with the requisite email domain.
Administrators can enable multi-factor authentication from Settings>Users>Account users.
See also: