This article outlines how to manage your internal remediation workflows using Breach Risk, including how to access and send an internal remediation request, how to update an existing remediation request, how to export your internal requests, how to complete requests, and how to archive individual requests.
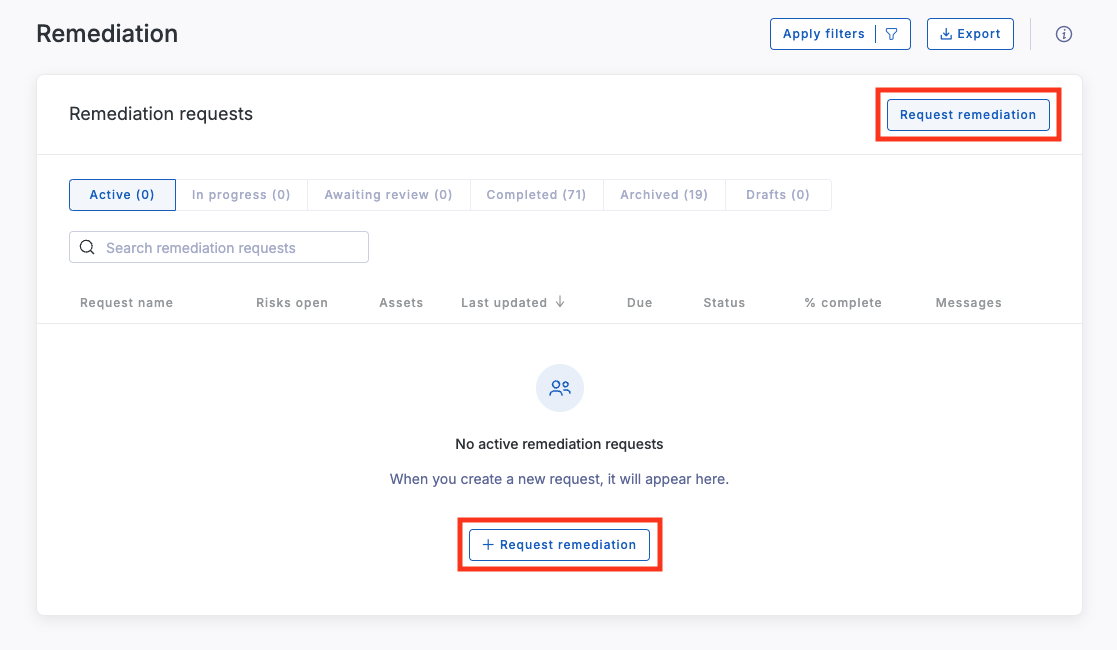
Navigate to Breach Risk > Remediation in the side menu. From the Remediation page, you can review a list of your organization's active remediation requests. You can also create new remediation requests from this page.

Each row displays the title of the request, the risk categories involved in the request, the number of open risks, the number of impacted assets, the last updated date, and the current status. You can select any request from the list to access additional details about the request or to update it as needed.
Requesting remediation from someone at your organization
As you manage internal risk findings, you may need to involve additional team members in the remediation process. You can use the Remediation section in Breach Risk to send remediation requests to someone at your organization.
From the Remediation page, click the Request remediation button.
This action will open the first step of the remediation workflow. You can select the risk findings that will be associated with this request. Your list may differ from the risks included in the sample image.
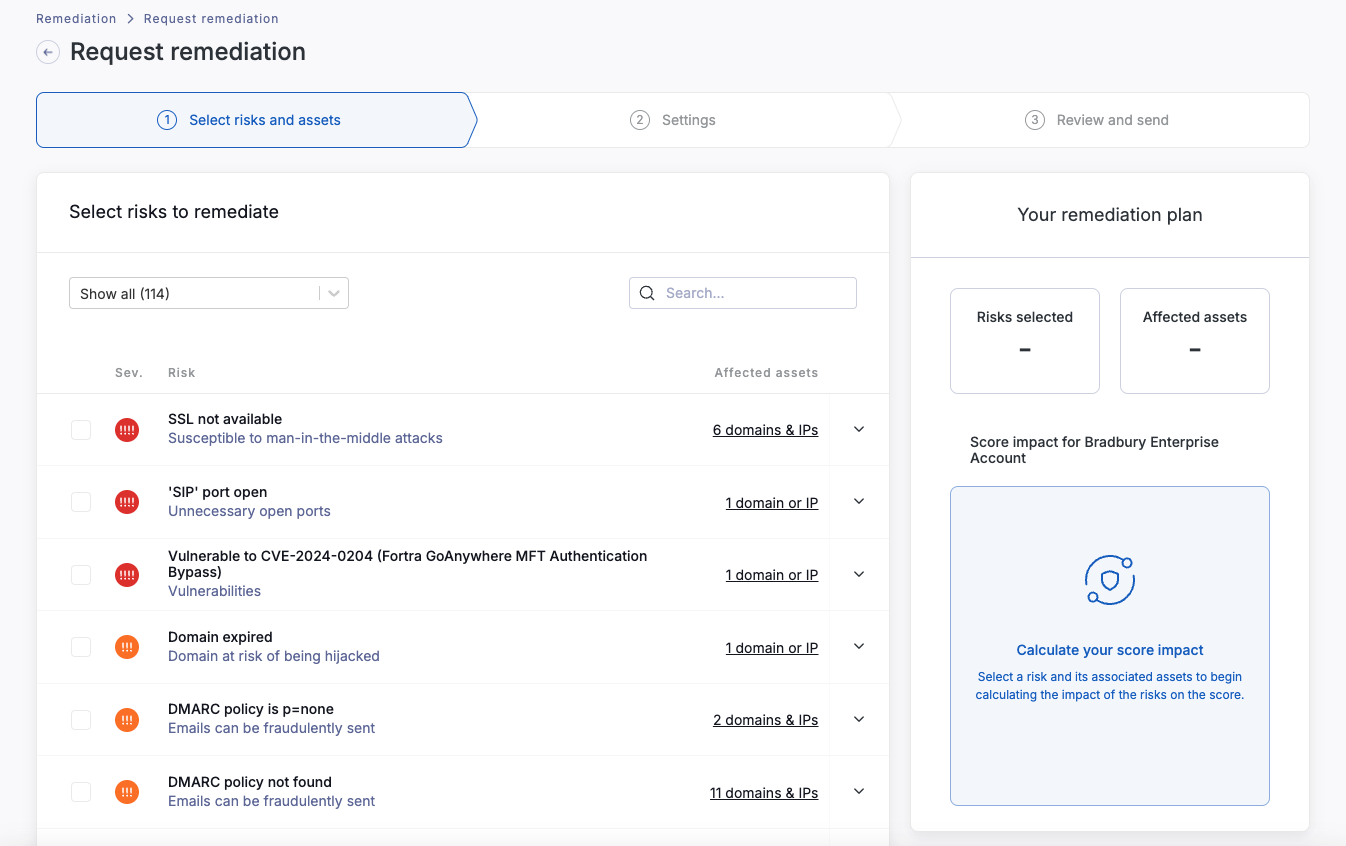
Each finding will list the impacted assets and is sorted by severity by default. You can expand the row to identify all domains and IP addresses associated with the finding. You can also use the search bar to find specific risks, or use the dropdown feature to view risks in a given category.
As you select specific findings to incorporate in this request, the remediation planner will evaluate how resolving these risks will impact your security rating. You can use dynamic estimation to evaluate how remediation will affect your organization.
When you are satisfied with the selection of risks, press Next to proceed to the Settings step.

Supply recipient email addresses, set a scheduled due date, and draft a message to communicate the needs associated with the full request. When you are ready, press Next to move to the final step of the process, where you can review your request before sending it.
After the request has been sent, you will be able to track progress in the Remediation requests table on the Remediation page. You can select any request from the table to review its status or update the request as needed.
Editing an existing remediation request
If you need to update an existing remediation request, select the corresponding row from the list on the Remediation page. The remediation request details page will open with a summary of the request, additional information about the risks that are under remediation, any correspondence about the requests, and the current progress state with a timeline of events.

You can add or remove risks from this request from the Risks section. You can also access additional information about specific risks and impacted assets from the list of risks.
You can update the status request in the summary section. You can update the title of the request, change the deadline, and add additional collaborators.
You can also use the Messages option in the upper right to communicate with your collaborators about this remediation request. Click the Messages button to open the messaging pane.
Exporting internal remediation requests
You may want to export remediation activity to incorporate the information into a stakeholder report. You can export a full set of remediation activities or an individual remediation from the UpGuard platform. Our export feature supports PDF and Excel formats, which you can select according to your needs.
From an individual request's page or using the multi-select option on the Remediation page, identify which requests you plan to incorporate into the export report, then press the Export button.
You will have the opportunity to define the export details.
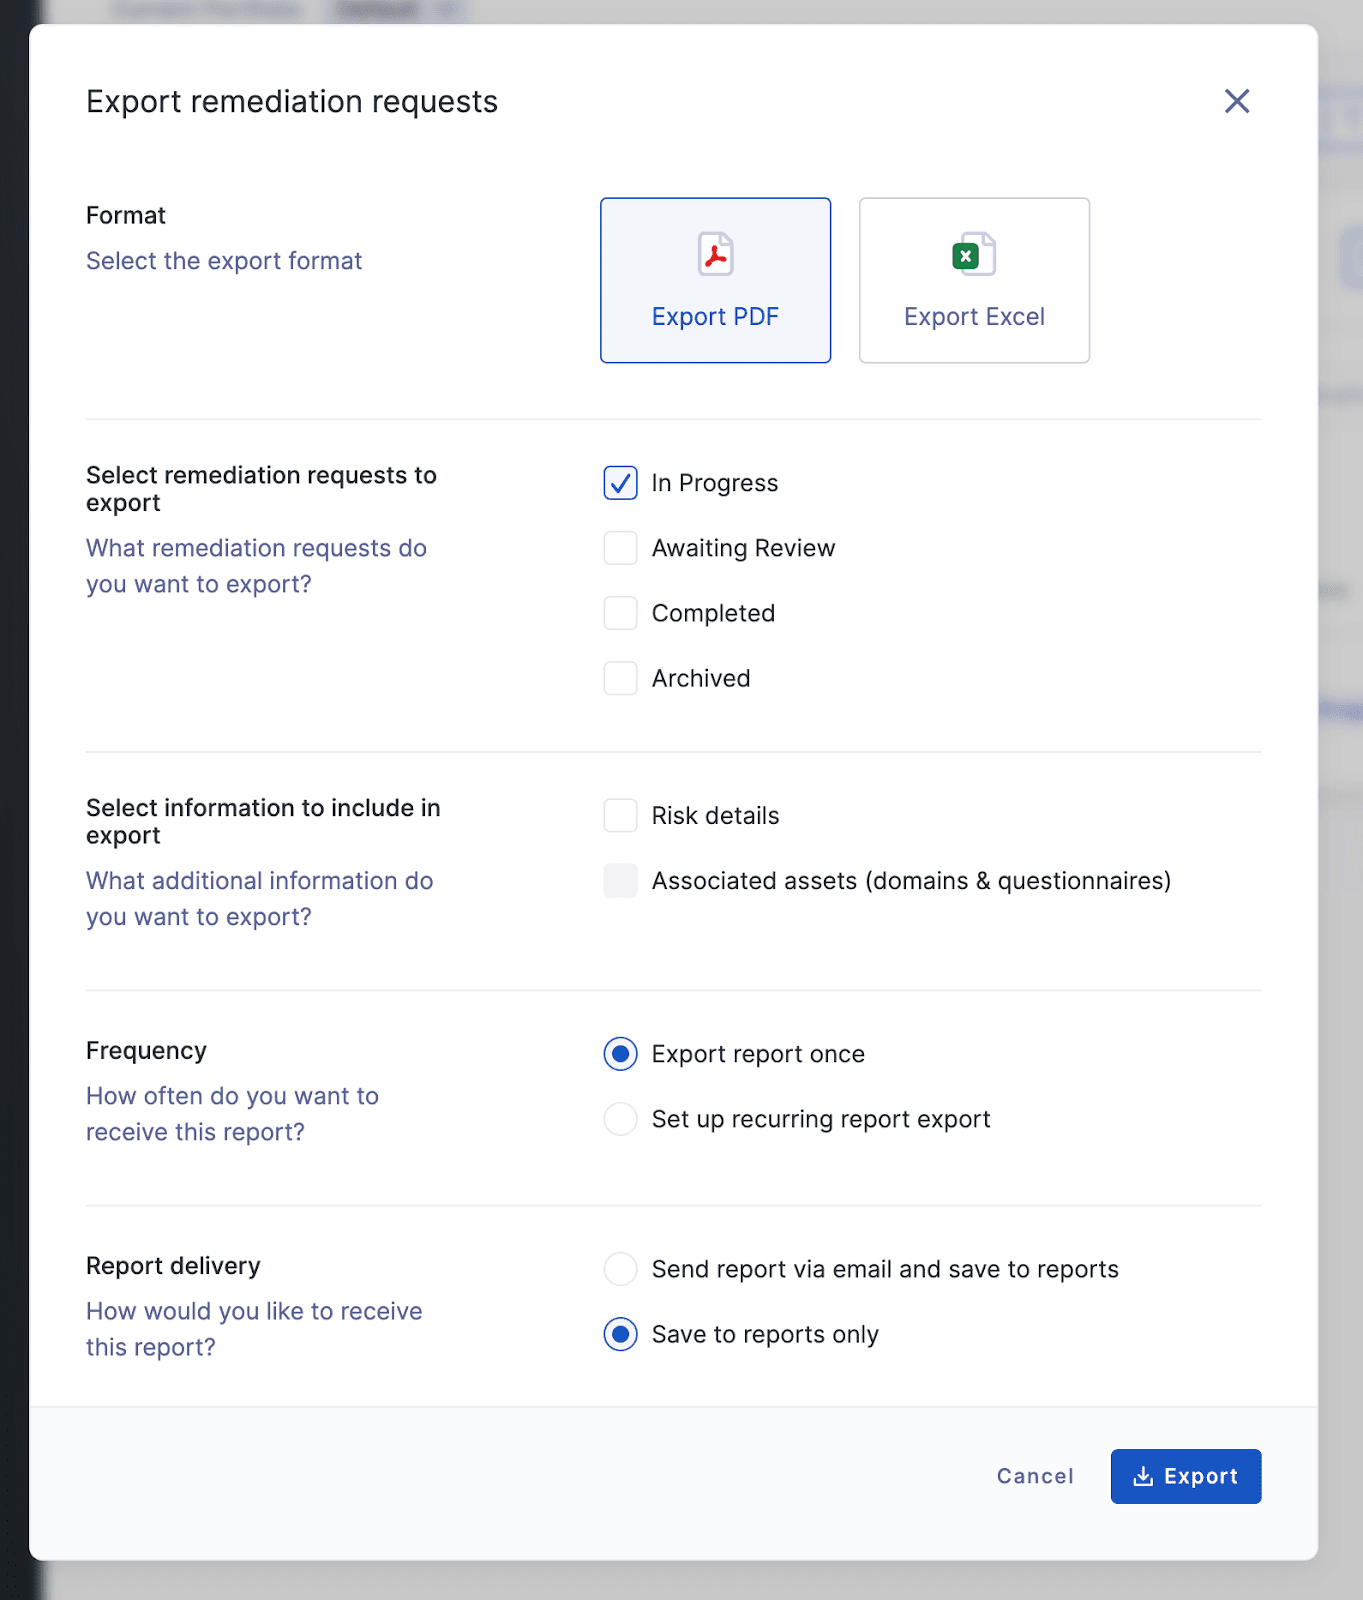
Select the following information to include in your export:
-
Format: You export information as either a PDF or an Excel document.
-
Select remediation requests to export: You can select which category of requests to include in the report.
-
Select information to include in export: You can add risk details and impacted assets to the report.
-
Frequency: You can export a single report, or create a recurring export to generate on the cadence you supply.
-
Report delivery: You can export these requests within UpGuard's Reports section and you can also send the report directly via email.
If you are exporting a single remediation request, you will be able to apply this additional parameter:
-
Select which sections you would like to export: You can include different types of risks (unremediated, partially remediated, waived, and remediated) with additional descriptions and impacted assets. You can also opt to include a timeline of events for the remediation request.
When you are satisfied with the information configured for the report, click Export. The exported remediation request will be delivered in the method you selected. You can navigate to the Reports section to access the newly generated report containing the details for the requests you selected.
Closing internal remediation requests
When you send a remediation request to someone at your organization, they will be prompted to respond to the request in UpGuard. After they have responded to the request and confirmed that they have made any necessary updates to remediate the finding, you can review any communications they have provided on the request. UpGuard's scanning services will assess the remediation and update the status as the risks have been mitigated.
When you consider the remediation request fulfilled, press the Mark as completed button to file this request under the Completed tab. You can reopen a request at any time by navigating to the request's overview page and pressing the Reopen button.
Archiving internal remediation requests
If you have an extensive list of completed remediation requests or you no longer wish to proceed with an in-progress request, you can archive any request to remove it from the active requests panel. You can archive individual requests or a set of requests.
From your Remediation page, identify which request you wish to archive. Click the archive icon to archive a single request. Or select multiple requests and use the Archive button that appears. You can also archive an individual request from that request's details page.
A modal will appear, where you can confirm that you intend to archive this request.
From the Archived tab, you can reactivate requests to move them back into your Active queue.
You can also delete archived requests, which will remove all data associated with the request. Deletion cannot be undone, so it is important to be sure that you do not wish to maintain a record of this remediation request.
See also:
For more information on remediation in UpGuard, read these articles next: