How breaches are classified
Breaches are grouped into four categories that include the following datapoints:
-
Low: Email addresses, IP addresses, names, website activity, gender, geographic region, and a myriad of other details.
-
Medium: Dates of birth, phone numbers, physical addresses, partial credit card data, bank account numbers, IMEI numbers, mnemonic phrases, recovery email addresses, credit card CVVs, address book contacts, and audio recordings.
-
High: Usernames, security questions and answers, banking PINs, PINs, private messages, government-issued IDs, email messages, credit card numbers, passport numbers, chat logs, SMS messages, password hints, cryptocurrency wallet hashes, and social security numbers.
-
Critical: Passwords, authentication tokens, historical passwords, and biometric data.
Types of breaches
UpGuard categorizes identity breaches into three categories to reflect their provenance.
-
"Company" data breaches are those shared on illicit communities where the data originates from one source company or organization. These breaches are named for the company from which the data was taken, which the attacker usually publicizes when distributing the data.
-
"Paste" breaches are those where the stolen data is shared on anonymous text-sharing sites with little information about its origin.
-
"Infostealer" breaches are credentials stolen by malware installed on a device used by the person and redistributed by the attacker.
Configuring the Identity Breaches list
To configure which columns are displayed in the Identity Breaches table, select Columns then add or remove properties to achieve the view you want.

Filtering the Identity Breaches list
By clicking the "Apply filters button" you can open the panel to apply filters based on different properties of the breaches like number of employees involved, severity, date, type of breach, and types of data exposed. After selecting your filter criteria, click "Apply."
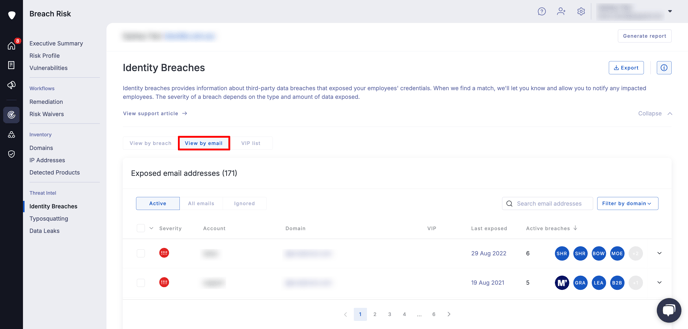
 How to view data found in the identity breaches module
There are three ways to view the data found in the identity breaches module by:
Viewing by breach
When viewing by breach, you can see a list of all the identity breaches that included at least one of your organization's email addresses.

You can also archive a breach if you believe it presents no risk by clicking the "Archive breaches" button which pops up when you select a breach.
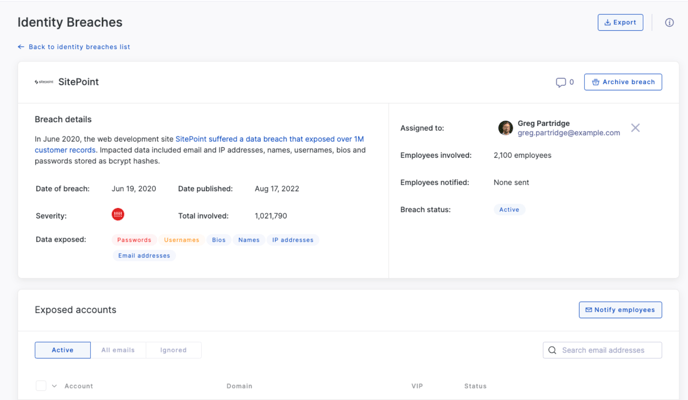
When you click on an individual breach, we'll give you an overview of the breach which includes:
-
Breached company name
-
Breach details
-
Date of breach
-
Date published
-
Notification sent
-
Breach status
-
Number of employees involved
-
Total breach size
-
Data exposed
-
Breach type
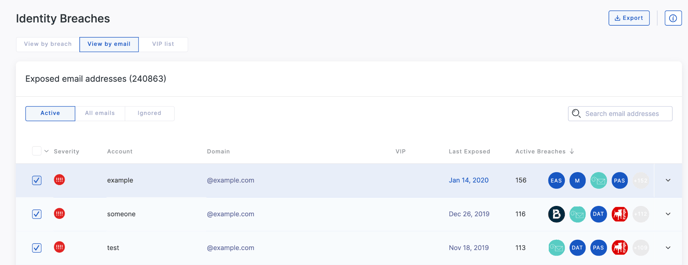
Viewing by email address
When viewing by email address, you are presented with a list of all email addresses that have been included in any breach (excluding those you have explicitly ignored).
Selecting an email address from the list shows you the details of all the breaches that email address was exposed in.
Ignoring emails
If the breach contains email addresses that are not relevant (such as ex-employees, or non-existent email addresses) click the "Ignore email addresses" button, and follow the prompts and they will no longer appear in this or any other breach.

Notifying employees
To notify exposed employees, click the "notify employees" button and follow these steps:
Select the employee(s) that you want to notify about the breach:
-
To select an individual employee click the square next to their account; or
-
To select all accounts, click the "Select all unnotified accounts"
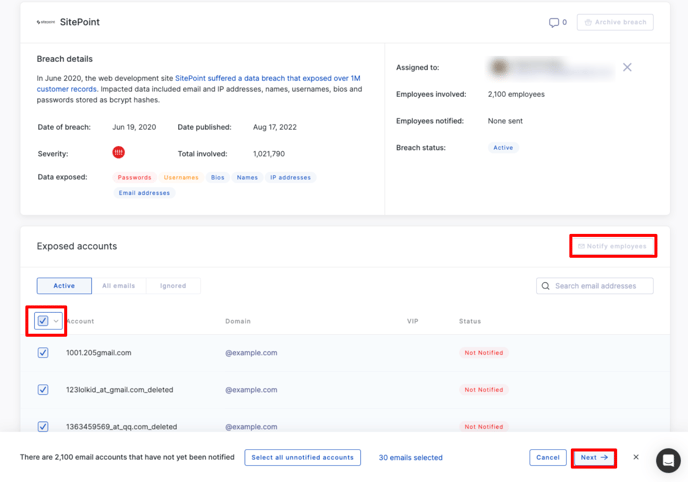
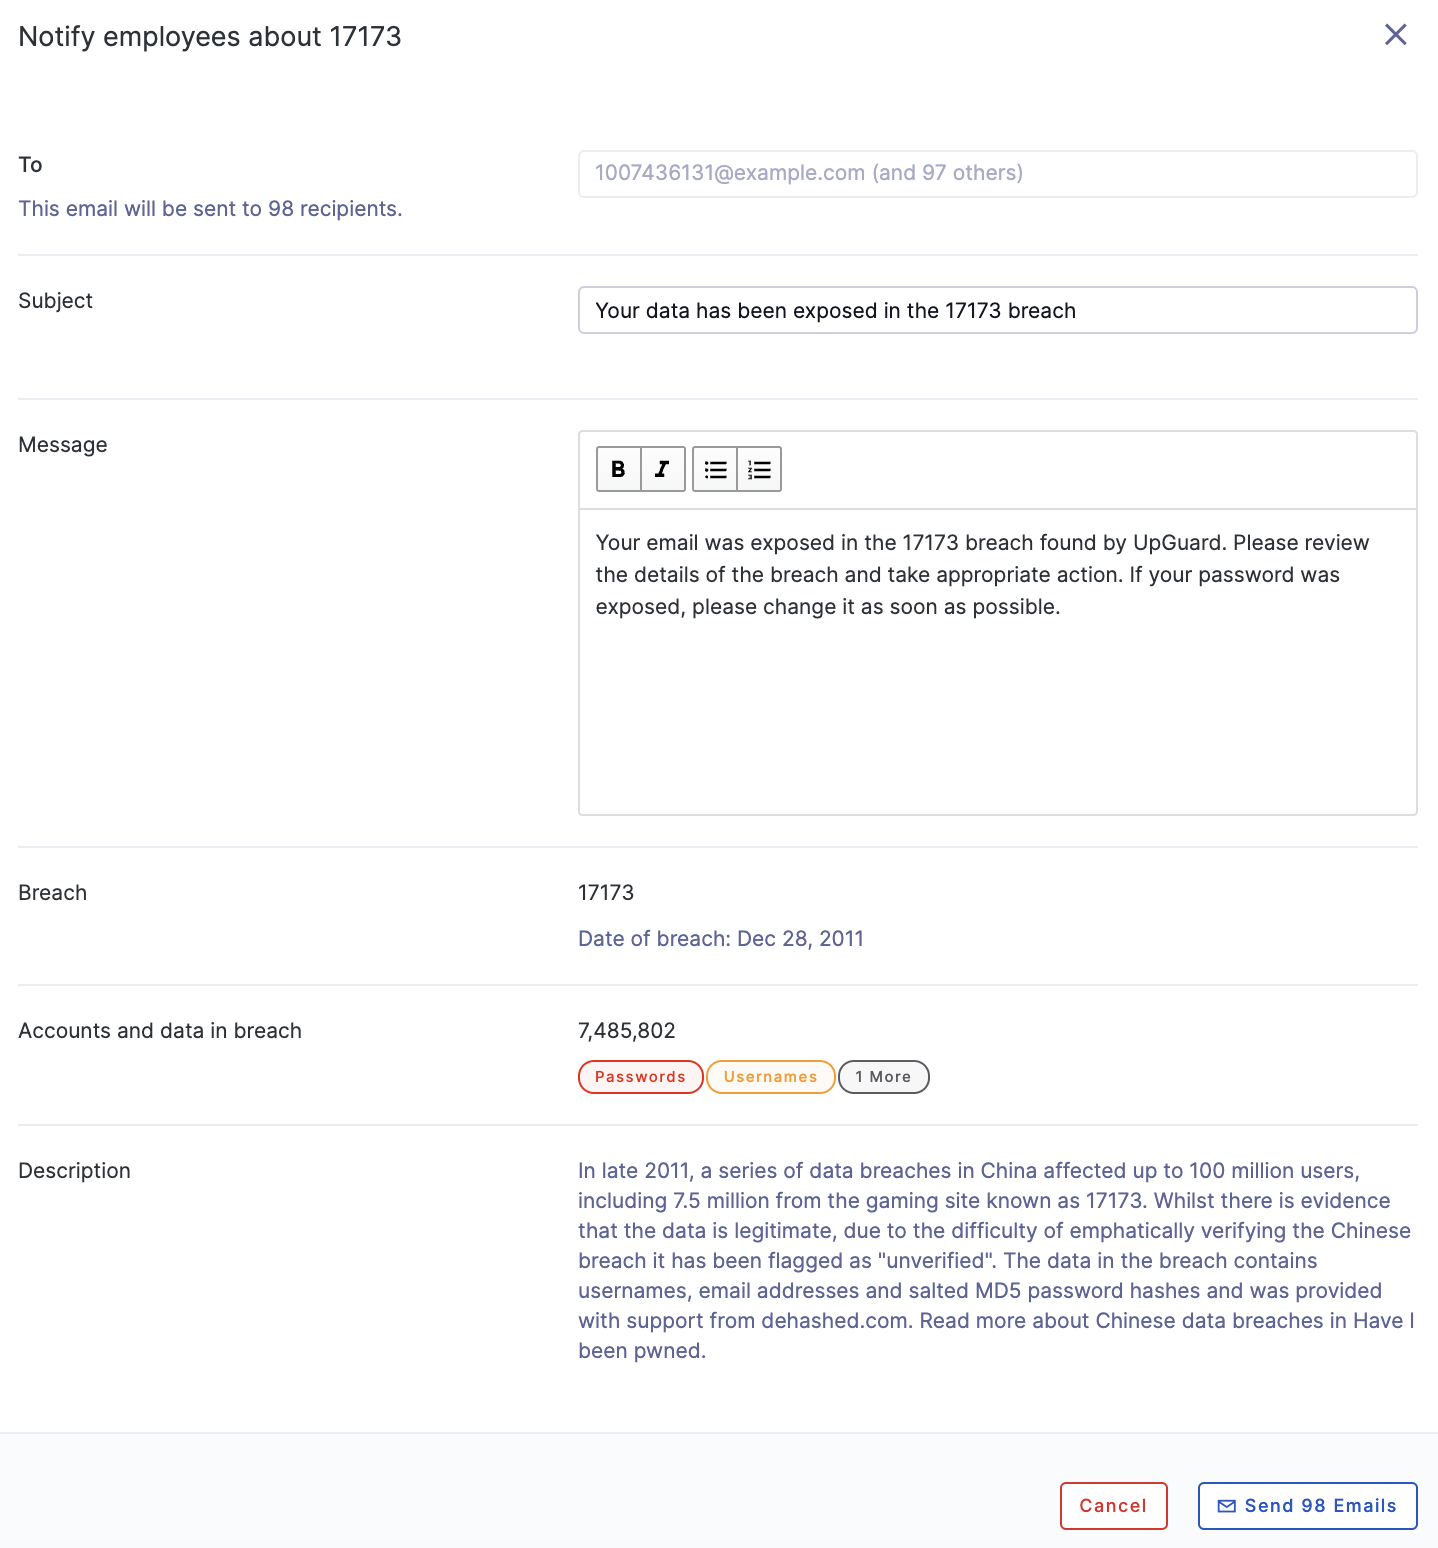
Once you've selected the accounts you wish to notify, click the "Next" button in the lower right-hand corner of the screen. You'll be taken to the "Notify Employees" screen which highlights who will be receiving the email as well as what message they will receive.
If you would like to change the subject line or message, use the provided input boxes and then click the "Send Email" button.
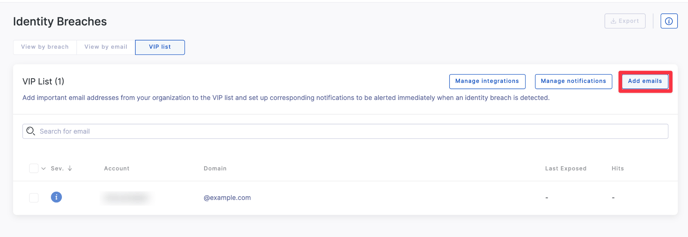
Viewing by VIP list
When viewing the VIP list by breach, you can see how many identity breaches a given VIP has been involved in, when they were last involved in an incident, and the overall severity. You will also be able to click through to Manage integrations or Manage notifications to ensure you are set up to act quickly when an identity breach occurs involving a VIP.
Adding an email to the VIP list
In the VIP list tab select Add emails and follow the prompts to add an email from your organization's domain by entering it individually, or pasting in a comma/space/tab separated list of email addresses.
Conversely, when selecting email addresses in the View by emails tab, you'll have the option to Tag as VIP in addition to Ignore emails.
See also: