While we recommend that you use UpGuard's security questionnaires and automated scanning tools to assess your vendors, additional evidence can also be an important source of information to help assess your vendors.
For example, you may send an UpGuard questionnaire to a large SaaS vendor only to be directed to a page on their website that proactively publishes complete security questionnaires, audit reports, and certificates. These documents can provide insights into the vendor's security posture and attack surface, and in some cases may even alleviate the need for sending a security questionnaire.
Our additional evidence feature allows you to capture and store this security or compliance-related documentation and any identified risks. Once identified, you can choose to include these risks in the vendor's risk profile, and cite them as part of your risk assessment for a vendor.
There are 2 ways to capture additional evidence in UpGuard: If you already have access to the documents you can upload them directly to the platform, or alternatively you can ask you monitored vendors to upload them directly to the platform and share them with you.
Before you can capture evidence, you need to be monitoring the vendor. If you aren't currently monitoring the vendor, you can learn how to monitor them here.
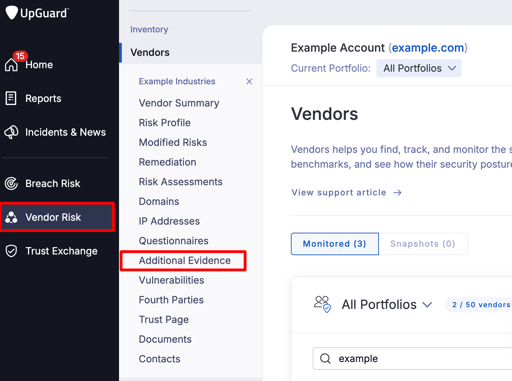
If you're already monitoring them, you can find the vendor by clicking on the "Vendors" section under Vendor Risk in the sidebar.
In the example below, I've chosen example.com as the vendor and clicked on "Additional Evidence".
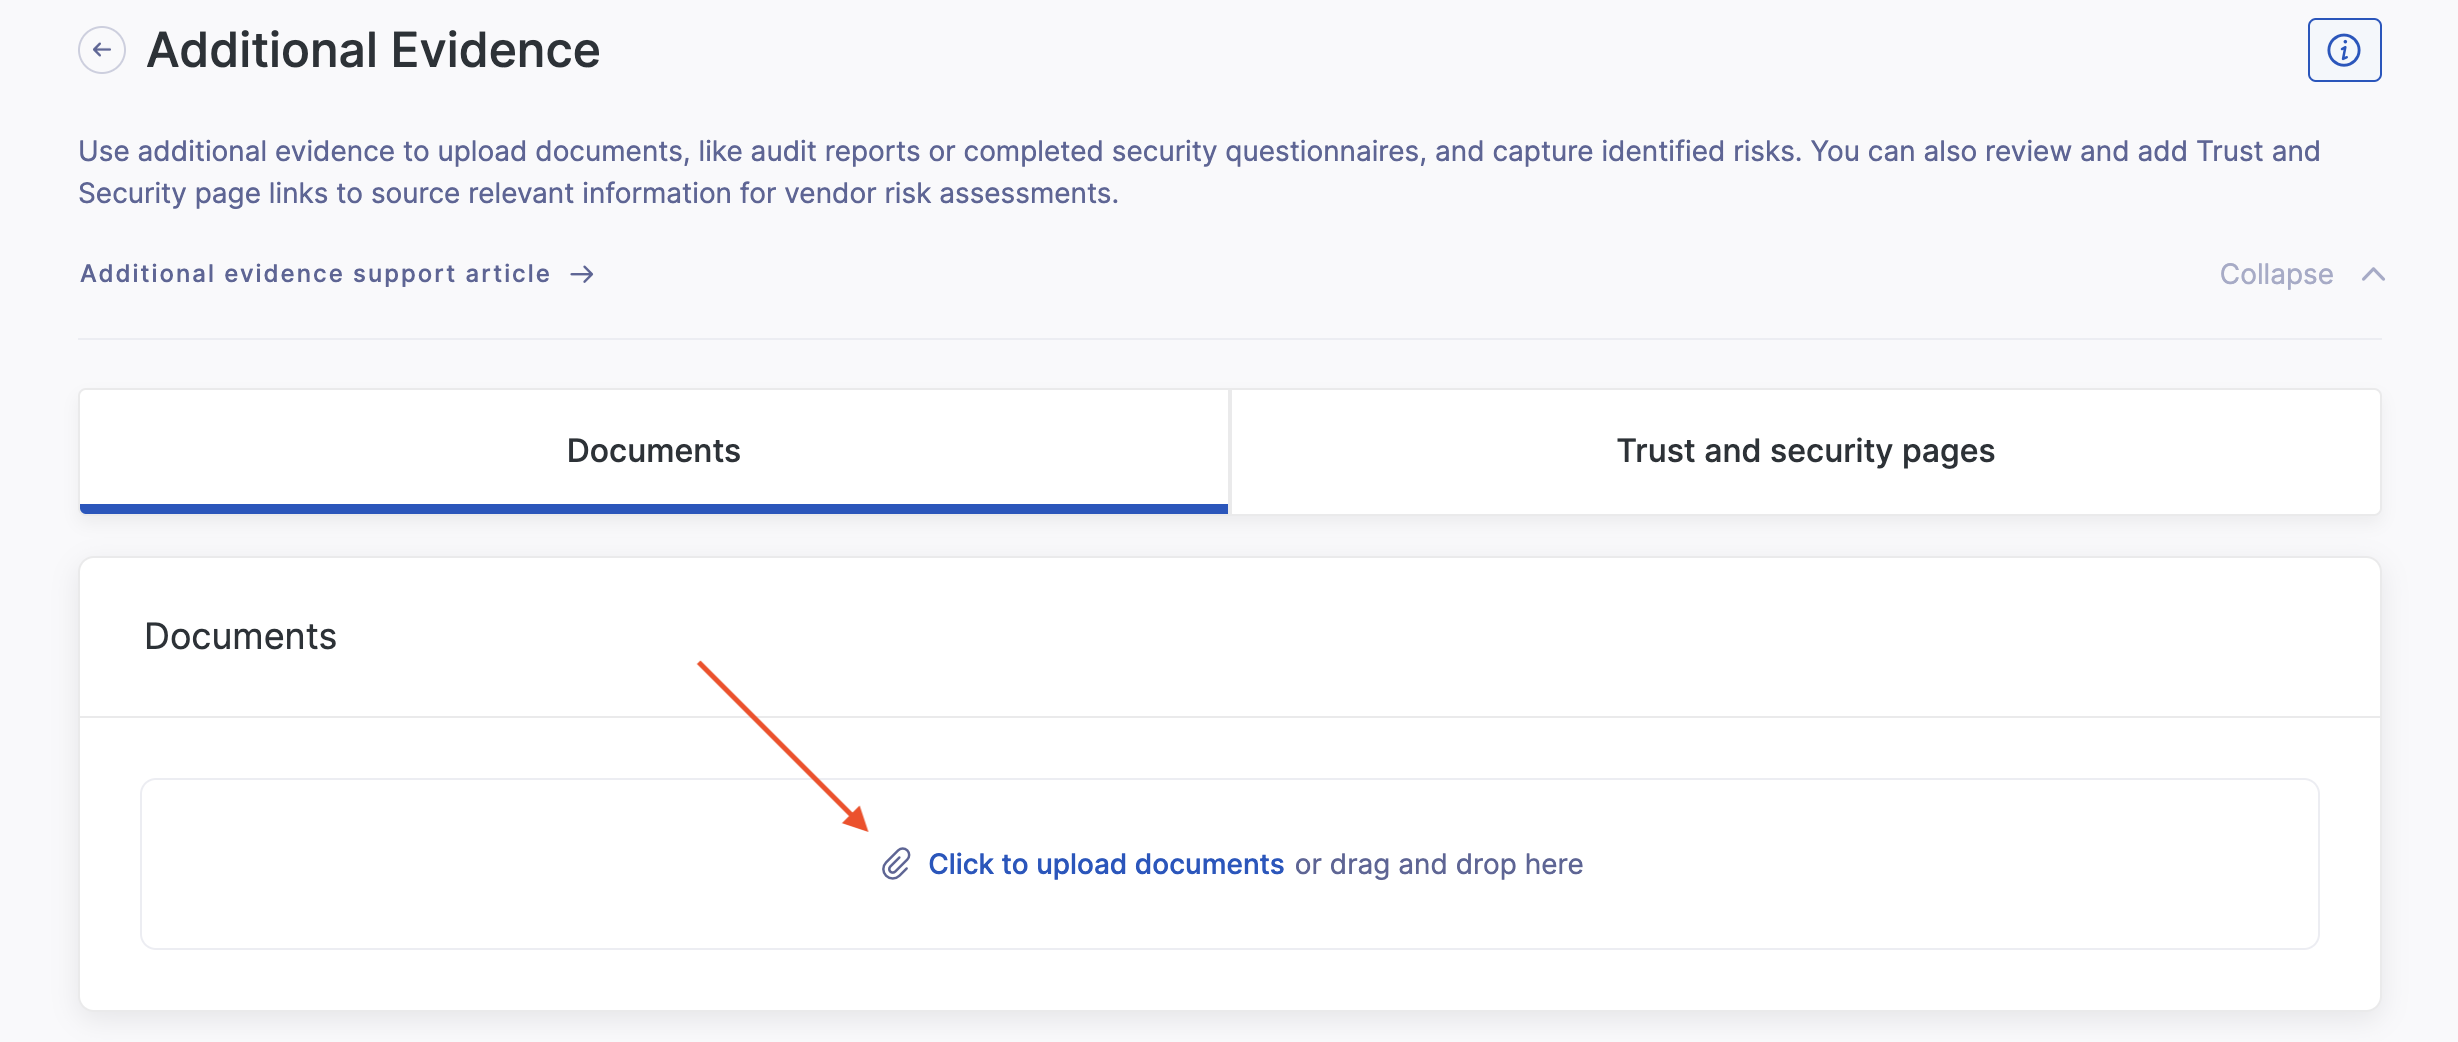
To get started, you can either select "Click to upload new documents" or drag and drop your files into the box. You can upload multiple documents at a time, with a maximum individual file size of 5 MB.
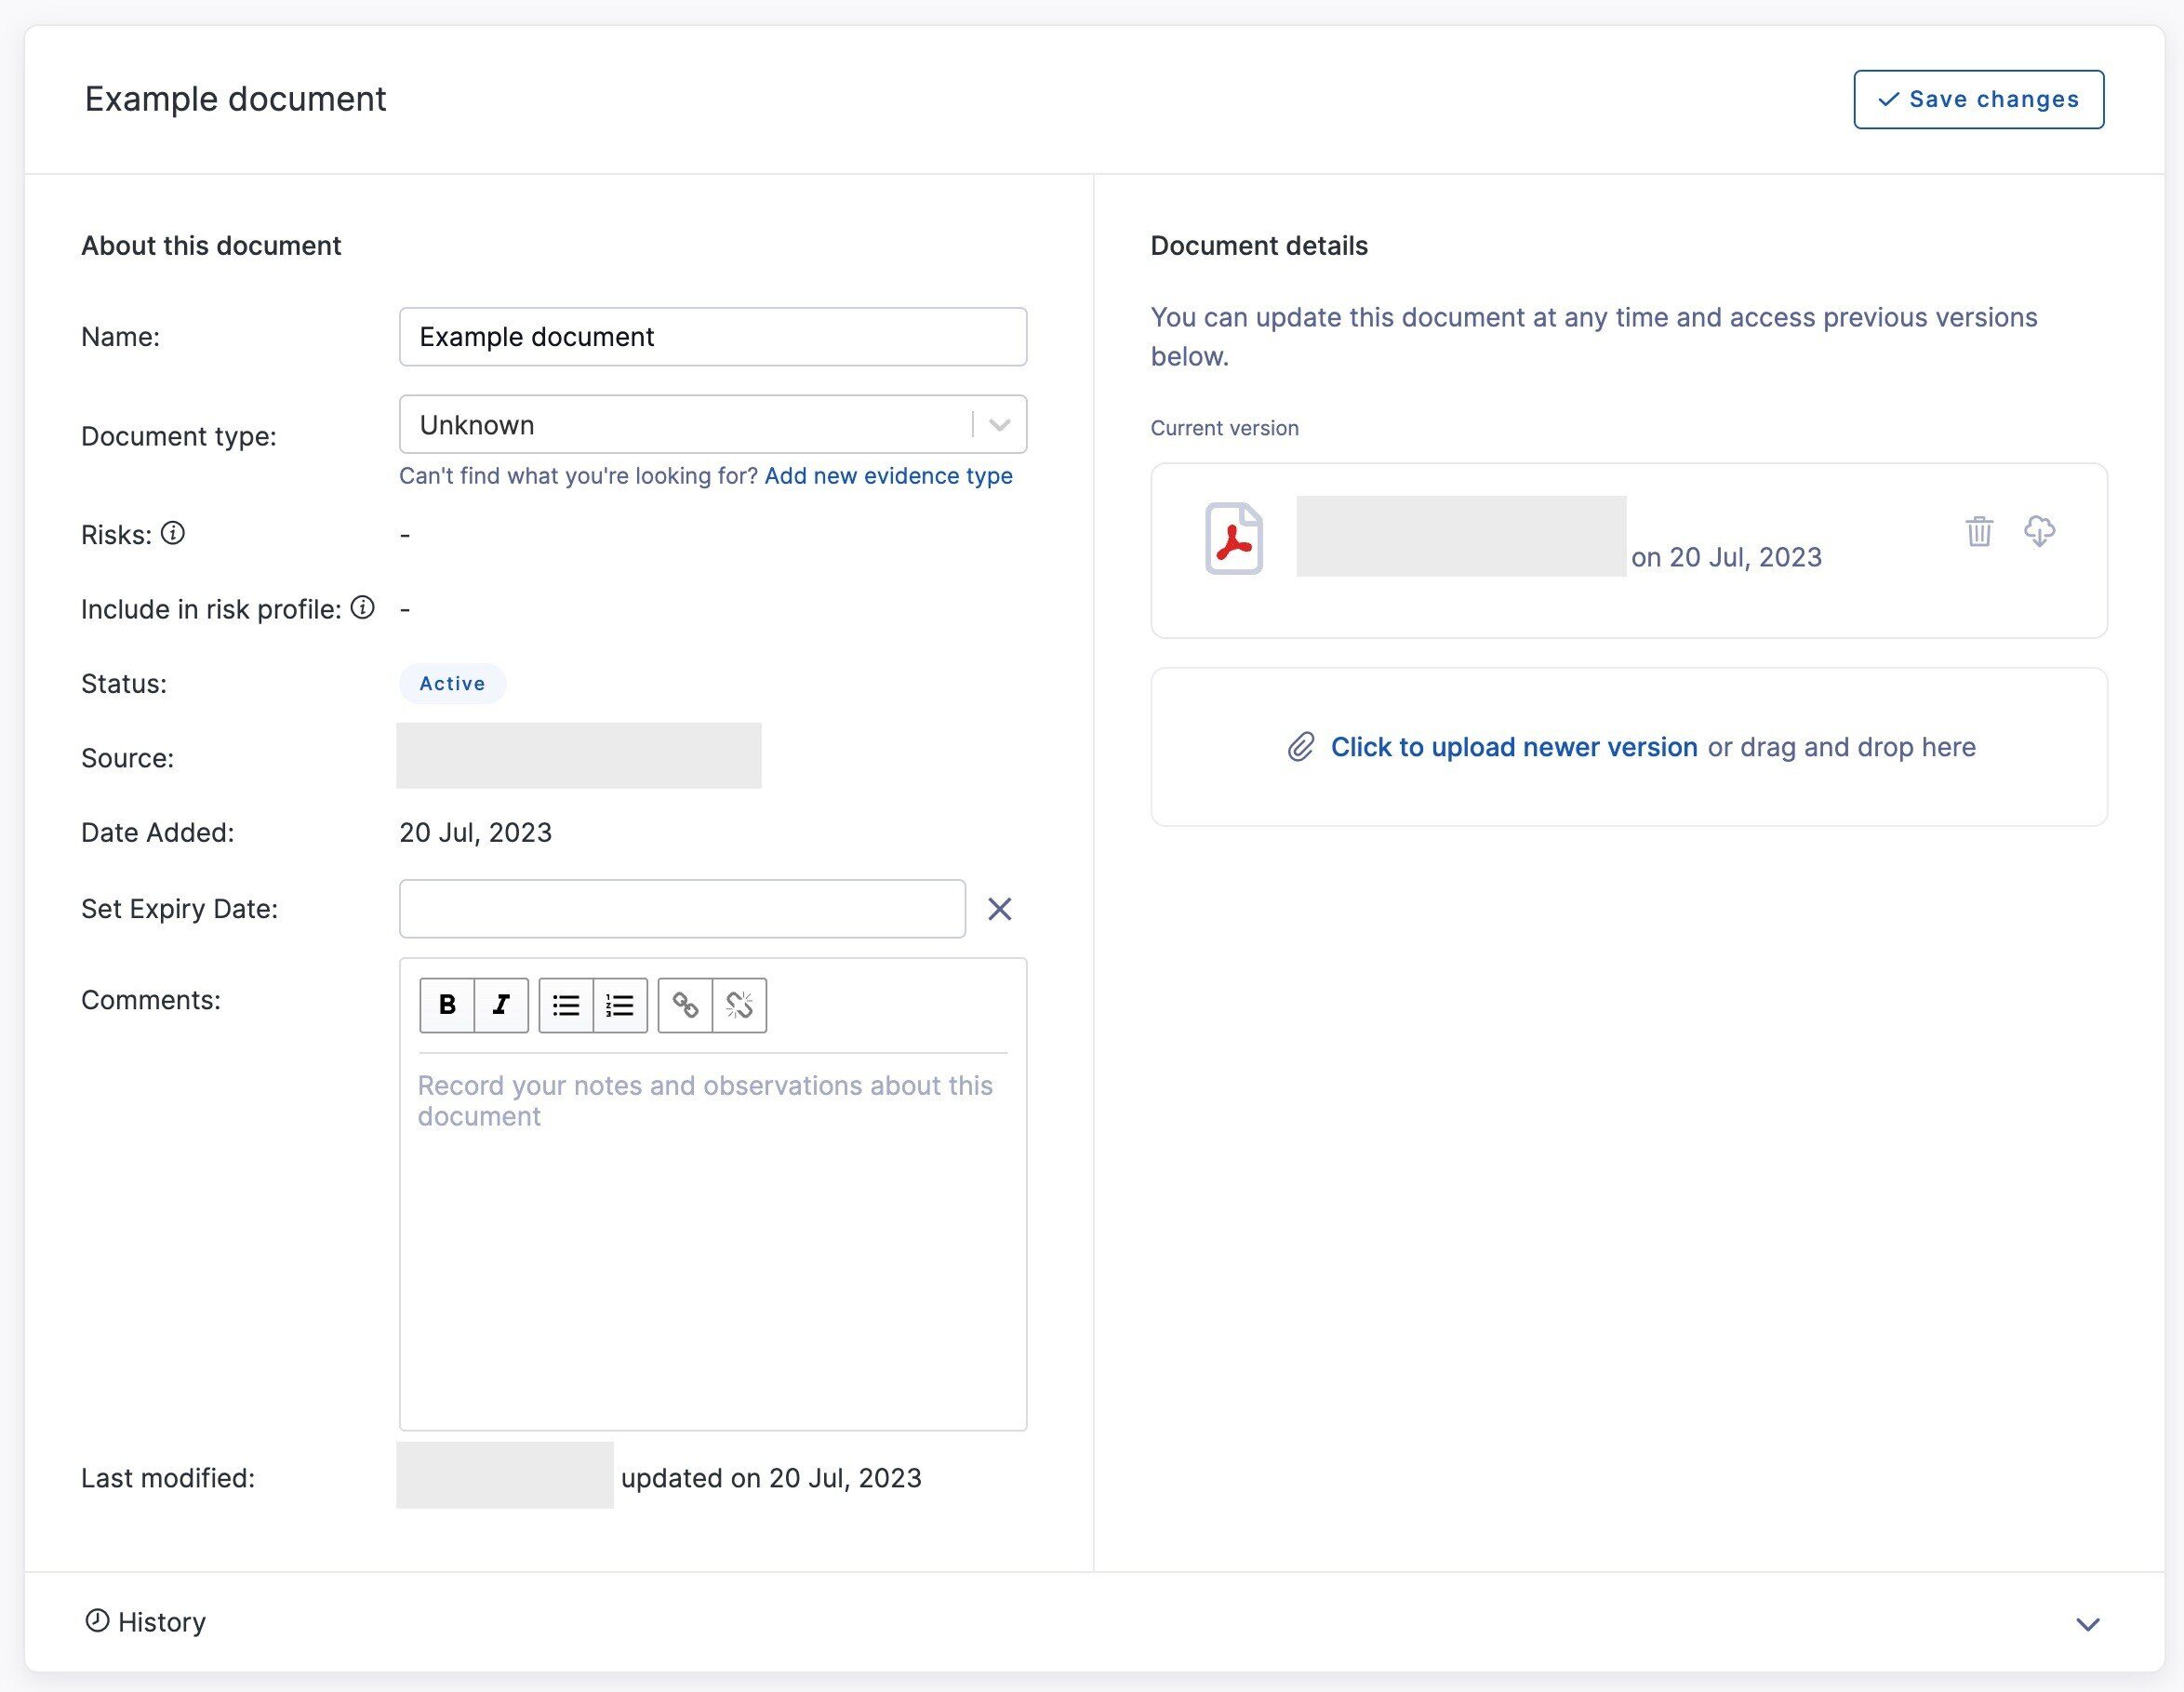
Once you have uploaded a new document you can add the following classification information and detail to your document:
-
Name the additional evidence: By default, it is the name of the uploaded document with the date appended to the end.
-
Choose a document type: Choose between a questionnaire, SOC 1 or SOC 2 report, ISO 27001 certificate, Audit report, Penetration test, Breach or Incident disclosure. You can also add your own custom document types in the Vendor Management section in Settings.
-
Set an Expiry Date: This could be based on the expiry date for a compliance report or certificate
-
Record any comments: If necessary, leave your comments on the document by clicking on the comments section.
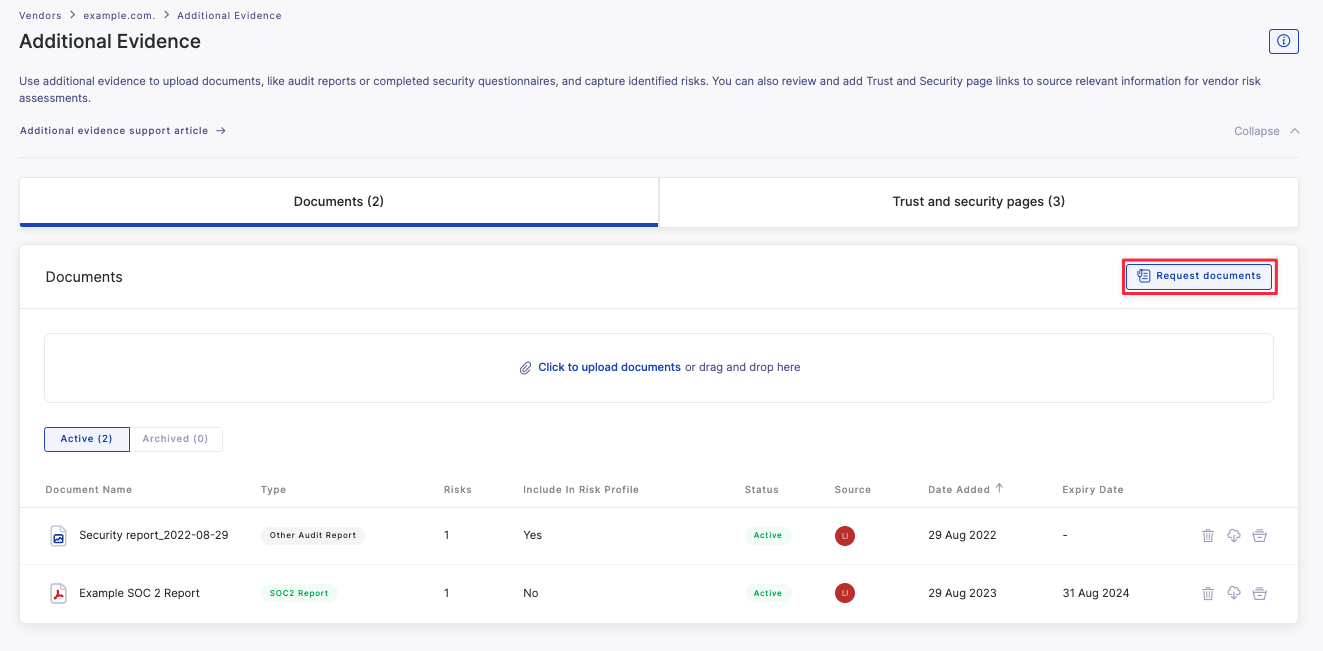
Request new documents from your vendor
You can request additional evidence documents directly from vendors, allowing vendors to load documents directly to the platform, to save time having to request and upload those documents outside the platform. To get started, select Request documents
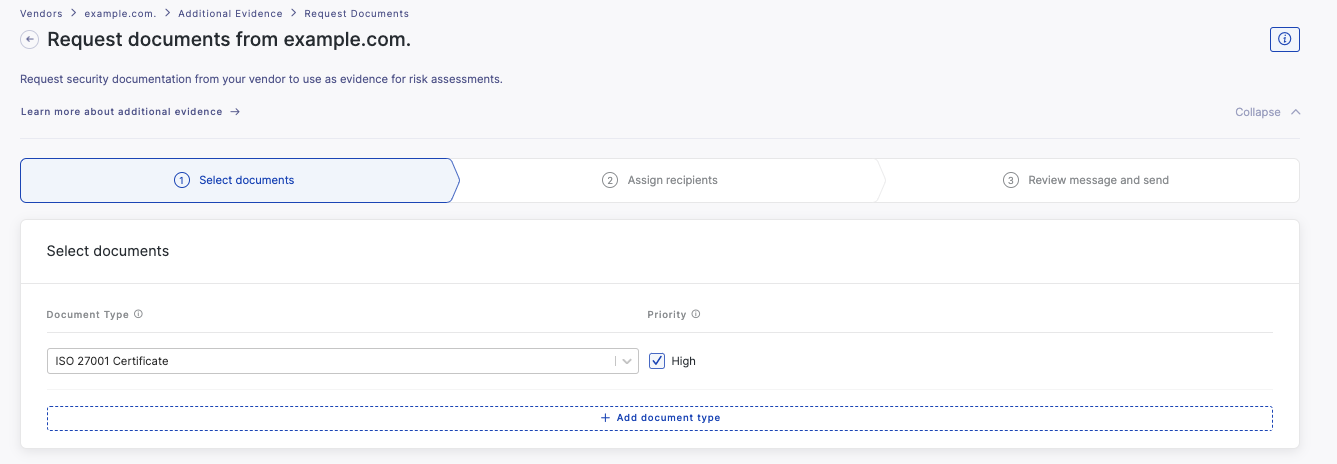
In the first step, you can select which documents you want the vendor to share, selecting from available document types. You can also indicate if a document is high priority, and can also add multiple documents to a single request.
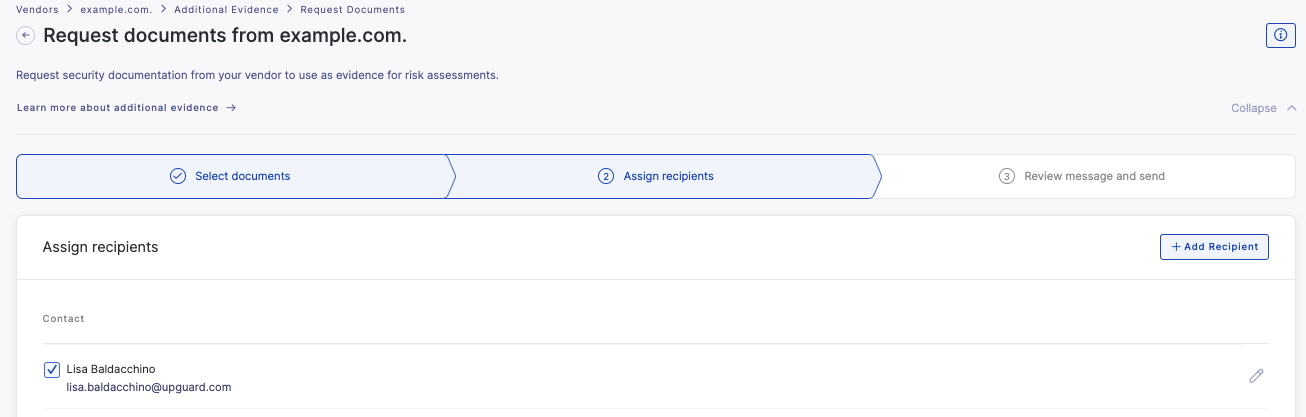
The next step is to assign recipients in the vendor organization to respond to the request.
Finally you can configure the message to be sent to your vendor with the document request. A default message can be set up in the Templates section in Settings.

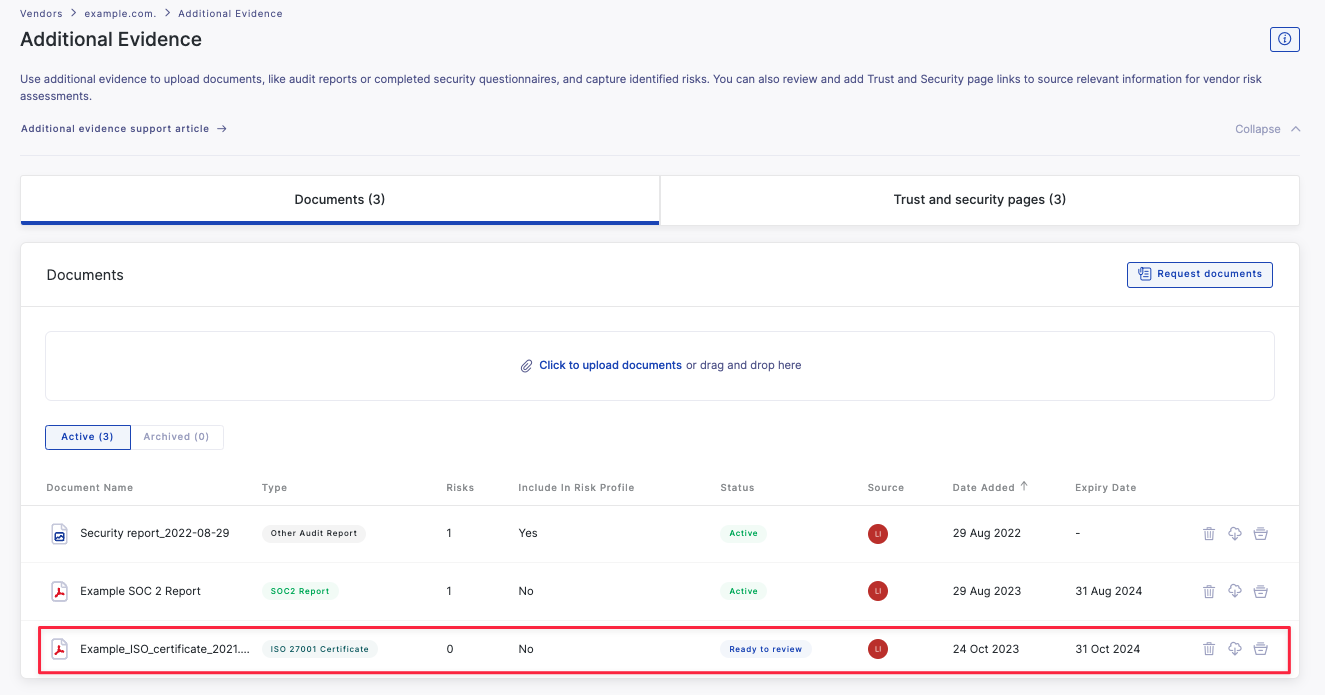
Once you have sent the request you will see the document you requested in your additional evidence list with the status Requested.

Once a vendor has responded to the request by uploading a document, you will see the details of the document that has been uploaded and see the status as Ready to review.
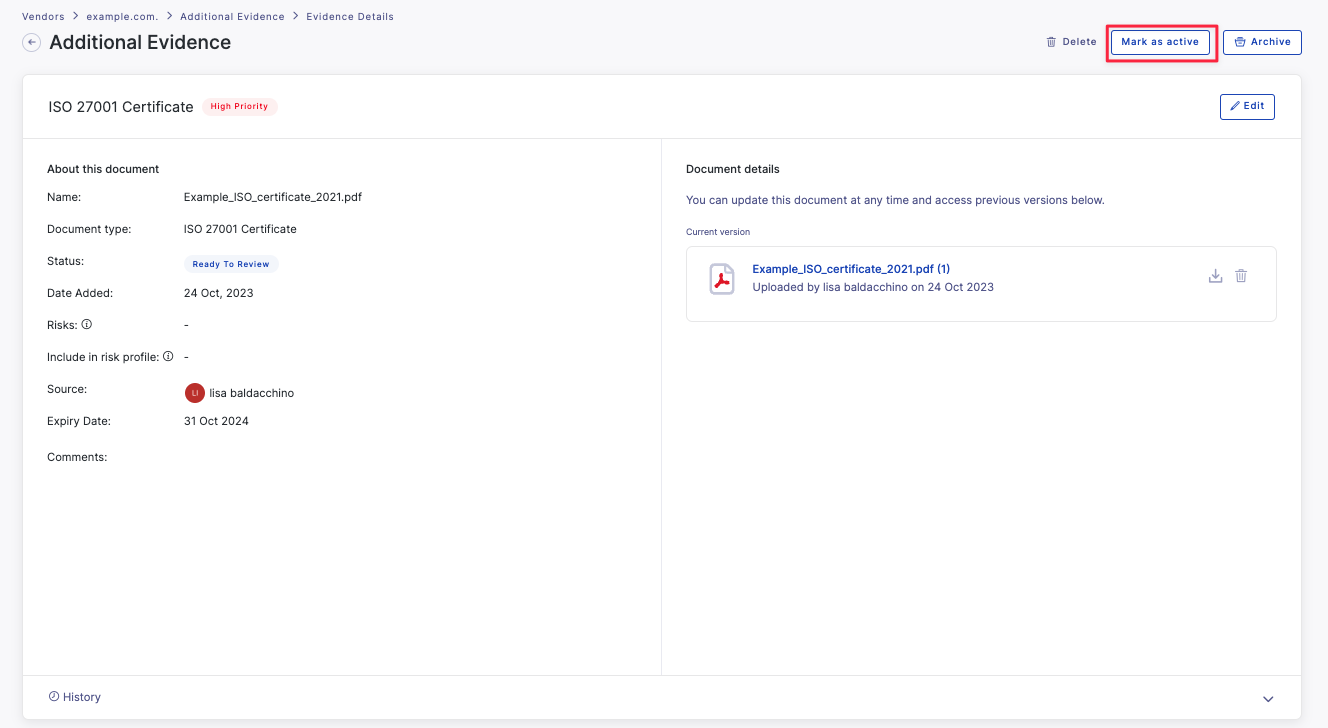
You can select the document to review it, add/edit information add comments. Once you have reviewed the document you can mark it as Active.
Capture identified risks
Once you have reviewed your uploaded document or document shared by your vendor you can add any risks you have identified by clicking "Add risk".

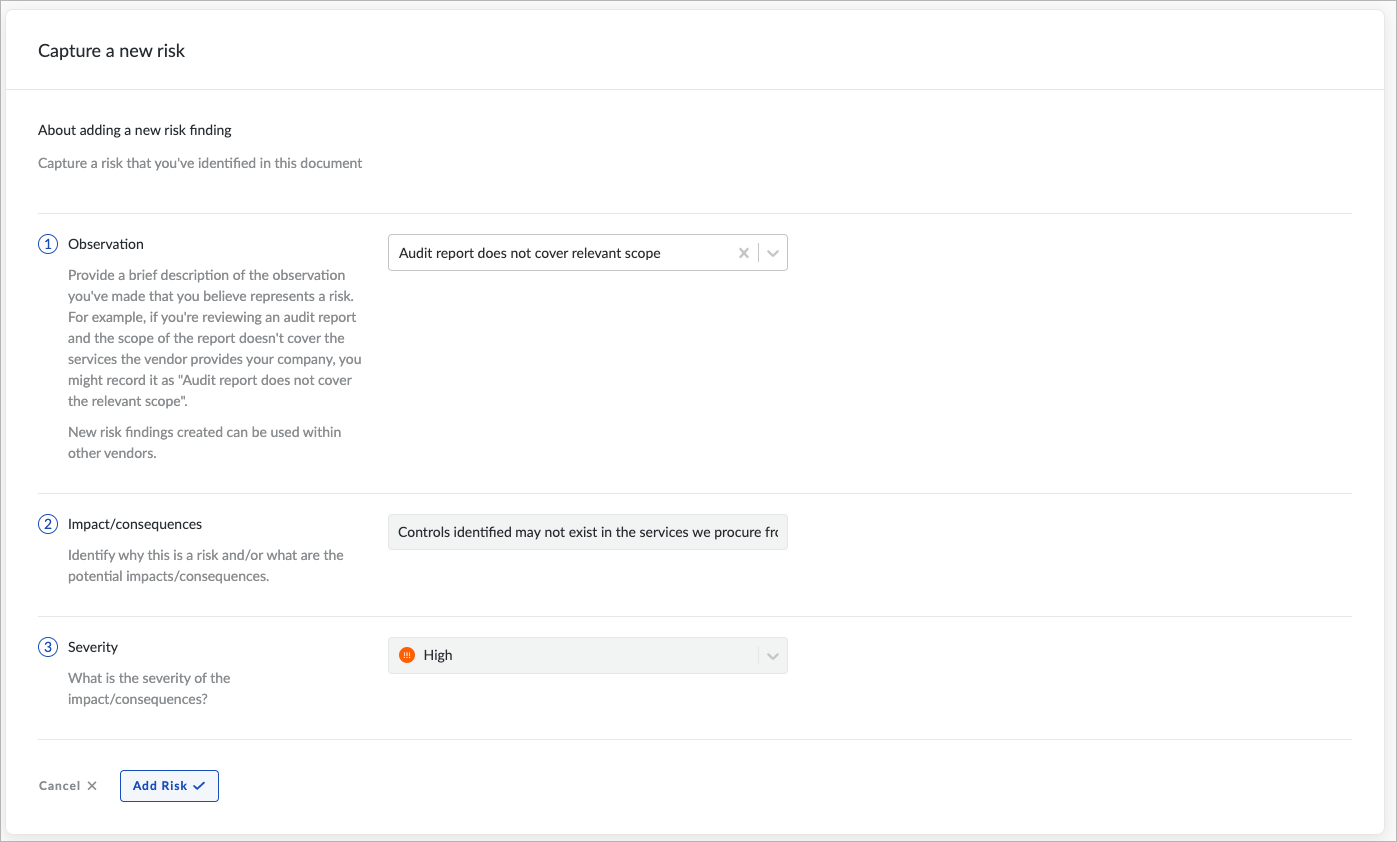
From here, follow the steps to add a specific risk to the document. You can either choose to use a previously created risk type or create a new one. In the screenshot below, I've chosen one that was previously created.
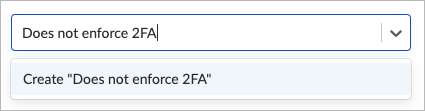
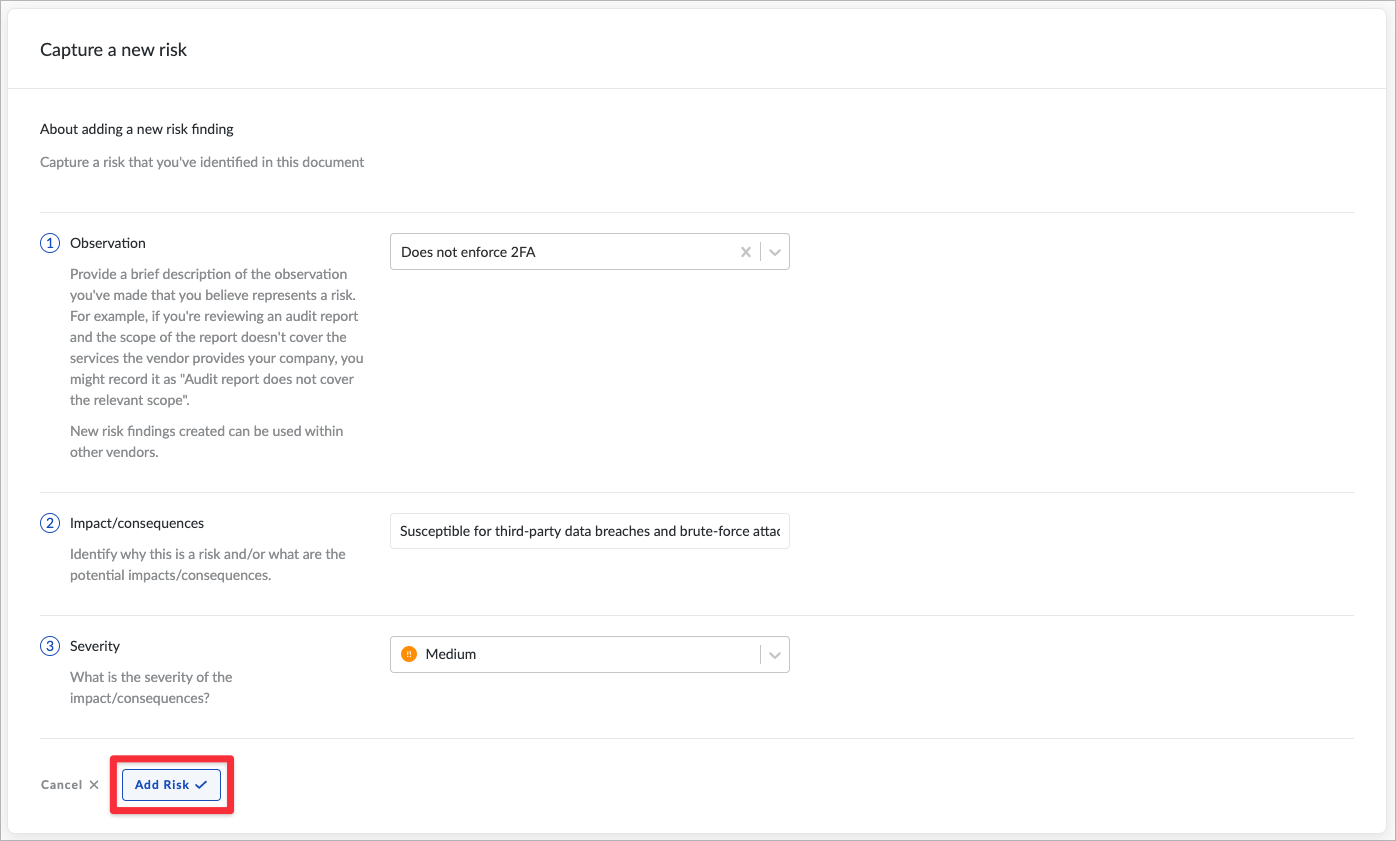
To create a new risk type, click on the observation text box and type your risk and click create:
From here, you'll need to enter the impact/consequence of the risk as well as its severity. When you're done, click "Add Risk".
Repeat this step as necessary until you've added all identified risks. You can also edit or delete risks at any time once you have added them.
Choose to include or exclude identified risks
Toggle to the right if you want to include the identified risks in the vendor's risk profile.

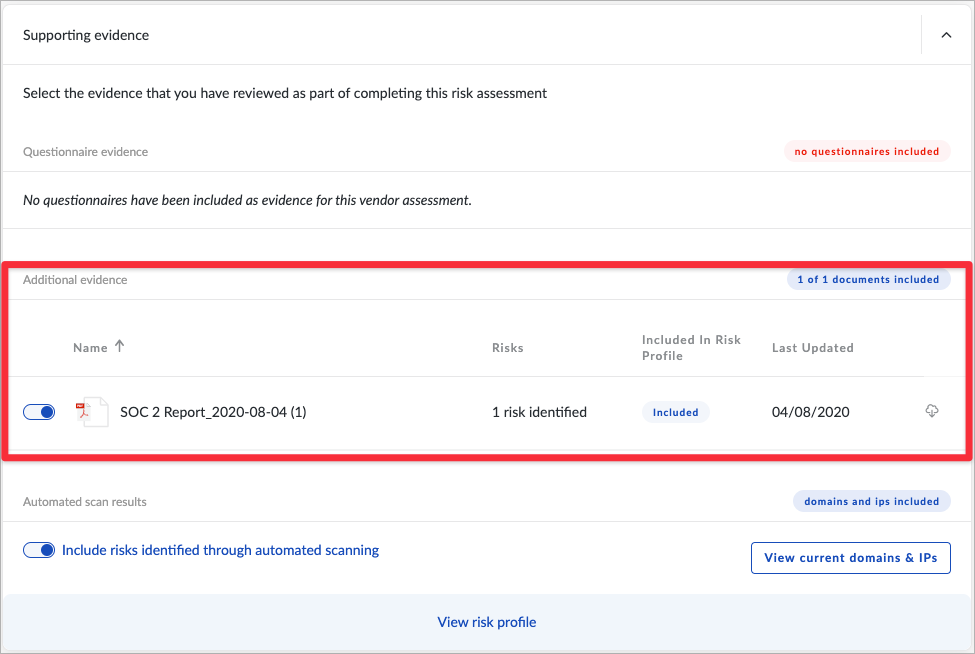
If included the finding, severity, and impact are displayed in the vendor’s risk profile.

And you will be able to include the information inside our risk assessment feature under supporting evidence.
If you can request remediation for have opted include the risks in the vendor's risk profile, you will be able to manage these risks from the risk profile page, including requesting remediation from the vendor and waiving risks.
Converting Documents to Additional evidence
From within the platform it is easy to convert other documents to Additional Evidence so you can classify and add risks to these documents, as well as use them as evidence in your vendor risk assessments. This includes both documents included with questionnaire responses and and general documents that you or others in your organization have uploaded.
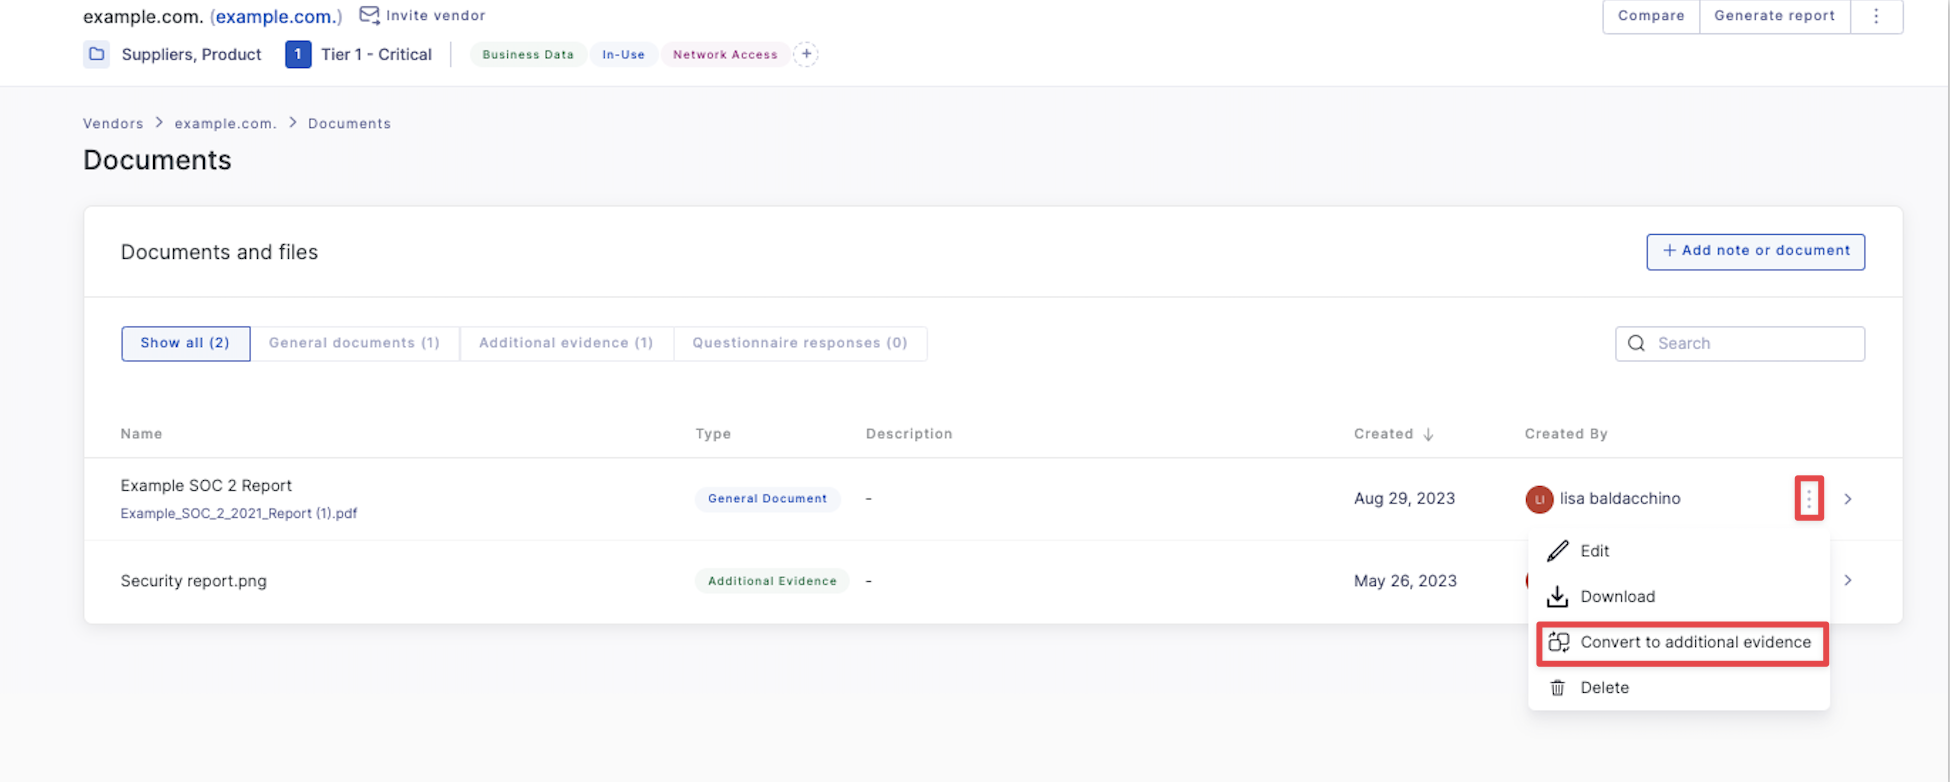
To convert a Document to Additional evidence navigate to the Documents page for a selected vendor.

Click on the 3-dot icon to display the available action types for the document you wish to convert (either General document or Questionnaire response Type), and select the action Convert to Additional Evidence.
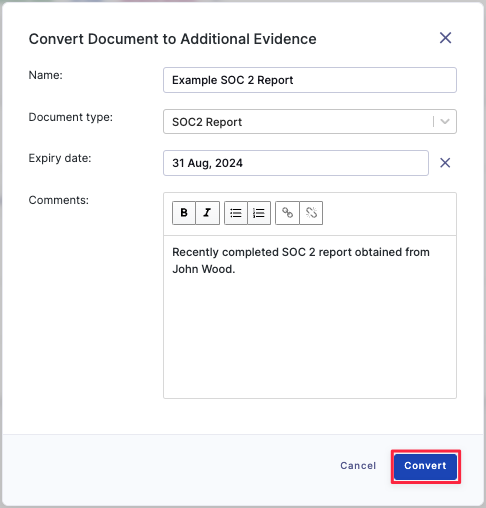
You will then be able to classify and add detail to your Additional Evidence item. Once you are satisfied with the information you have added, select Convert.
The converted document will then be added to the Additional Evidence page for that vendor. You can then go on to add and manage risks for this Additional evidence as described in the previous section.
See also: