Once you have completed a security questionnaire, the requester may send you a remediation request following information provided in the questionnaire.
If you have received a remediation request and need to respond, keep reading. This article includes sections on accessing the UpGuard platform and responding to the questionnaire-based remediation request.
You'll receive an email inviting you to access UpGuard in order to respond to a remediation request. This email will have a link to the specific remediation request you have been asked to complete.
Note: If you can't find the invitation in your email or you're not sure if you have an account, you can always visit https://cyber-risk.upguard.com/ in your browser. From this URL, you'll be able to create an account, access a previously registered account, and access any remediation request that you have been invited to answer.
Answering the remediation request
Navigate to Remediation Requests, which will list any remediation requests that you have received.
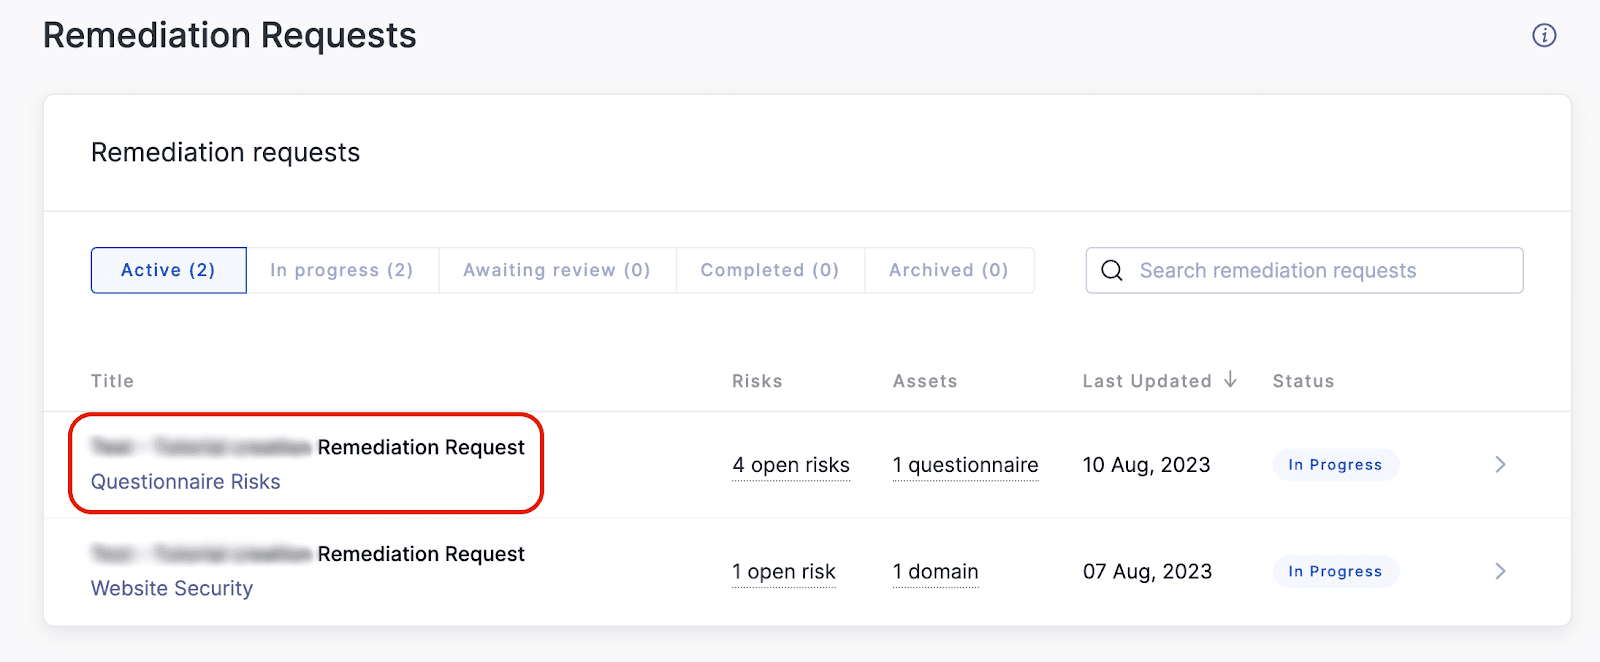
If you have multiple remediation requests, you can select the one that matches the email invitation you received or you can evaluate which category of request is relevant. For a questionnaire-based request, the request is tagged with Questionnaire Risks. Select that request to open the Remediation Request overview page.
The overview page includes the following sections:
-
Summary: This section provides an overview of information for this request, including the contact information for the person who sent the request.
-
Progress: This section provides a timeline for the status of the request.
-
Company Name's Security Posture: This section provides an estimation of how the company's security rating will be impacted by this remediation request.
-
Risks: This section includes all risks that are included in this remediation request, as well as any specific assets impacted by the risk.
As you plan your internal adjustments, you can review the relevant information in the questionnaire by clicking the View in Questionnaire option under the relevant risk.
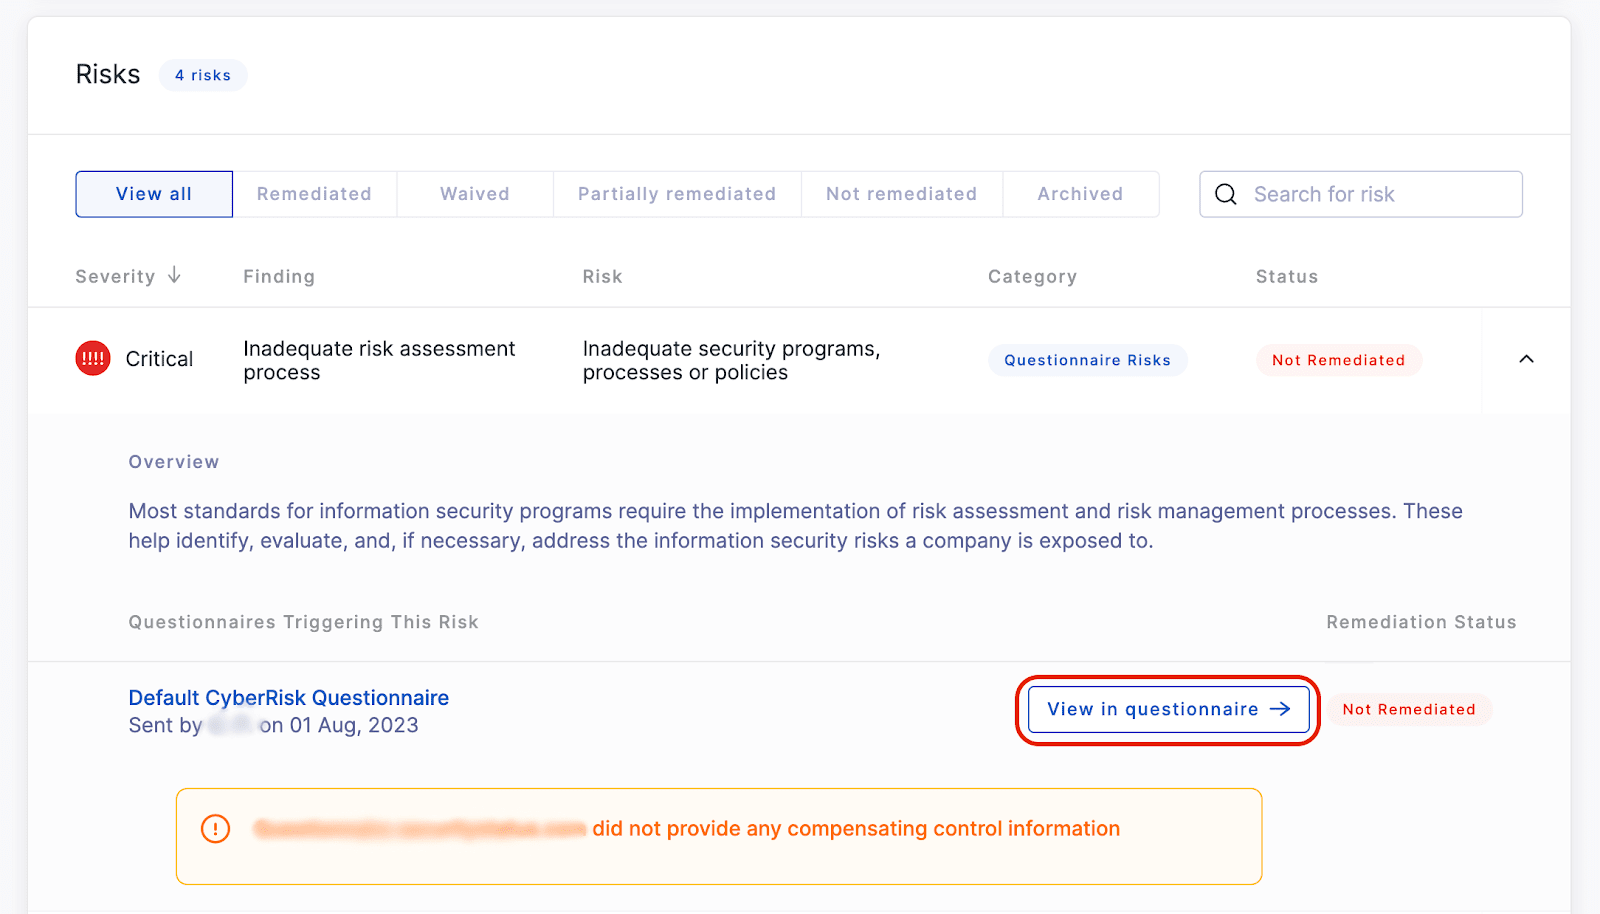
The section of the questionnaire will load with information relevant to the finding. You would then make the necessary internal changes, such as establishing your change management process. Once you have created or updated the necessary policies, you can adjust your questionnaire responses appropriately and submit those changes to the requester.

When you submit those changes to the questionnaire (and following any necessary rescan or review), those changes will be reflected in the remediation request. The specific risk that has been remediated will now have a status that reads Remediated and be included in the Remediated tab of the Risks section.
You can use this process for each of the active findings included in the remediation request.
Further reading
To continue learning about UpGuard's remediation workflow, read these articles next: