How to filter your vendors
Learn how to filter your monitored vendors in UpGuard
In addition to the search bar which allows you to search vendors by name or URL, you can also filter vendors to find specific vendors that meet certain criteria. For example, you may want to filter vendors who have a security rating between 750 and 950 or you may want to find all your vendors who don’t currently have a label applied.
You can filter by score (min, max) or label (match any, match all, do not include).
Step 1: Go to Vendors
Navigate to Vendor Risk > Vendors in the sidebar or by clicking here.

Step 2: Open filters
Once you’re on the Vendors page, select Apply filters.

Step 3: Apply filters
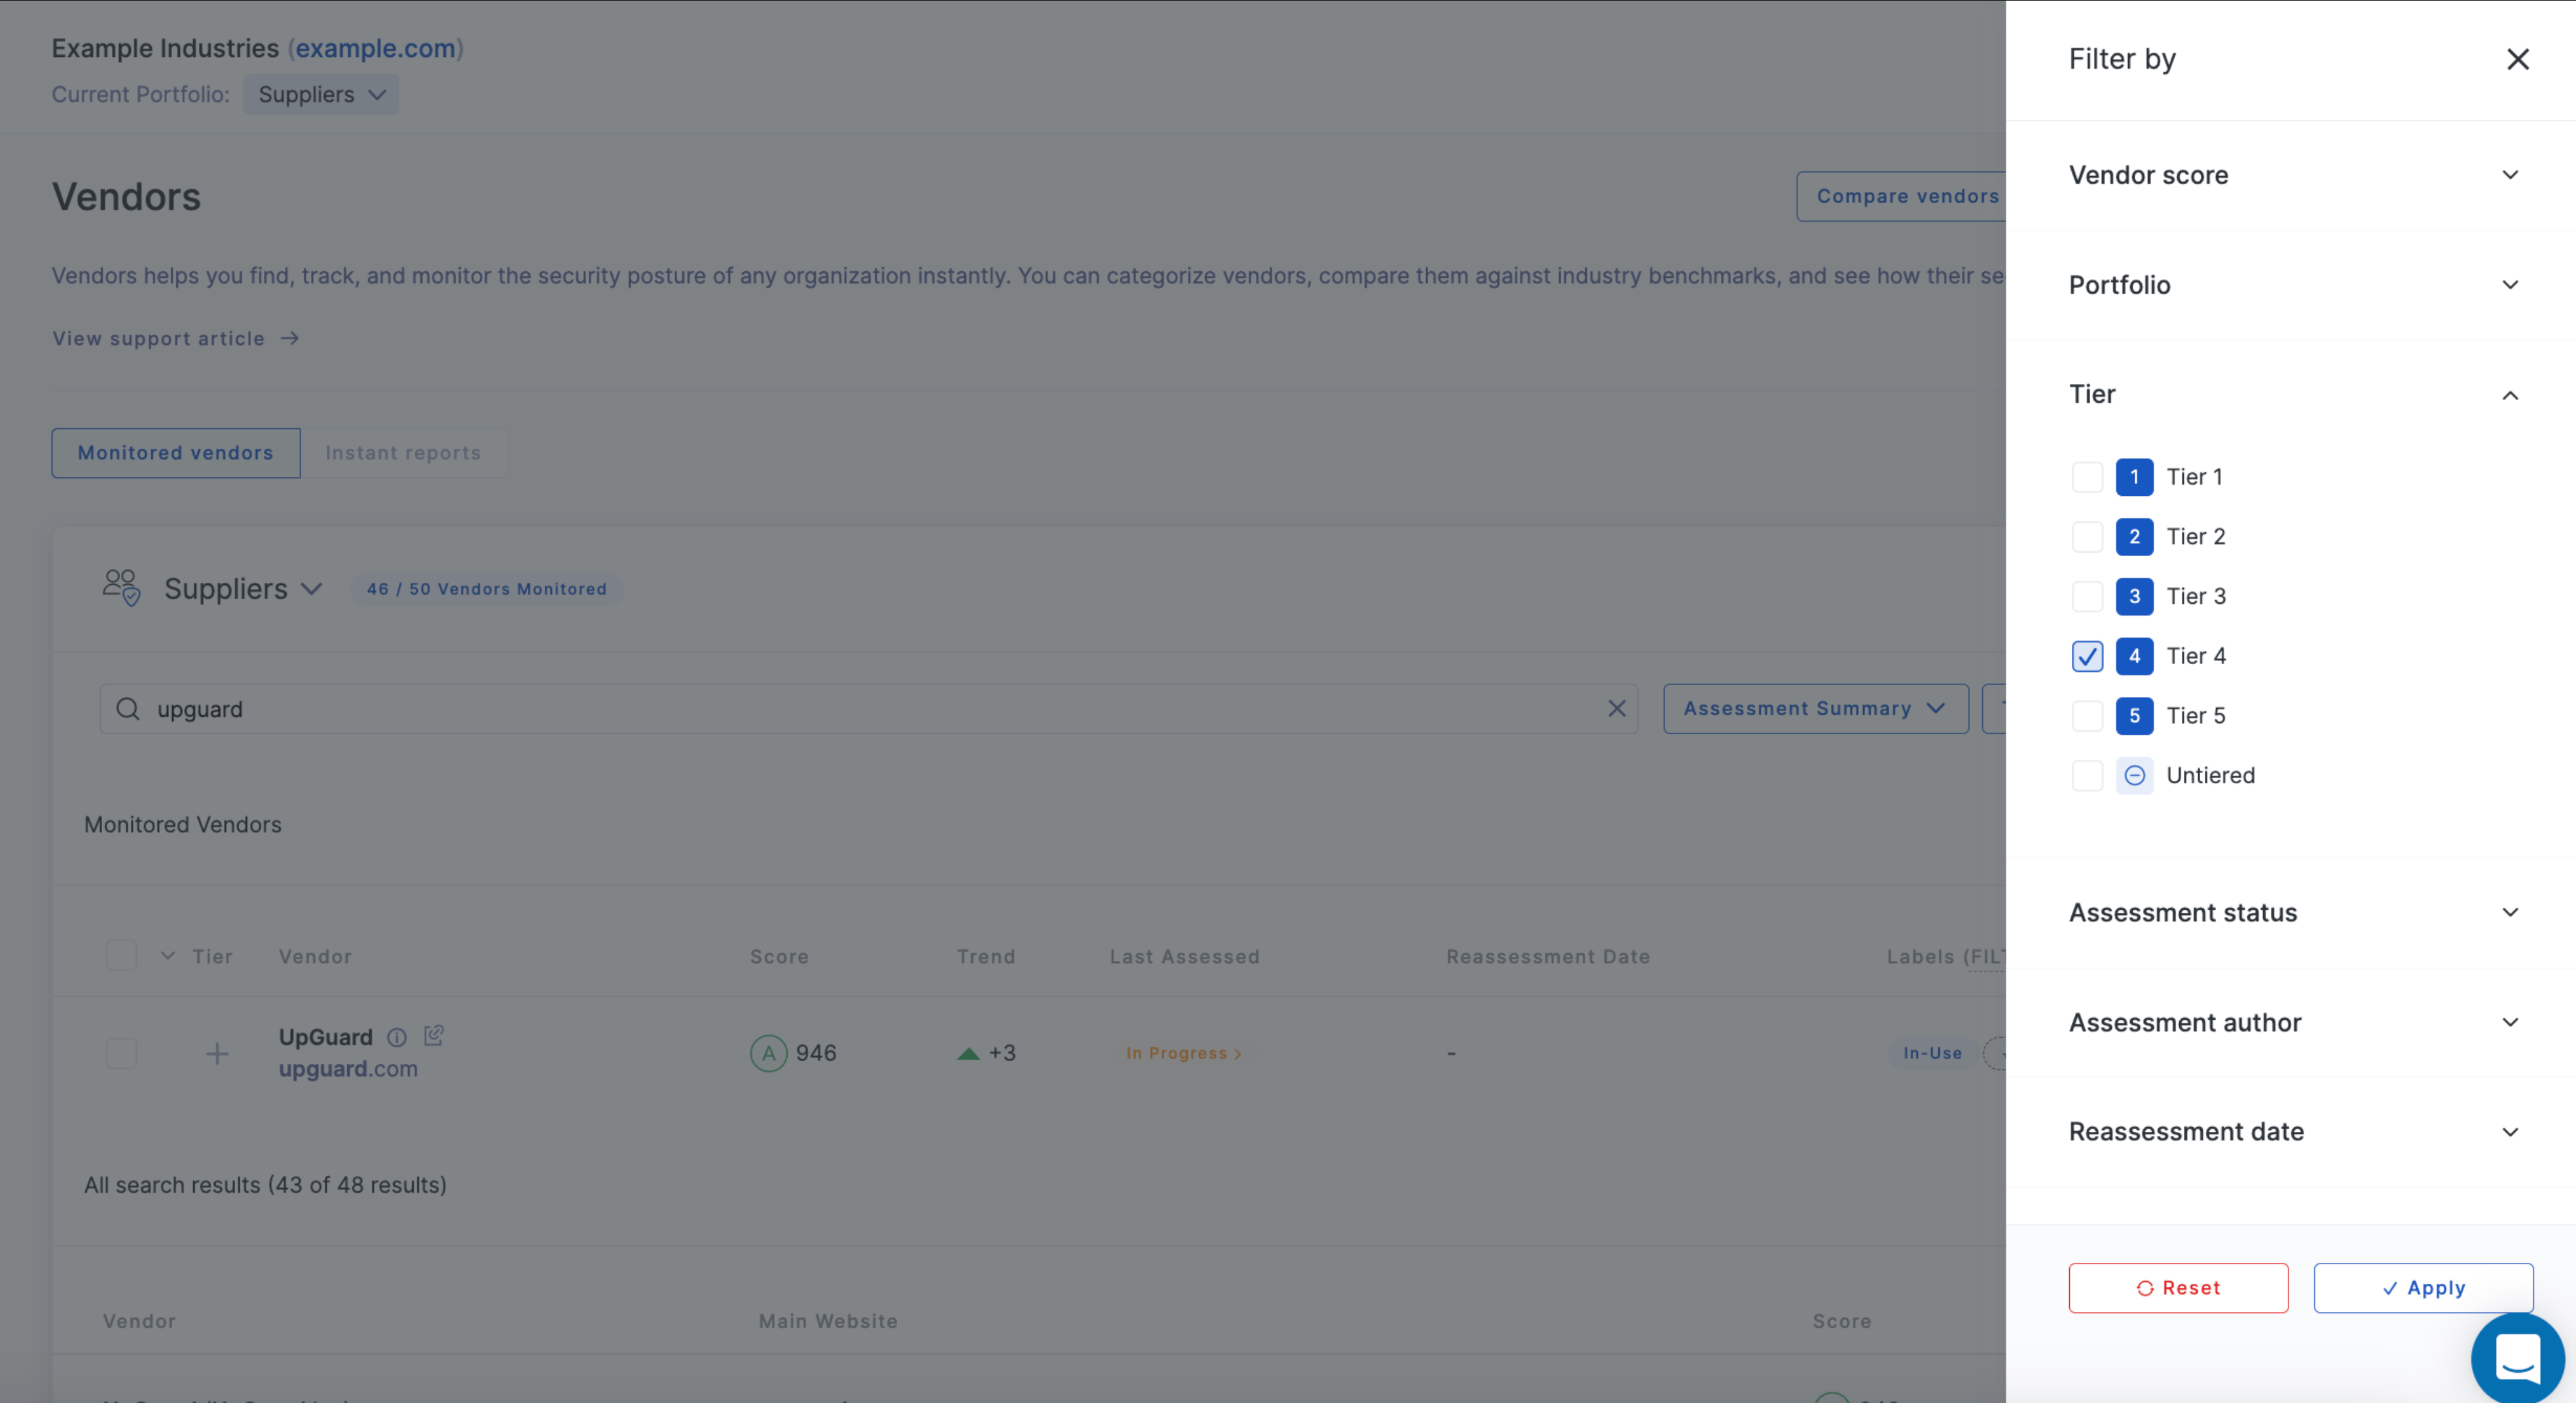
A menu will appear from the right side of your screen allowing you to filter by things like score range (min score to max score) and label. The label filter allows you to use any, all, or not operators to refine your results.
When you're happy with your selection, select Apply.

Step 4: Review results
After applying the filter, you'll see the small blue filters active banner at the top which highlights you have a filter active. The filter button has also been updated to reflect this.

Step 5: Export results (optional)
You can also export the results of your filters by selecting Export.
A menu will appear so you can configure your export including the format (PDF or Excel).
See also

