How to request a Managed Vendor Assessment
UpGuard's Managed Vendor Assessment product lets you offload the work of assessing your vendors to our team of security analysts.
Written by Abi Tyas Tunggal
To request a Managed Vendor Assessment
1. Navigate to Managed Assessments in the side bar
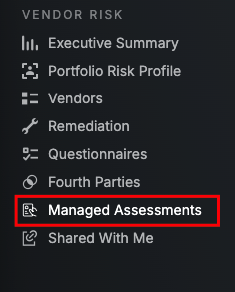
2. Up the top right when you are in the Managed Assessments area you will see the option to Request assessment to log a new request.

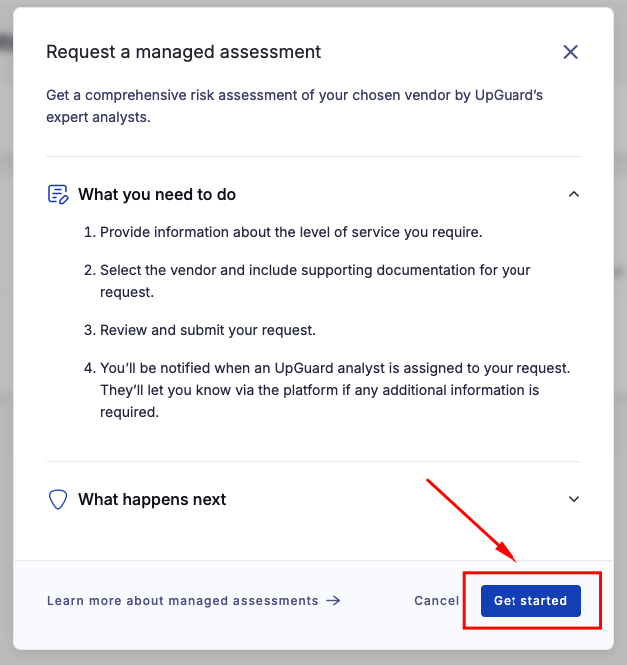
3. You will then be prompted with an information screen as show below providing you with some information before proceeding, when ready click Get started.
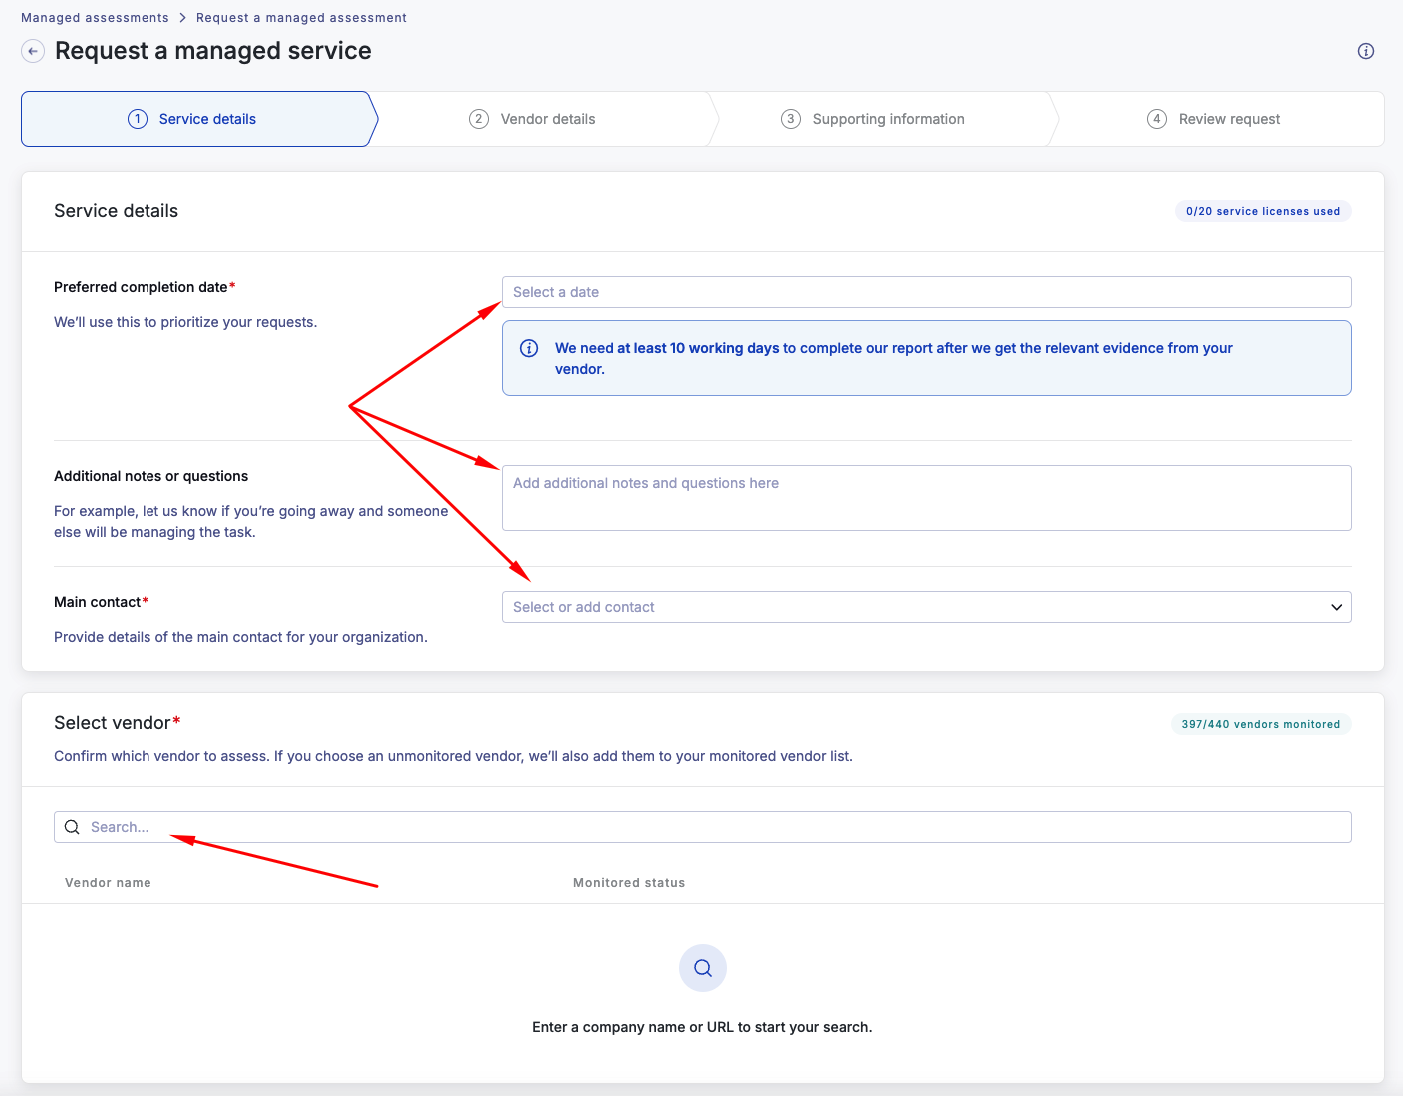
4. Next, you’ll arrive at the Service Details screen, where we’ll need specific information about the request. This includes your preferred completion date for the Risk Assessment, any additional notes or questions for the team, the main contact at your organization for this request, and the vendor, which you can select by searching for their domain name. Once all fields are completed, click the Next button to proceed.
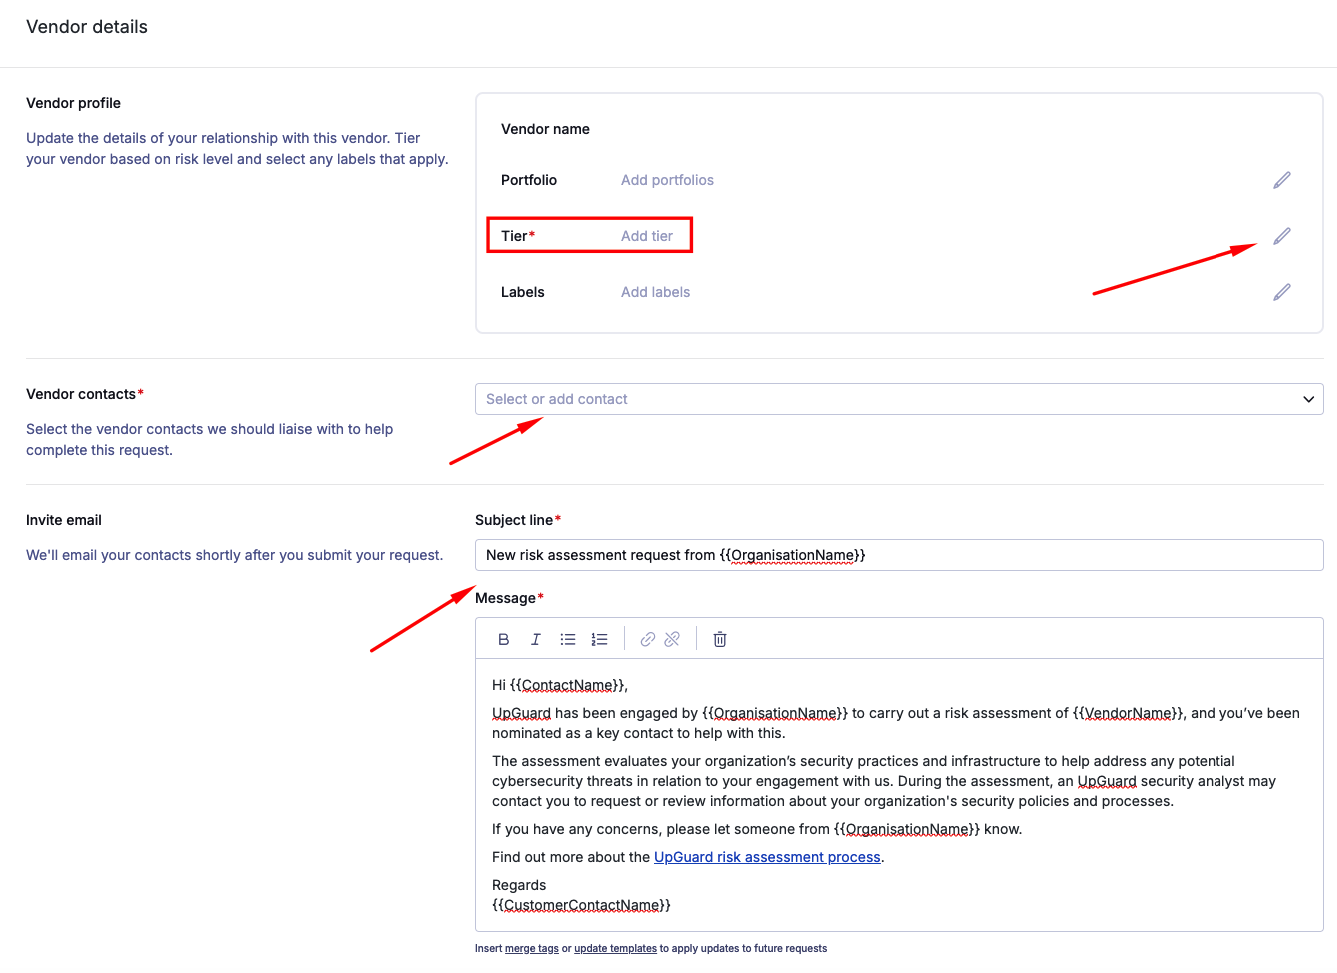
5. Next, you'll arrive at the Vendor Details screen, where we’ll need specific information about the vendor. You’ll be asked to provide the vendor’s tier, a vendor contact for email communication, and you'll see a prefilled email message that will notify the vendor of the engagement. Once this information is entered, you can proceed to the next step by clicking Next.
6. Next, you'll arrive at the Supporting Information screen, where we'll need details about your engagement with the vendor. This information is crucial for our Third-Party Risk Analysts to conduct an in-depth Risk Assessment. To ensure accuracy and detail, it's important we fully understand the nature of your company's relationship with this vendor.
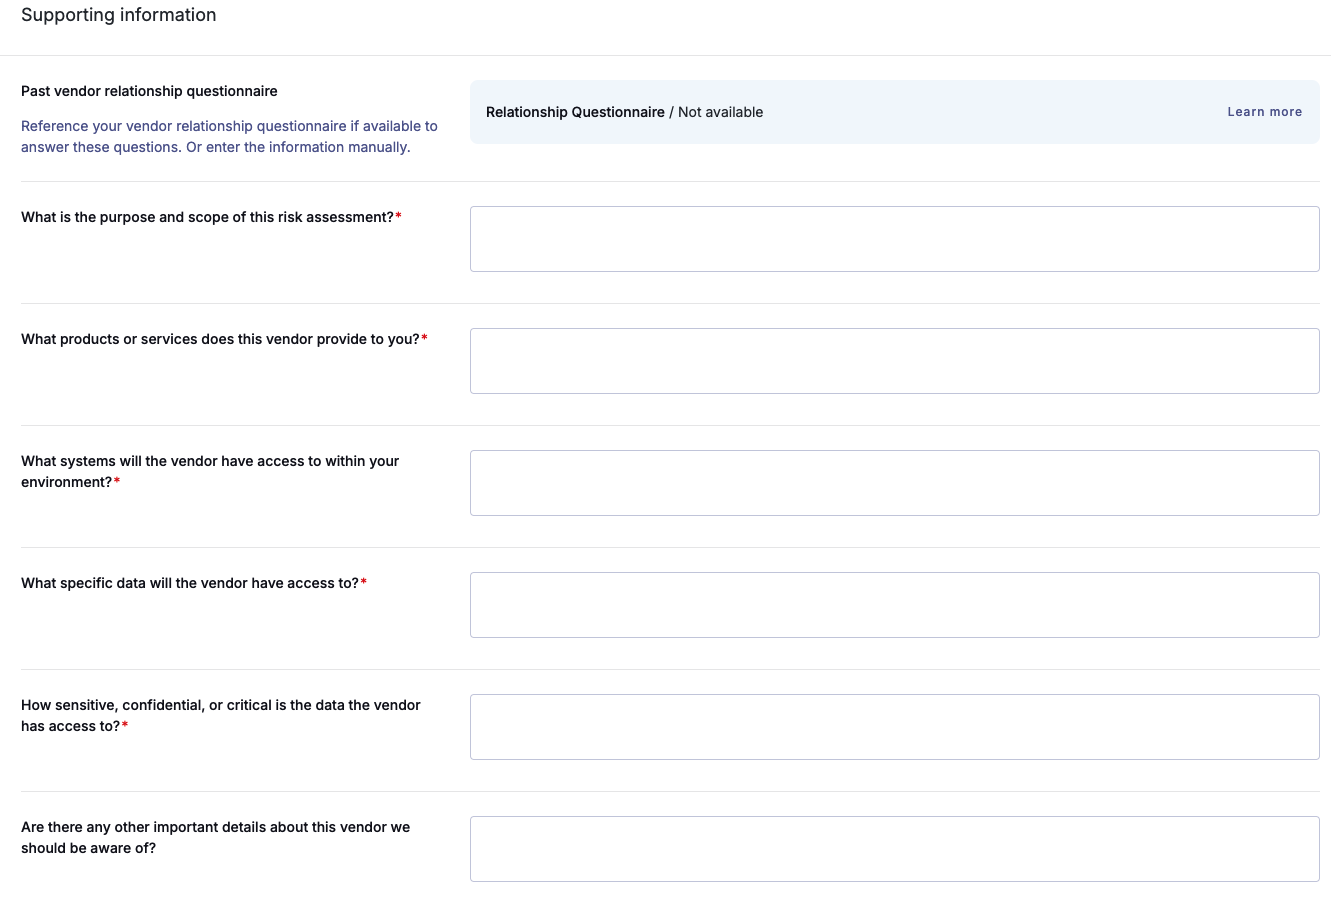
7. You will also have the option to upload documents, which helps speed up the process. If available, include relevant security documents for the vendor, such as an ISO 27001 certificate and SOA. These documents will be used to pre-fill the questionnaire, saving the vendor time, and will also serve as evidence in the Risk Assessment. Once this information is entered, you can proceed to the next step by clicking Next.

8. On the final page, you can review all the information you’ve submitted. Once you’ve completed your review, click the "Submit" button to log the request.
9. After submitting the request, you'll see a summary of the request along with all the information you provided.
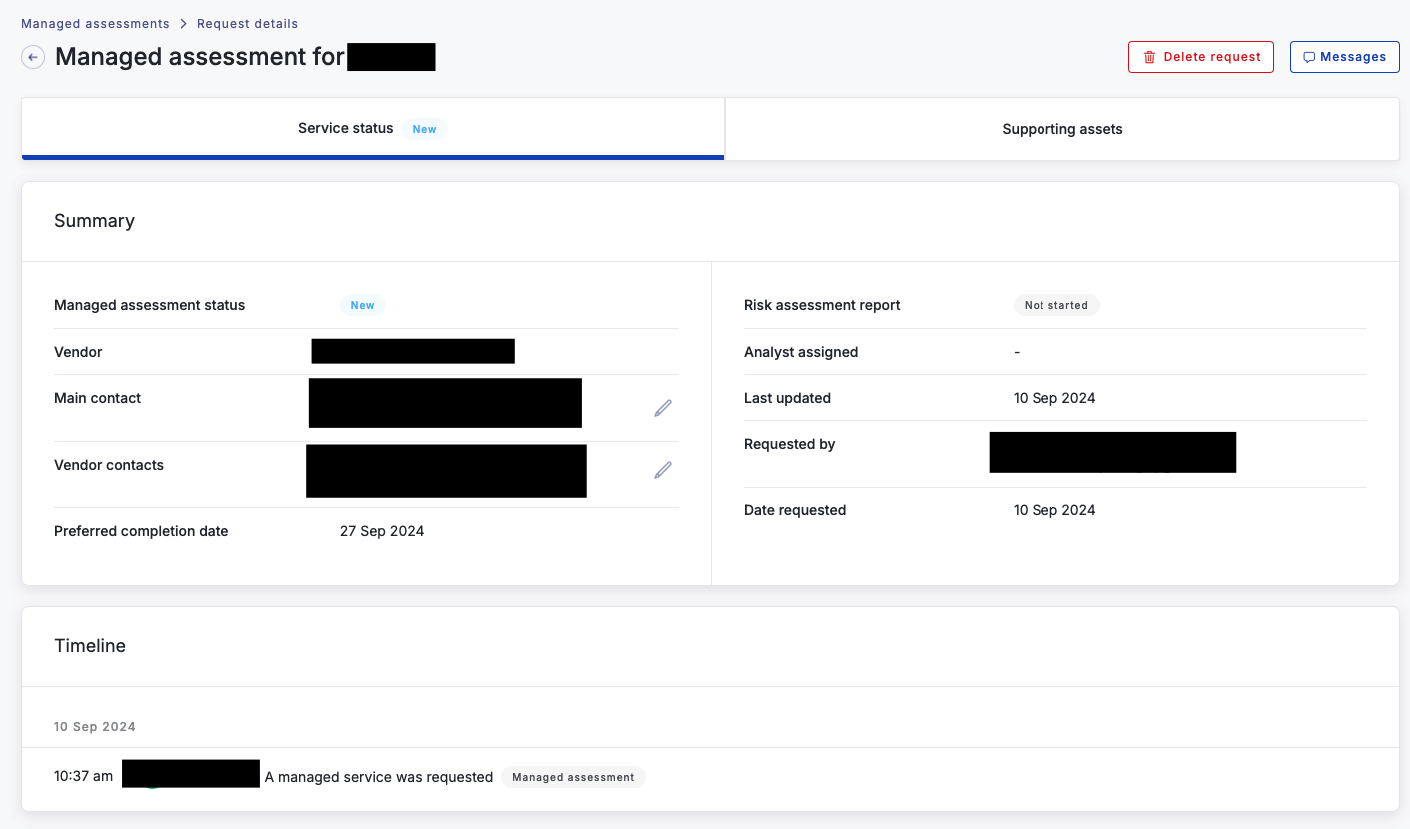
10. At the top right of the screen, you’ll have the option to select the "Messages" button, allowing you to communicate directly with your assigned Analyst within the product. You can also leave internal notes.

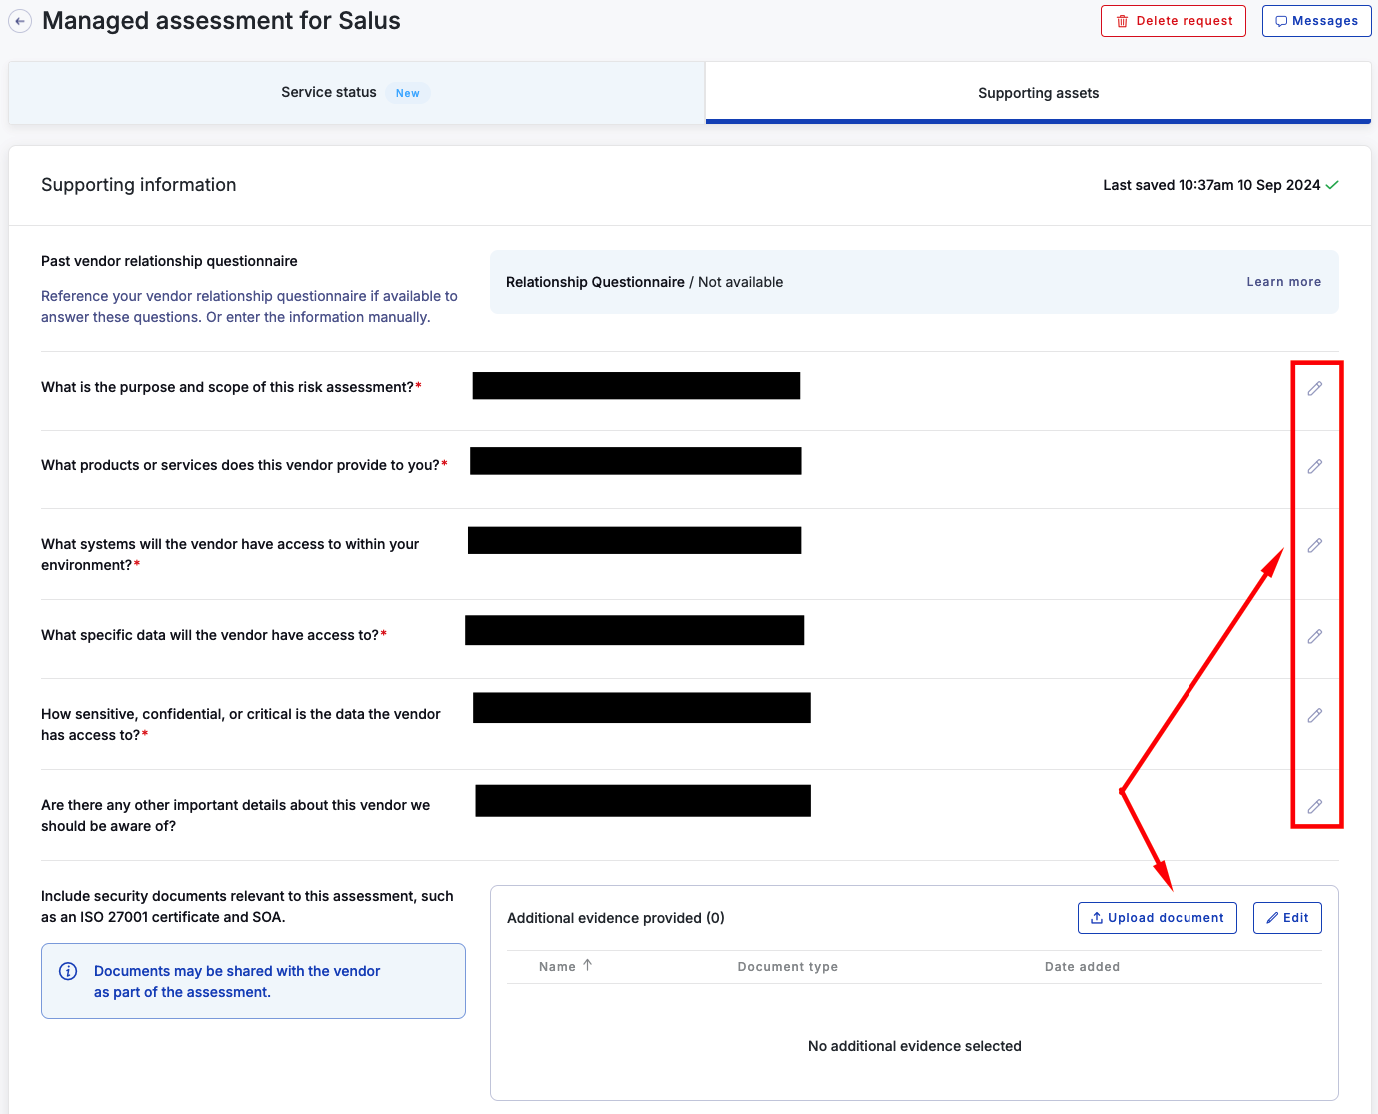
11. You can navigate to the Supporting Assets area to amend any information while the request is still in a new status. Please note that once the Risk Assessment has commenced, this information will be locked and no further changes can be made.
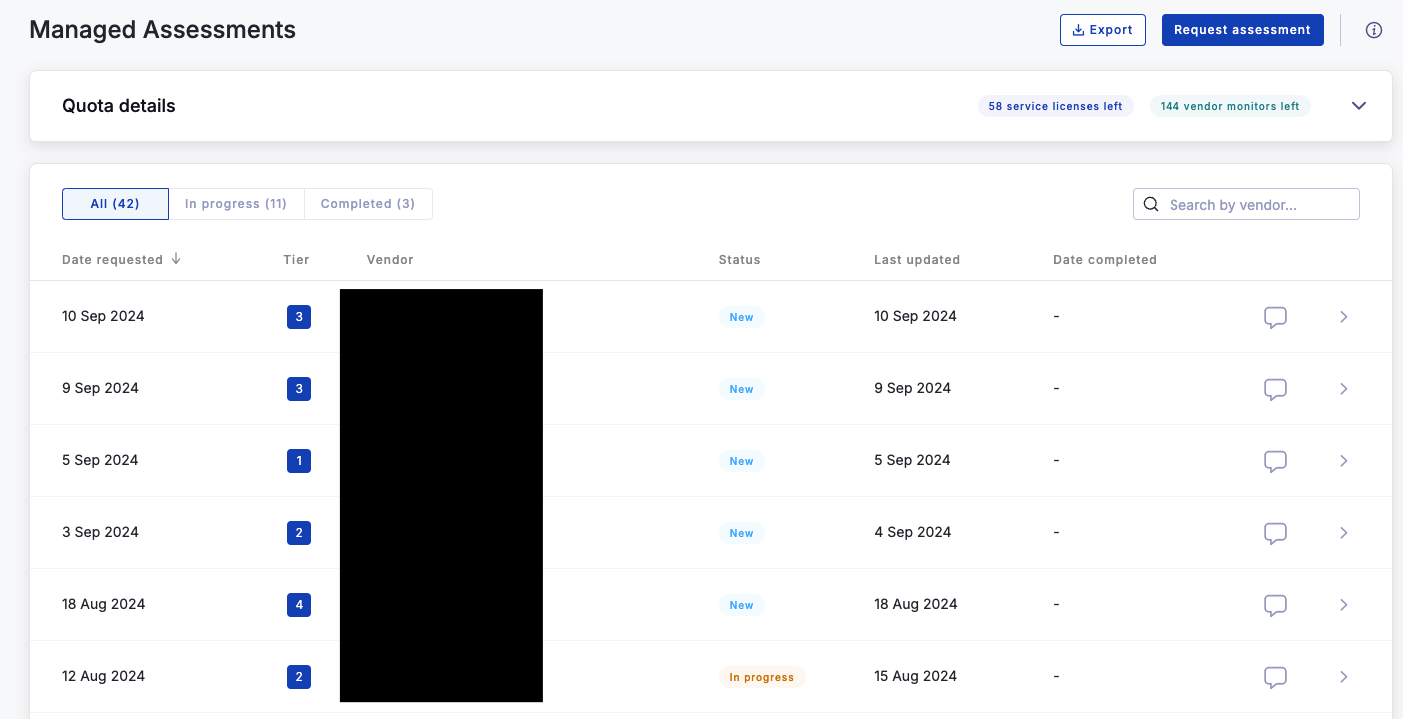
12. To track all your requests, navigate back to the Managed Assessments screen. There, you'll see a list of your requests, including details such as the date requested, tier, vendor, status, last updated, and completion date.
Managed Service Status and Tiers
You can keep track of the status of any active requests here too. There are many possible statuses.
To see the details of a request and edit it select it from the list of requests. Customers can edit or delete a managed service after it has been requested in this view.
Deleting requests
If a customer requests a managed service by accident or changes their mind, they can delete a request using the delete request button in the top right. This option is only available if an analyst has not started work on the assessment.
Analysts can still delete requests after the managed service has been started. If a customer needs to delete a started managed service they can contact the analyst to negotiate this.

Also see:
