Risk waivers let you waive vendor risks identified through automated scanning, security questionnaires, and additional evidence. You can create a vendor risk waiver from a number of places.
In this article, we'll show you how to:
- Waive risks from a vendor's risk profile
- Waive risks from security questionnaires
- Waive risks from the Portfolio Risk Profile page
- Waive risks from the Risk Waivers page
1. Waiving risks from a vendor's risk profile
You can use the Risk Profile page to create a vendor risk waiver. Firs, navigate to Vendor Risk > Vendors > Select a vendor > Risk Profile. In the Risk details section, if you see a risk you want to waive, select the row and then choose Manage risk > Waive this risk.

Once you click to waive the risk, you can configure the risk waiver. Enter a justification, set an expiry date if applicable, then select whether the waiver requires approval. Your administrator can set the default approval control in Settings to require approvals for all risk waivers, and nominate authorized approvers.

Review the details, and if everything looks good, select Submit risk waiver.

2. Waiving risks from security questionnaires
You can also use the Questionnaire details page to create a vendor risk waiver. When you are viewing the details of a security questionnaire, you’ll see Risks identified as part of the questionnaire. To waive a specific risk, select Manage risk and Waive this risk.

Once you click to waive the risk, you can configure the risk waiver. Enter a justification and set an expiry date if applicable, then select whether the waiver requires approval. Your administrator can set the default approval control in Settings to require approvals for all risk waivers and nominate authorized approvers.

Review the details, and if everything looks good, select Submit risk waiver.

3. Waiving risks from the Portfolio Risk Profile
You can also create a vendor risk waiver from the Portfolio Risk Portfolio page. When you identify a risk, you can select it to see which vendors are exposed to the risk. If you wish to waive a risk for a particular vendor, click on the vendor and then click Create a Risk Waiver.
Once you click to waive the risk, you can configure the risk waiver. Enter a justification, set an expiry date if applicable, then select whether the waiver requires approval. Your administrator can set the default approval control in Settings to require approvals for all risk waivers, and nominate authorized approvers.

Review the details, and if everything looks good, select Submit risk waiver.
4. Waiving risks from Risk Waivers
You can create a vendor risk waiver from the risk waivers tab of the Modified Risks page. First, navigate to Vendor Risk > Vendors > Select a vendor > Modified Risks.

Select Create risk waiver to get started.
You’ll be taken to the first step of the vendor risk waiver process: Select risk. If the vendor has a lot of risks, you can use the Show all dropdown to filter by risk category or use the search bar and enter text.

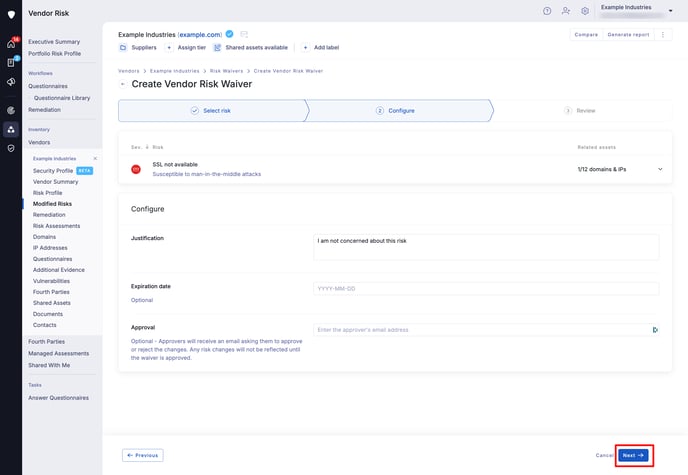
Once you've selected the risk you want to waive, you can configure which assets the risk is being waived for by clicking on the arrow. Once you are happy with your selection, click Confirm and next.

Now you can configure the risk waiver. Enter a justification, set an expiry date if applicable, then select whether the waiver requires approval. Your administrator can set the default approval control in Settings to require approvals for all risk waivers, and nominate authorized approvers.
Review the details, and if everything looks good, select Submit risk waiver.

See also