With the custom roles feature in UpGuard, you can configure role-based access control (RBAC) for your users so that each user has permissions for what they need to accomplish their goals. Custom roles ensure each member of your team has the permissions they need, while minimizing your organization's user-based attack surface.
To reduce risk and prevent data breaches, you can specify different levels of permission for each user in relation to their role and needs. We recommend setting your roles using the principle of least privilege to define the scope of access for each type of user.
Note: Custom roles are only available with certain plans. If you need to scale your plan to include role-based access control, contact our Customer Success team.
In this guide, you will create a new role, update an existing role, and change a user's role. Ensure that you have set up access to your company's account within the UpGuard platform and that you are logged in as an administrator, as only administrators can manage user roles.
Custom roles enable you to define access levels and authorized activities for certain types of users. To create a new role, you must have administrator access for your organization's account.
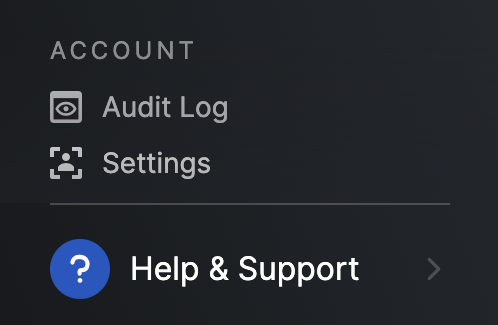
Find the Account heading in the left navigation menu and select the Settings option.
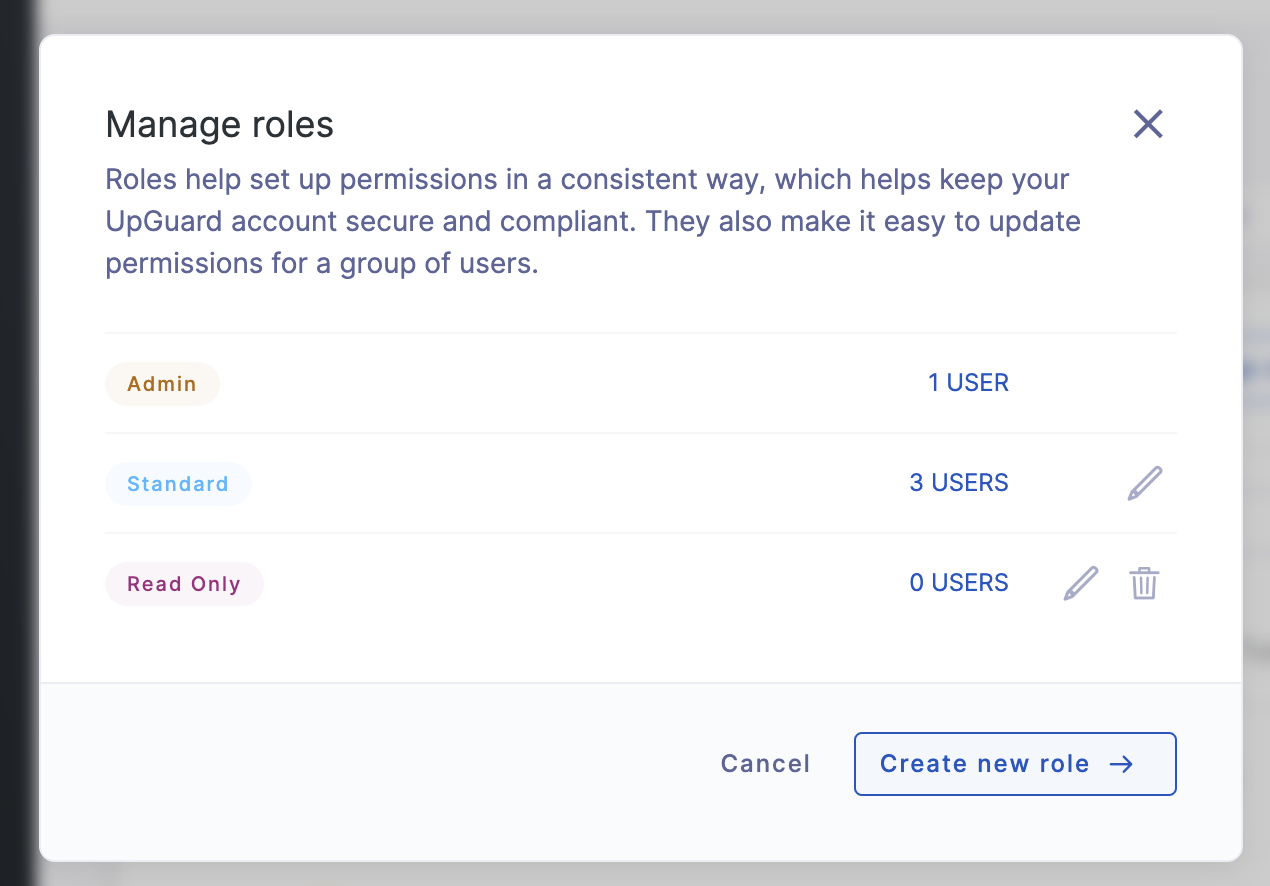
From the Users page in the settings, press the Manage roles button.

The Manage roles button will load a modal where you can manage existing roles or create new roles. Press the Create new role button.
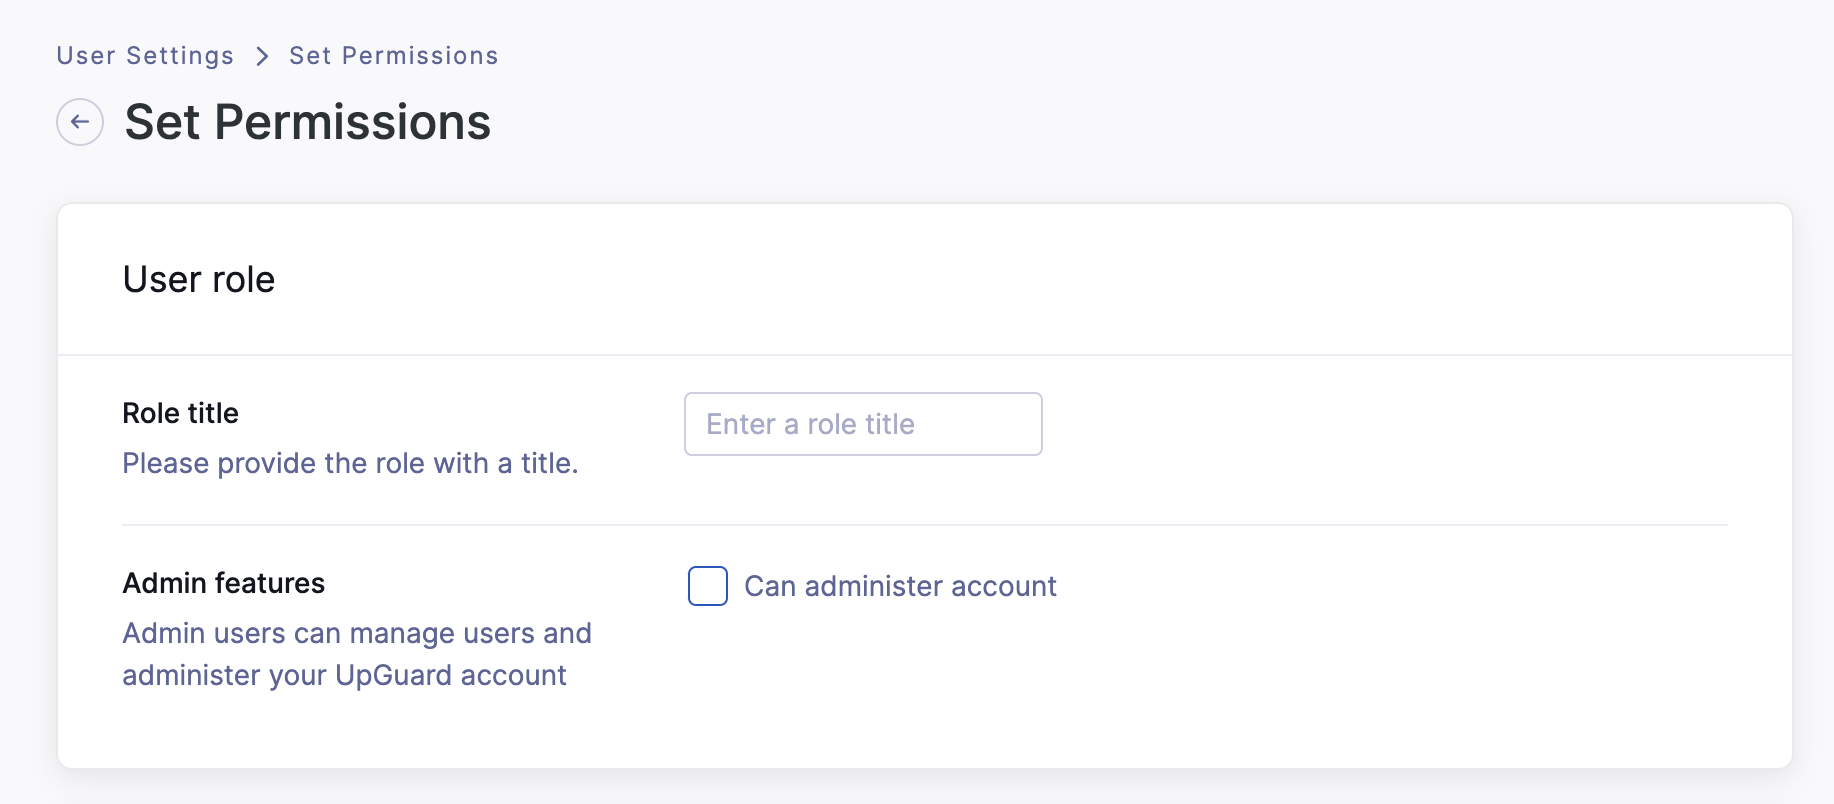
You will access a new screen titled Set Permissions, where you can name the role and set the permissions needed. The sample role includes custom administrator access.
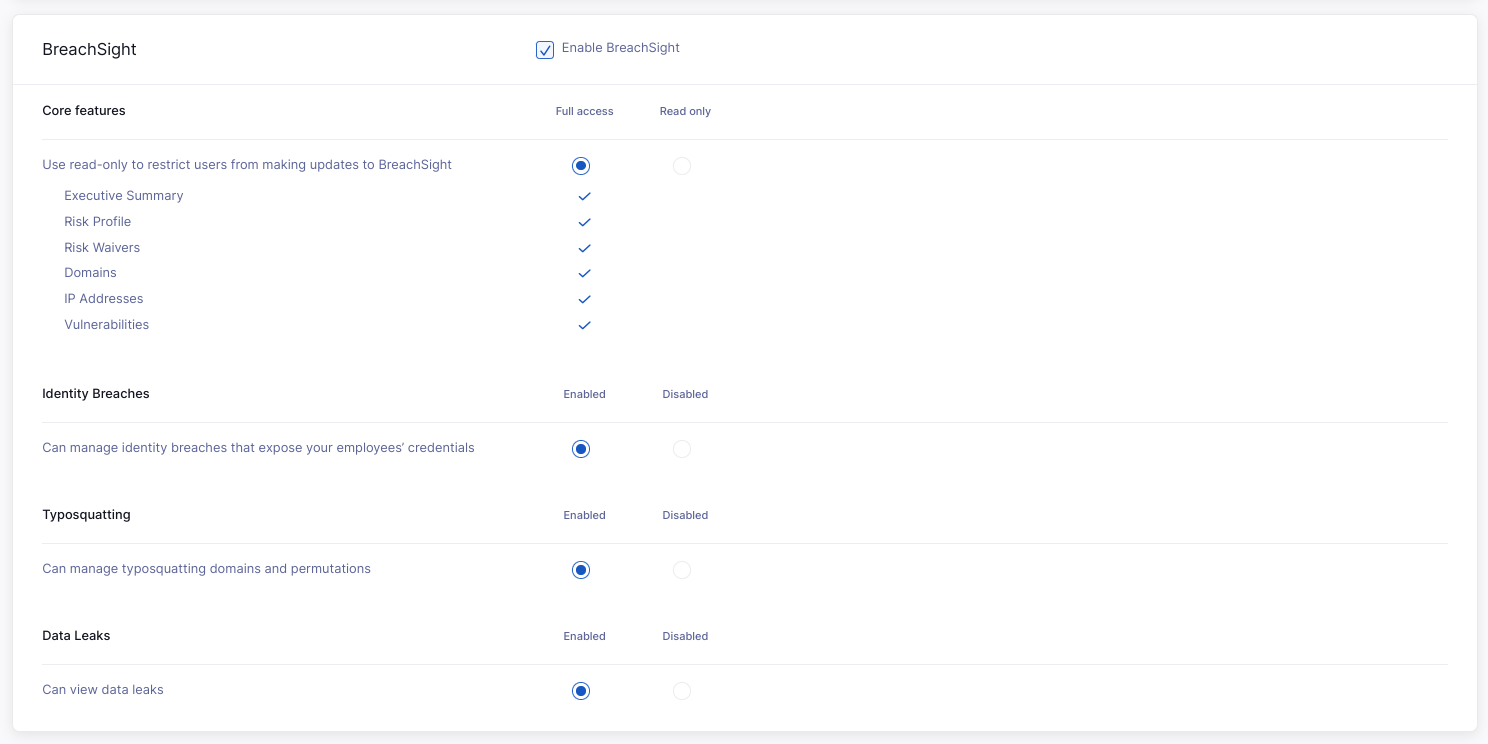
You can optionally provision administrator access to this role, but we recommend maintaining tight control over admin-level access. You can check the boxes to Enable BreachSight and Enable Vendor Risk, which will provide additional settings for each product. Unchecking the box will remove the permissions settings for each product.
When you check the Enable BreachSight option, you can grant standard or restricted access to BreachSight's core features for your new users. You can also enable or disable the Identity Breaches, Typosquatting, and Data Leaks features (if available to your plan).
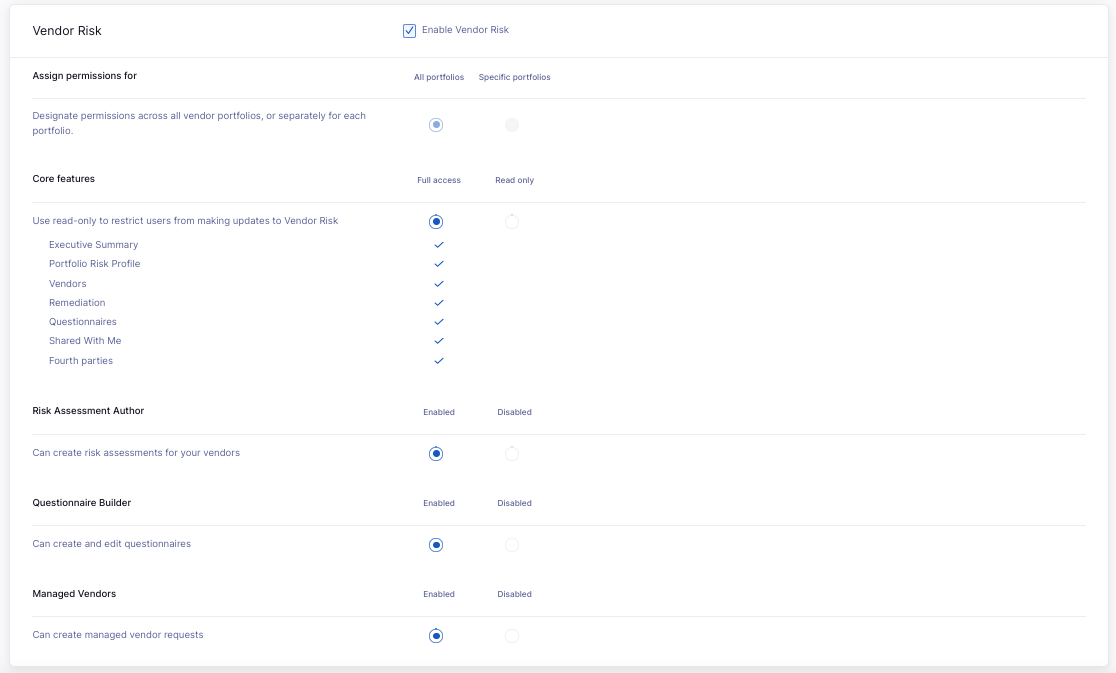
When you check the Enable Vendor Risk option, you can grant standard or restricted access to Vendor Risk's core features for your new users. You can also enable or disable the Risk Assessment, Questionnaire Builder, and Managed Vendors features (if available to your plan). Disabling the Risk Assessment feature will hide the module from the sidebar navigation menu.
Once you have determined the settings for this role, press Save role.
Updating an existing role's permissions
You can use a similar process to manage an existing role and update the permissions.
As the administrator, navigate to your organization's Settings and find the Users page. Press the Manage roles button.
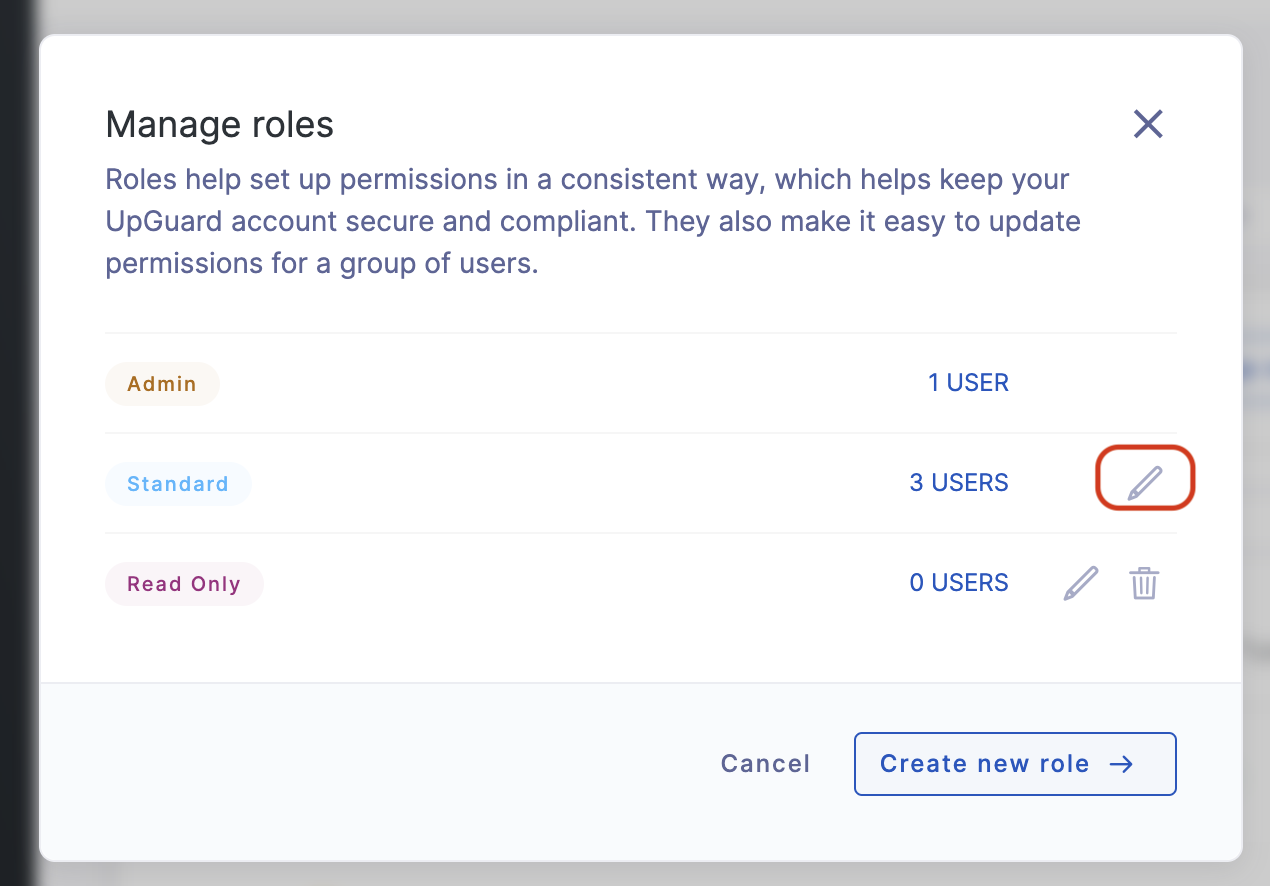
A modal will load with your existing roles, as well as the option to create a new role. Press the pencil icon next to the existing role that you need to update.
You will be redirected to the Set Permissions page, where you can update the permissions associated with that role. This page is the same for creating a new role or updating an existing role, with the latter listing only the permissions currently associated with that role. When you are satisfied with the changes, press Save role.
Note: If you edit a role with a limit for user licenses, you will receive a reminder about the limitation: "You have reached your license limit of X users. We have limited the options on this screen to any that would not consume an additional license. If you need more user licenses, please contact support to discuss your account limits."
Whenever you update a role, the changes will cascade to all users assigned to that role.
Changing a user's role
When your custom roles are ready, you can provision user access with those roles.
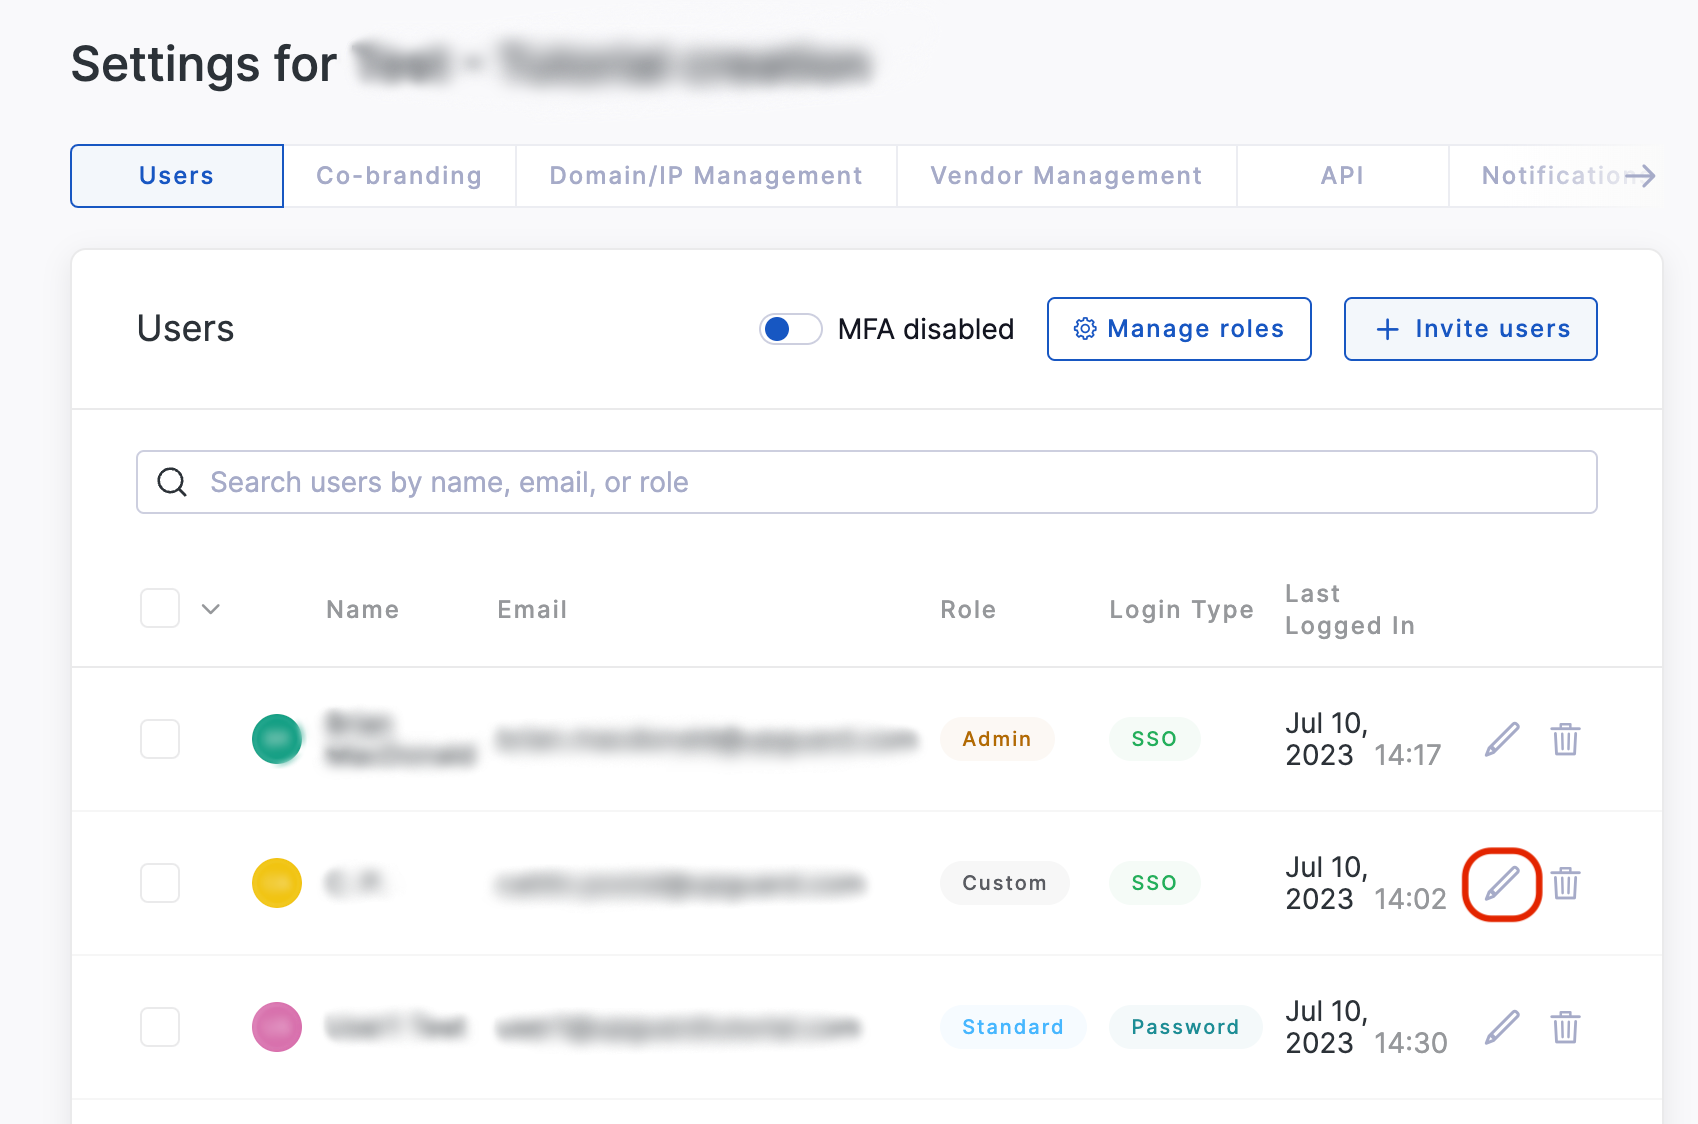
As the administrator, navigate to your organization's Settings and find the Users page. A list of your organization's current users will load. You can use the edit icon next to any user to update that user's role.
After pressing the edit icon for a user, you will access the Set Permissions page for that user. On this page, you can change the role or update individual settings for a user. Press the Apply changes button to save the updated permissions.
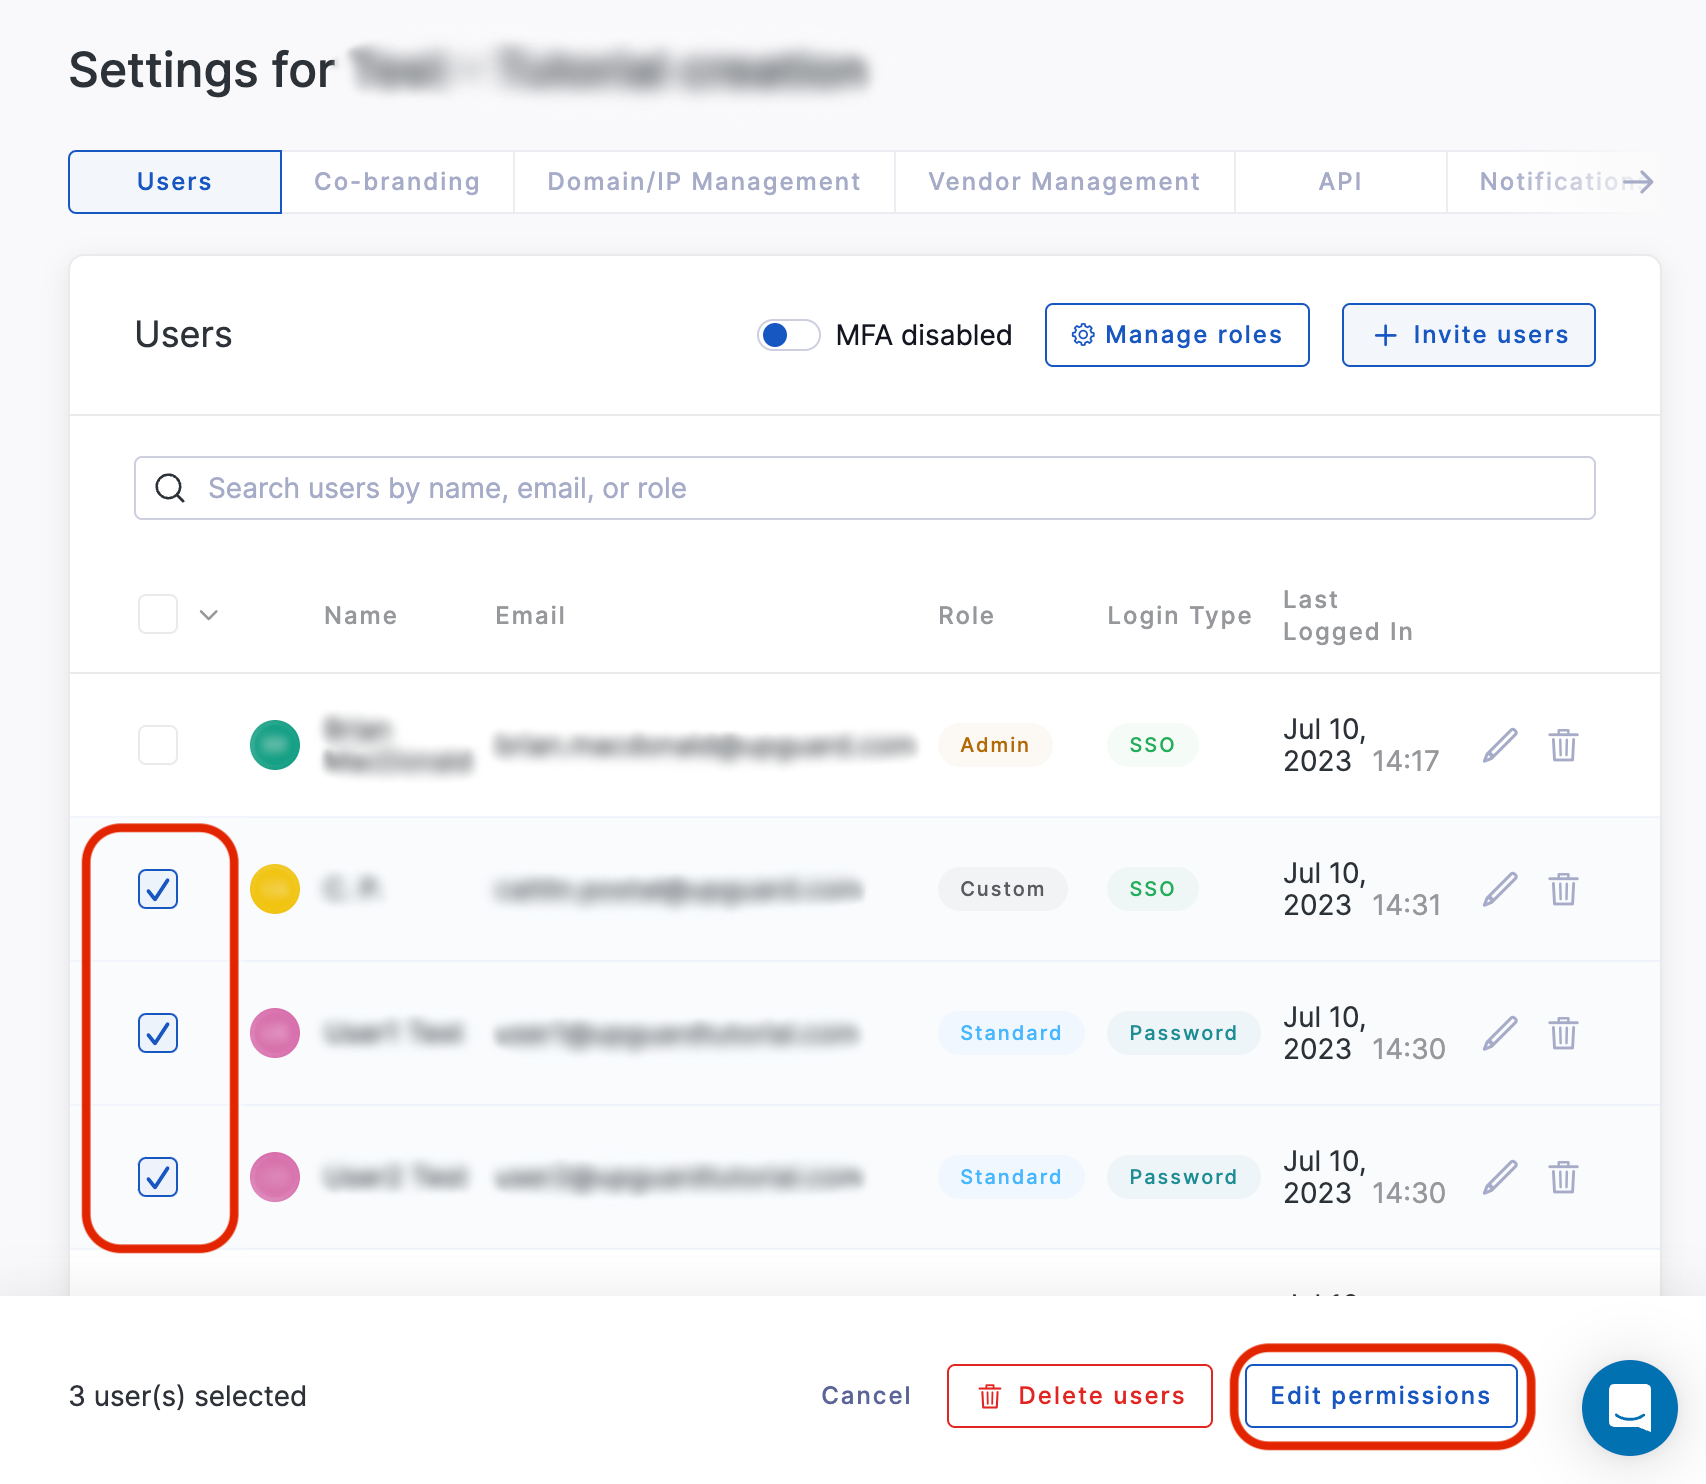
To update the settings for multiple users at the same time, use the multi-selection tool on the left of the table. Once one or more users are selected, a section of the screen will display the options to Delete user(s) or Edit permissions. With the users selected, press the Edit permissions button.
When you are satisfied with the changes, press Save role.
Further reading
For more guidance on user management, read these articles next: