Labels improve your continuous visibility for attack surface and vendor risk management because you can customize your information experience. You can evaluate specific aspects of your security posture with two types of labels available in the UpGuard platform:
-
Domains & IP Management labels are used to label your and your vendors' domains and IP information across Breach Risk and Vendor Risk.
-
Vendor Management labels are used to categorize and label your vendors.
These labels enable you to sort your domains and vendors according to the criteria you define within the labels settings. You can filter vendors to generate reports with specific information, as well as categorize your monitored domains or a subsidiary's domains.
Note: Only administrators can manage labels for your organization's account. You can have multiple users with administrative privileges.
This guide includes sections on how to add new labels from two areas of the platform, update an existing label, and remove a label.
Adding labels
- Click the Settings cog in UpGuard's top-right corner. Only administrators can manage labels for your organization's account.
- Click the Domain/IP Management or Vendor Management tab, depending on which type of label you want to create.
- Scroll to the Labels section.
The Domain/IP Management tab will have a section with a fillable text box to create new labels.

The Vendor Management tab also has a section for creating labels. In the example shown, there are two existing labels: New and Test Label:
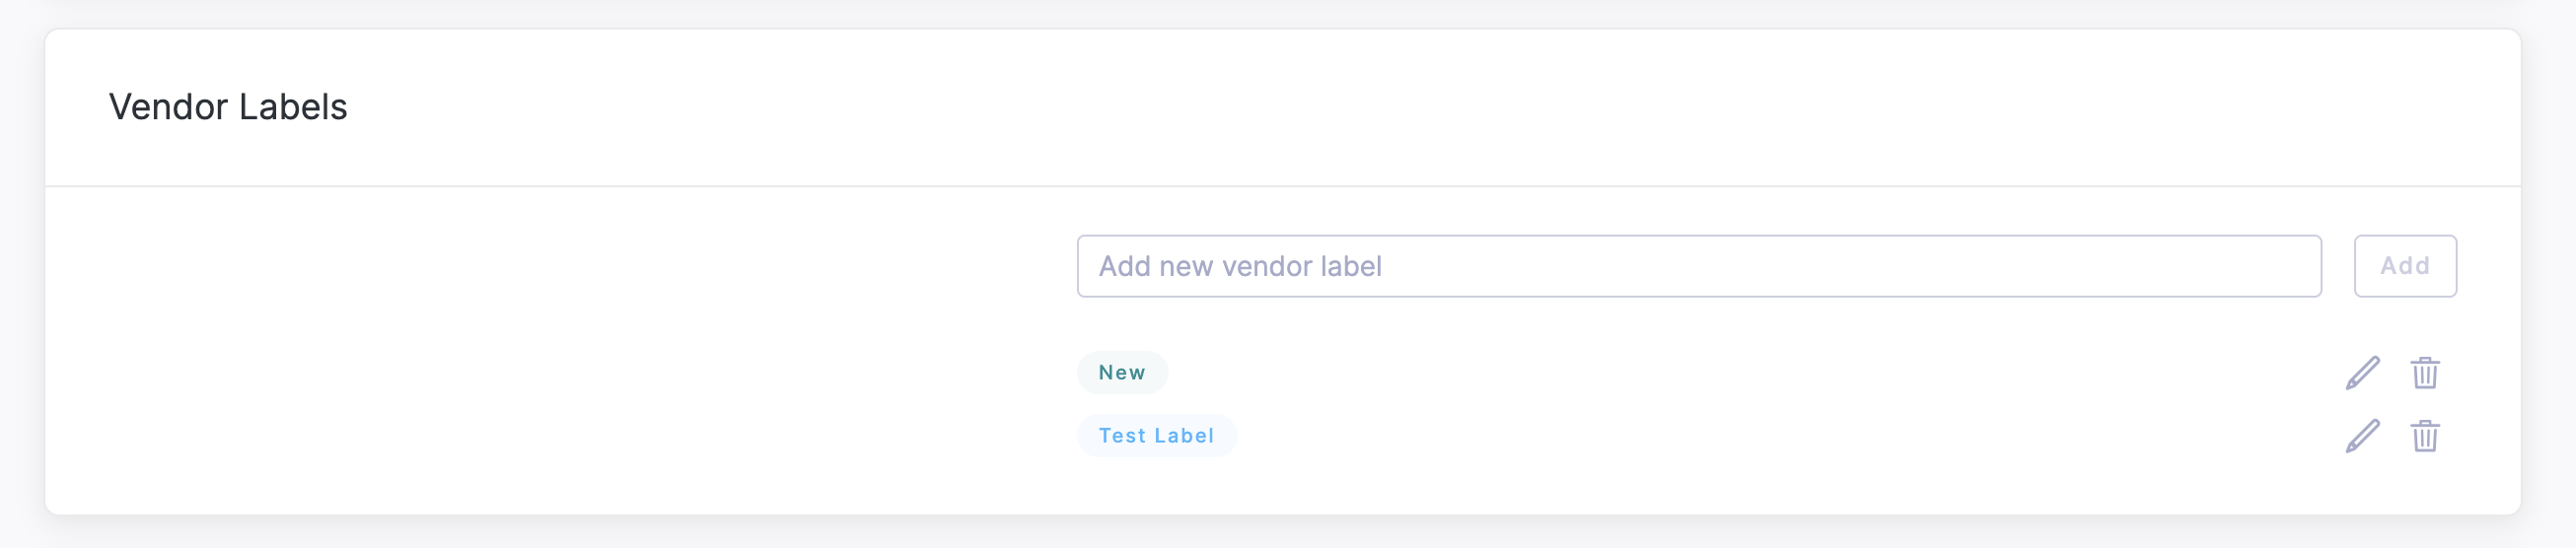
To add a new label, use the appropriate field and press Add.
You can also add labels with any of the Add labels buttons in the platform. You can find this button in the Domains & IPs section for Breach Risk or in the Vendors section of Vendor Risk.

Pressing the Add label button loads a new pane that lists out all the labels you currently have available for your account. The default options for Vendor Relationship are In-Use, Business Data, Customer Data, Network Access, and Physical Access, though you can also add custom labels. The example below includes custom labels for New and Test Label.
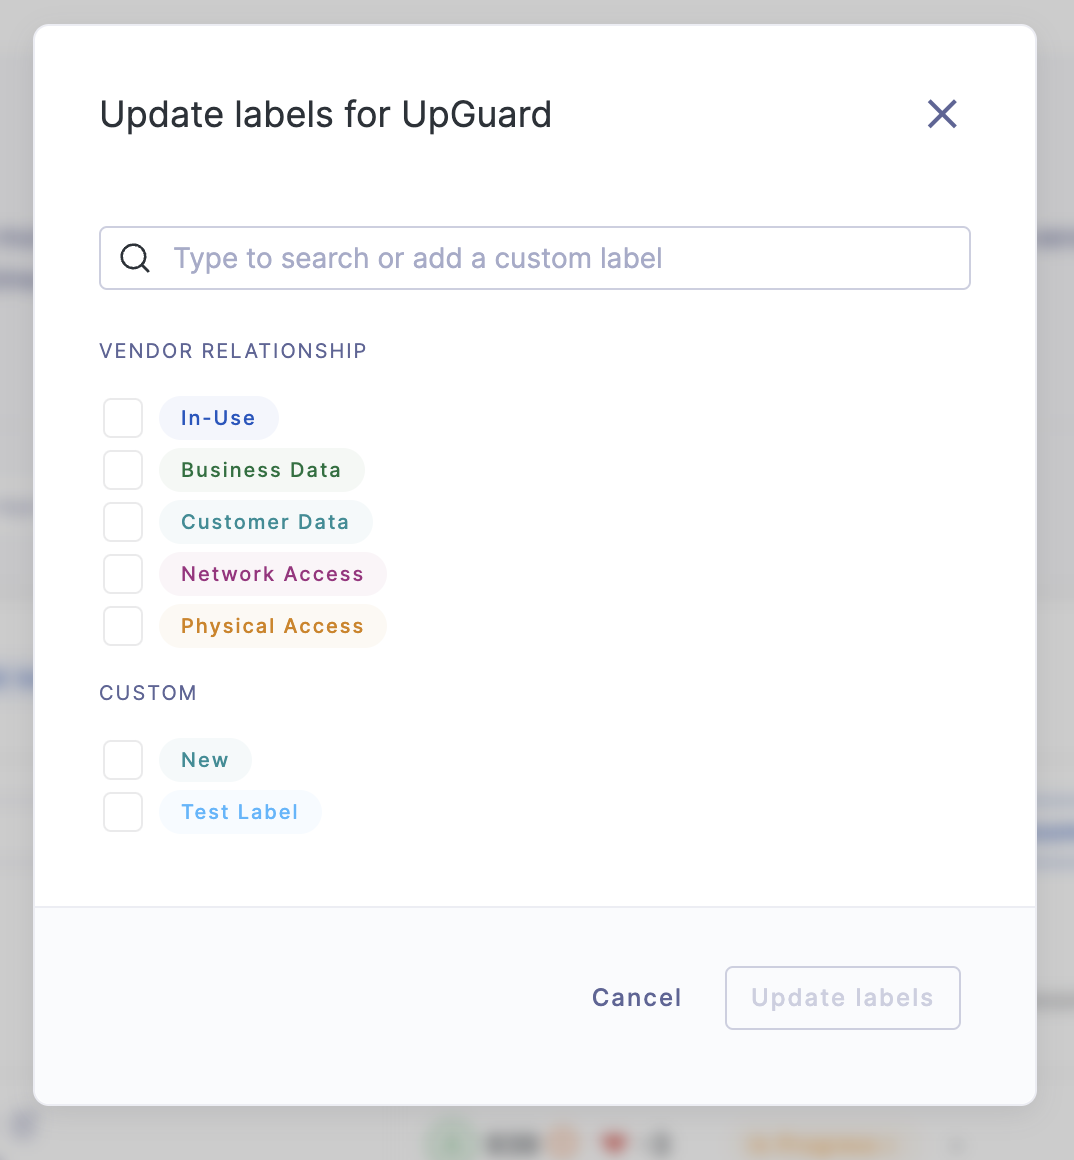
Select whichever labels apply and press the Update labels button.
Modifying and removing existing labels
- Click the Settings cog in UpGuard's top-right corner. Only administrators can manage labels for your organization's account.
- Click the Domain/IP Management or Vendor Management tab, depending on which type of label you want to create.
- Scroll to the Labels section.
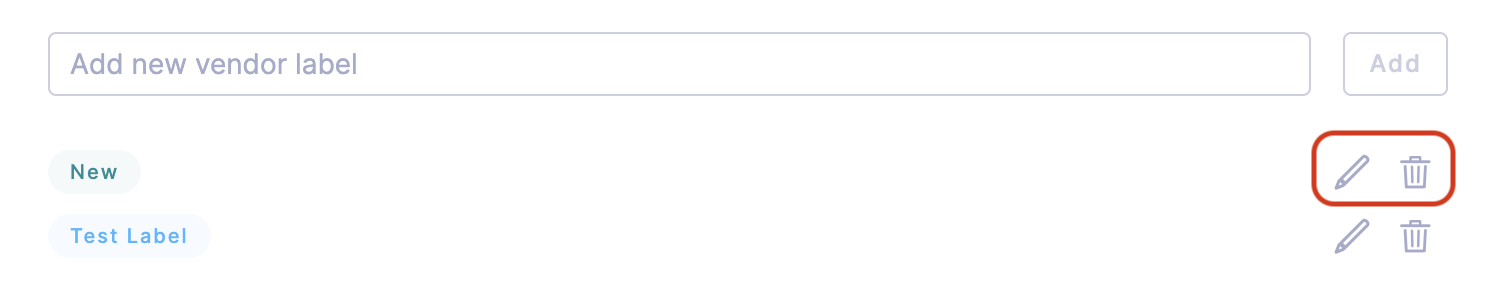
- To edit the label: click the pencil icon.
- To delete the label: click the trash can, then click Delete on the in-line confirmation.
Automatically populating vendor labels
To save time and ensure consistency, you can create automation rules to assign vendor labels, based on onboarding request submissions. Visit How to use automation to apply tiers, labels, portfolios and custom attributes to your vendors to learn more.
See also:
For further guidance on labeling your organization's assets, read these articles next:
To label your vendors, read these articles next: