UpGuard allows you to create and store risk assessments for any of your monitored vendors. The risk assessment feature allows you to:
-
Specify the evidence you reviewed as part of the assessment (including domains and their associated risks, questionnaires, additional evidence, and automated scan results)
-
Document your findings based on this evidence
-
Request remediation, add comments to, or waive risks
-
Record who conducted the assessment
-
Set a reassessment date
-
Export the assessment as a PDF
-
Make the assessment visible within the app to all the users of your account
Monitor the vendor
Before you can create a risk assessment, you need to be monitoring the vendor. If you aren't currently monitoring the vendor you want to assess, you can learn how to monitor them here.
Select the vendor
If you're already monitoring them, you can find the vendor by clicking on the selected vendor in the Vendors list under Vendor Risk in the sidebar. Once you have chosen the vendor, click on Risk Assessments in the side panel:
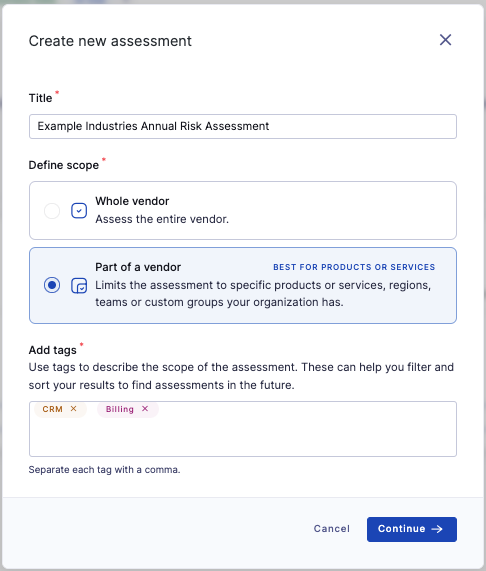
Conduct an assessment and define scope
If you haven't assessed the vendor, you should see a screen similar to the screenshot shown above. Select Create new assessment to proceed.
You'll then be given the option to tailor the risk assessment Title and Scope. In this case, the risk assessment scope is limited to cover the organizations CRM and Billing systems. When you press continue you will be directed to the first stage of your risk assessment.
The risk assessment workflow comprises three main stages which are outlined below.
Stage 1: Gather and select evidence
This stage is about collecting all the information together in order to assess the risk level of a vendor. The amount of evidence required is likely to vary depending on the risk they pose to your organization, usually managed through tiering your vendors, so you should decide upfront what you need based on this.
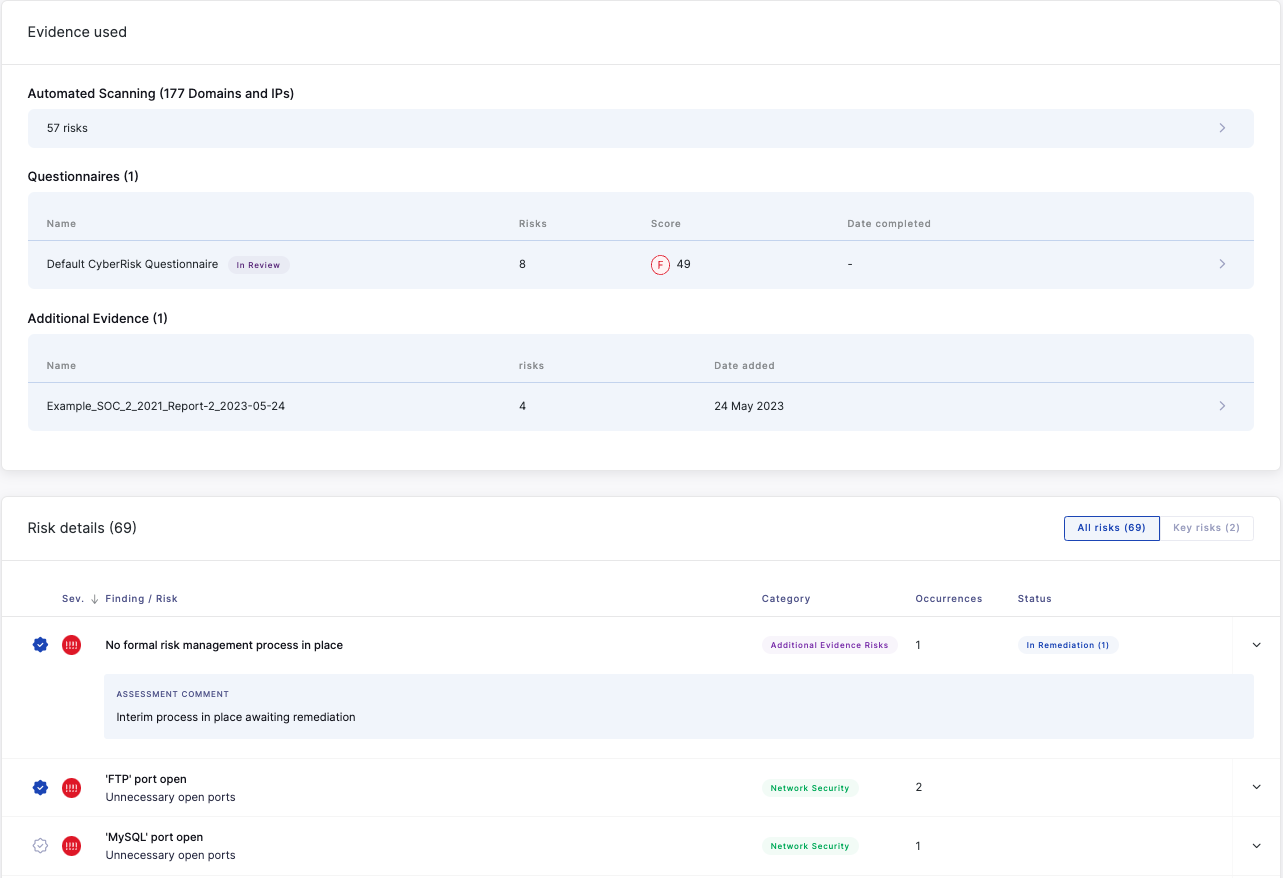
You can select the following evidence types to include in your assessment:
-
Select Automated Scanning risks identified from domains and IP addresses - this is defaulted to all domains attributed to this vendor, but if you want to limit the scope of the assessment you can Change selection to limit the scope to particular domains.
-
Send or select an existing security questionnaire to help identify potential weaknesses among your vendors by gathering additional information that automated scanning cannot surface
-
Upload additional evidence documentation relevant to the security posture of the vendor
-
Include information found in publicly available Trust and Security pages.

Stage 2: Manage risks
During this phase you should decide on which automated scanning, questionnaire and additional evidence risks you believe need to be remediated or require other follow up action based on the nature of the risks, the evidence provided, and the criticality of this vendor.
-
You can request remediation on a risk or group of risks as part of this stage of the risk assessment workflow.
-
You can also add commentary against individual risks in this step. This could include compensating control information or mitigation activity that is underway. These comments are included in the final risk assessment and report, but not stored against the risk profile.
-
You may also choose to waive a risk if the vendor has provided sufficient information about the controls they have in place, which can be done within the risk assessment by expanding out one of the risks.

At the top of the Review Risk section, you can see a "Remediation Summary" which allows you to create or amend a remediation request linked to this risk assessment.
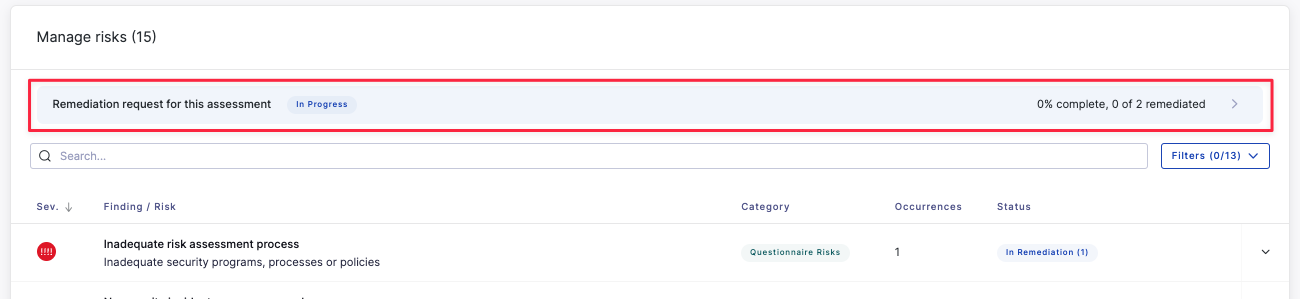
You can still complete your assessment whilst remediation is in progress - the remediation summary will continue to update within the completed assessment until it is eventually closed.
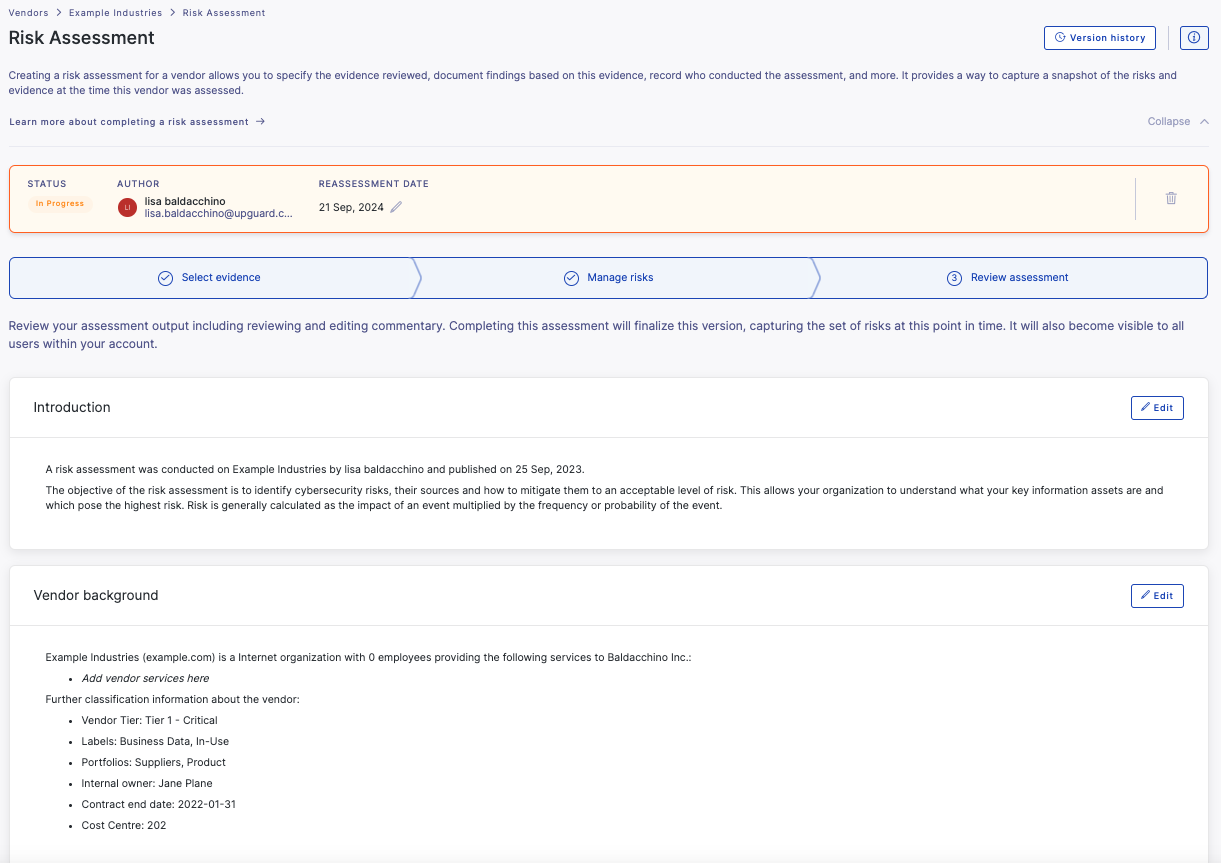
Stage 3: Review assessment and commentary
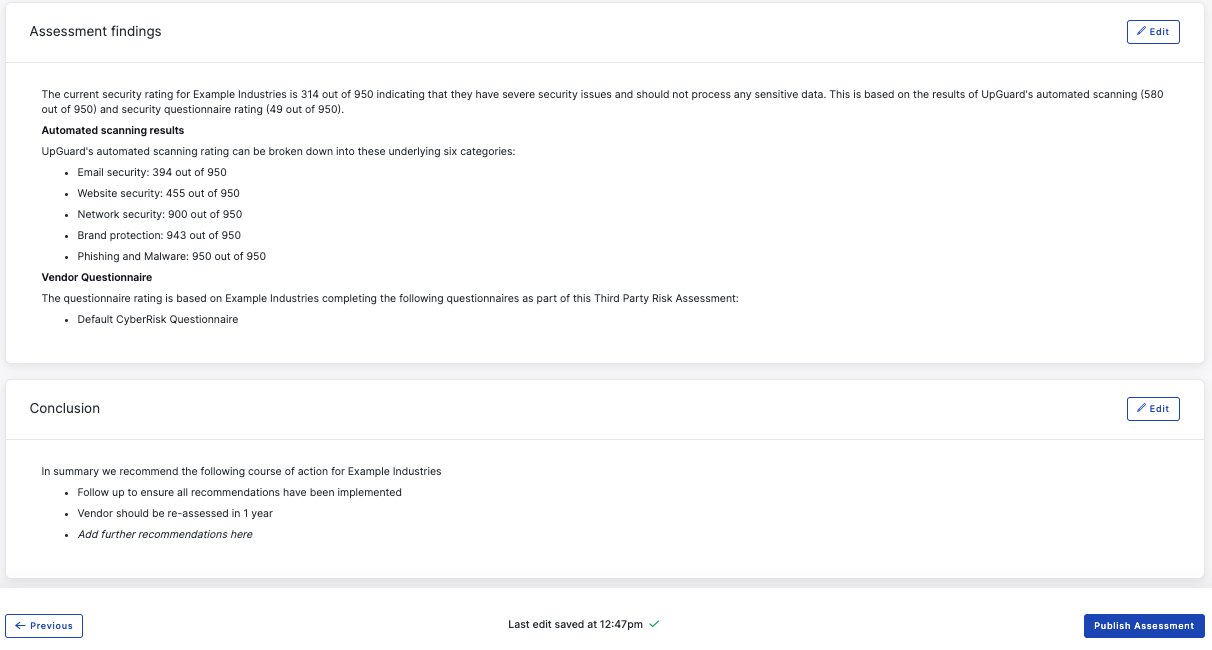
The commentary in your risk assessment will be pre-populated based on the customizable template found in Settings>Templates>Risk assessments. UpGuard provides a pre-defined default template which uses merge tags so you can pre-populate your risk assessment with important information like vendor tier and attributes, and vendor rating including category breakdown. To give you the flexibility you need to present the information in the way you need the template is broken into 4 sections: Introduction, Vendor Background, Assessment summary and Conclusion, each of which can be customized according to your specific needs.
In the review step you can:
-
Review the included evidence, including following up on any outstanding action items such as incomplete questionnaires or unapproved risk waivers.
-
Review your included risks and any comments you added to individual risks, and follow up on any open remediation requests and note any further action or remediation required.
-
Add key risks - these should be risks you want to focus on as part of your assessment, and highlight in your risk assessment report. Select the check box to the left of the risk to add to Key risks list .
-
Review and edit the commentary which has been automatically generated based on your template, and add any additional vendor-specific comments and recommendations. The commentary supports bold or italicised text, ordered or unordered lists, and adding tables using HTML (with inline styles for colors and spacing).
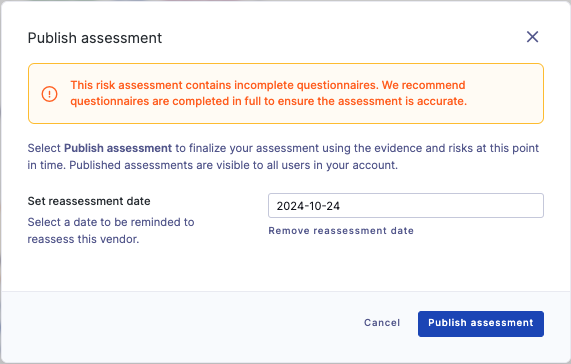
Complete the assessment and define a reassessment date
Now that you've finished conducting your risk assessment, click on the Complete Assessment -> button in the bottom right corner, and define a date to reassess the vendor in the future.
Viewing risk assessments and conducting additional risk assessments
You can view your risk assessments including name and scope in the Risk assessments tab. If you have multiple engagements for a vendor, you can conduct multiple concurrent risk assessments for that vendor. If you want to reassess a vendor with the same risk assessment scope, you should select reassess, to create a new version of that risk assessment, and the scope and commentary from the previous risk assessment will be carried over into the new version, but if you want to change the scope you can start a new, concurrent risk assessment by selecting Create new assessment.

See also:
- What is the Vendors section?
- What is included in a vendor's vulnerabilities?
- How to generate a risk assessment summary report
- How to generate a vendor risk report
- What details can UpGuard Vendor Risk provide about a vendor?
- How to add a new vendor
- How to remove a vendor
- What is the difference between a vendor snapshot and a monitored vendor?
- How to capture additional evidence