Connecting UpGuard to your Jira Cloud workspace allows you to get the notifications you need directly into a Jira project of your choice. You’ll first need to connect UpGuard to your Atlassian account and authorize access. Once this is done, you'll create an integration by selecting which notifications you want to trigger creating an Issue in Jira. Then you'll customize all your regular data fields (such as assigning an owner, classifying the issue type and any other custom fields you have set up). Let’s run through an example.
Connecting to your Jira Cloud workspace
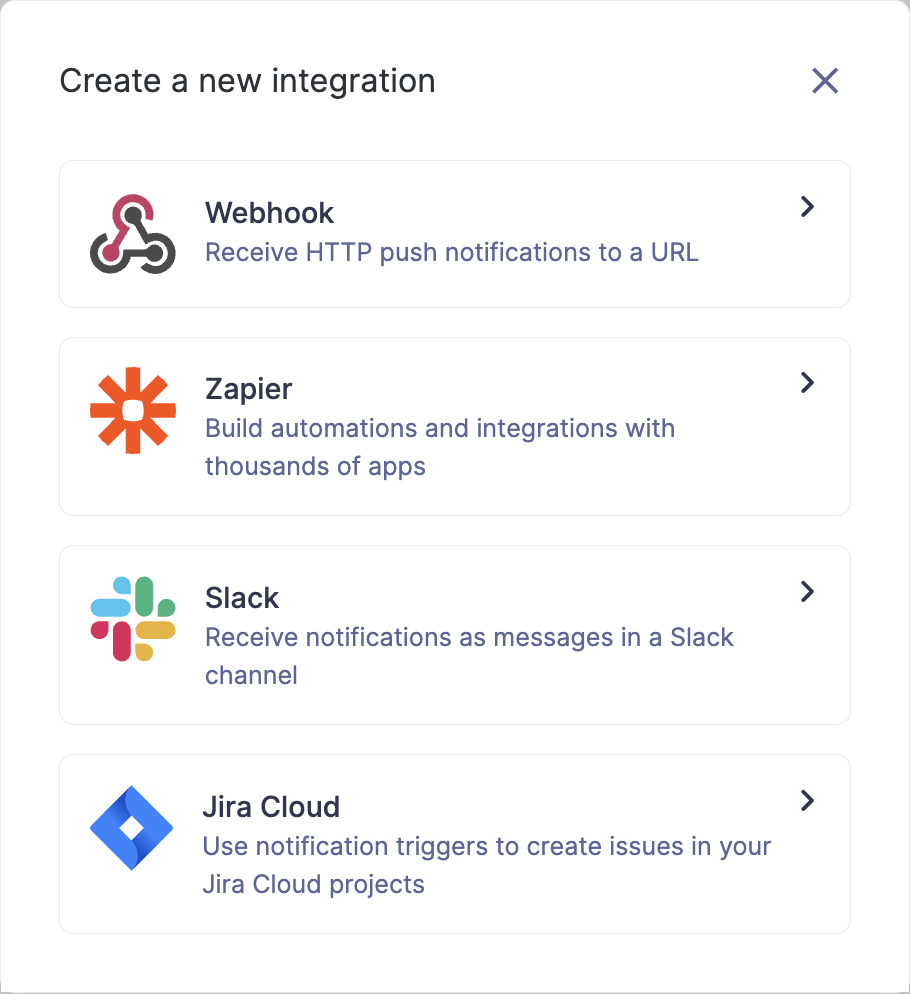
1. Navigate to the Integrations tab within Settings, then select + New Integration.
2. Select Jira Cloud.
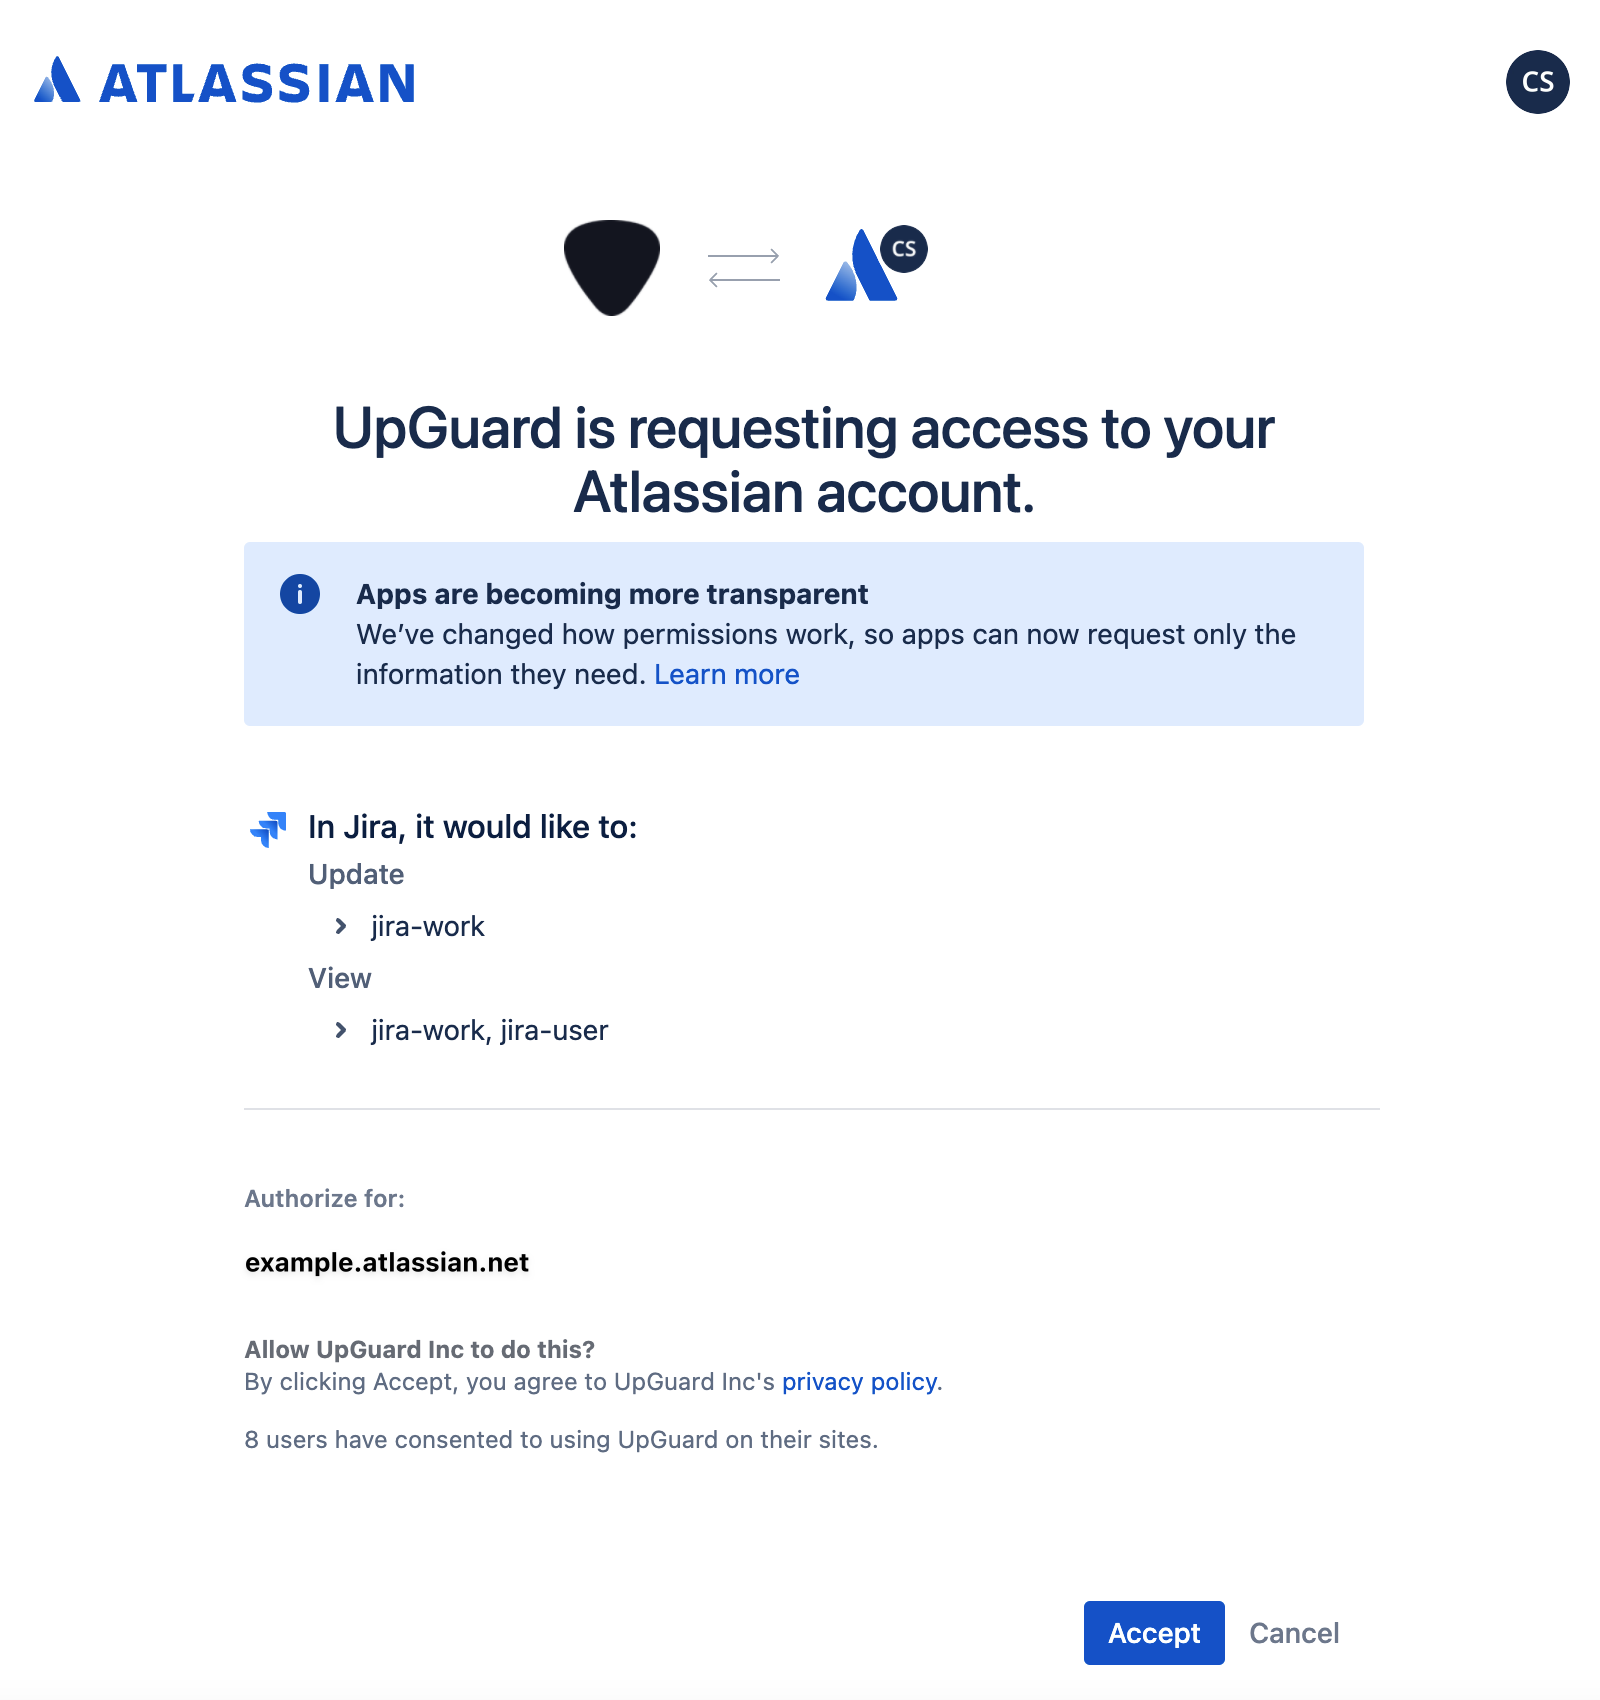
3. Select your workspace (if required) and hit Accept. Congratulations! Your UpGuard account is now connected to Jira Cloud and you are ready to create an integration.
4. Once you hit accept, you will be directed to the Create Integration workflow. Note: If you wish to change or disconnect your workspace, click on Manage Connections on the Integrations page.
Creating a Jira Cloud integration
Now that your Atlassian account is connected you will see the create integration workflow.
1. Triggers. Enable the triggers you would like to integrate. For this example I’ve chosen to enable notifications for when my company’s score drops below 600, and for when a VIP identity has been breached. Click Confirm and next ->

2. Name and destination: Create a name for your integration and select the Jira Cloud project you wish to integrate with then hit Confirm and next ->

3. Review content: This is the fun part, where you get to customize your Issue creation and the customized messaging. Select the nominated trigger on the left-hand side, confirm you have the correct project selected and choose the Issue type (this is a required step). This will then display a variety of other fields which are custom to your particular Jira instance/project - required fields are denoted with a *.
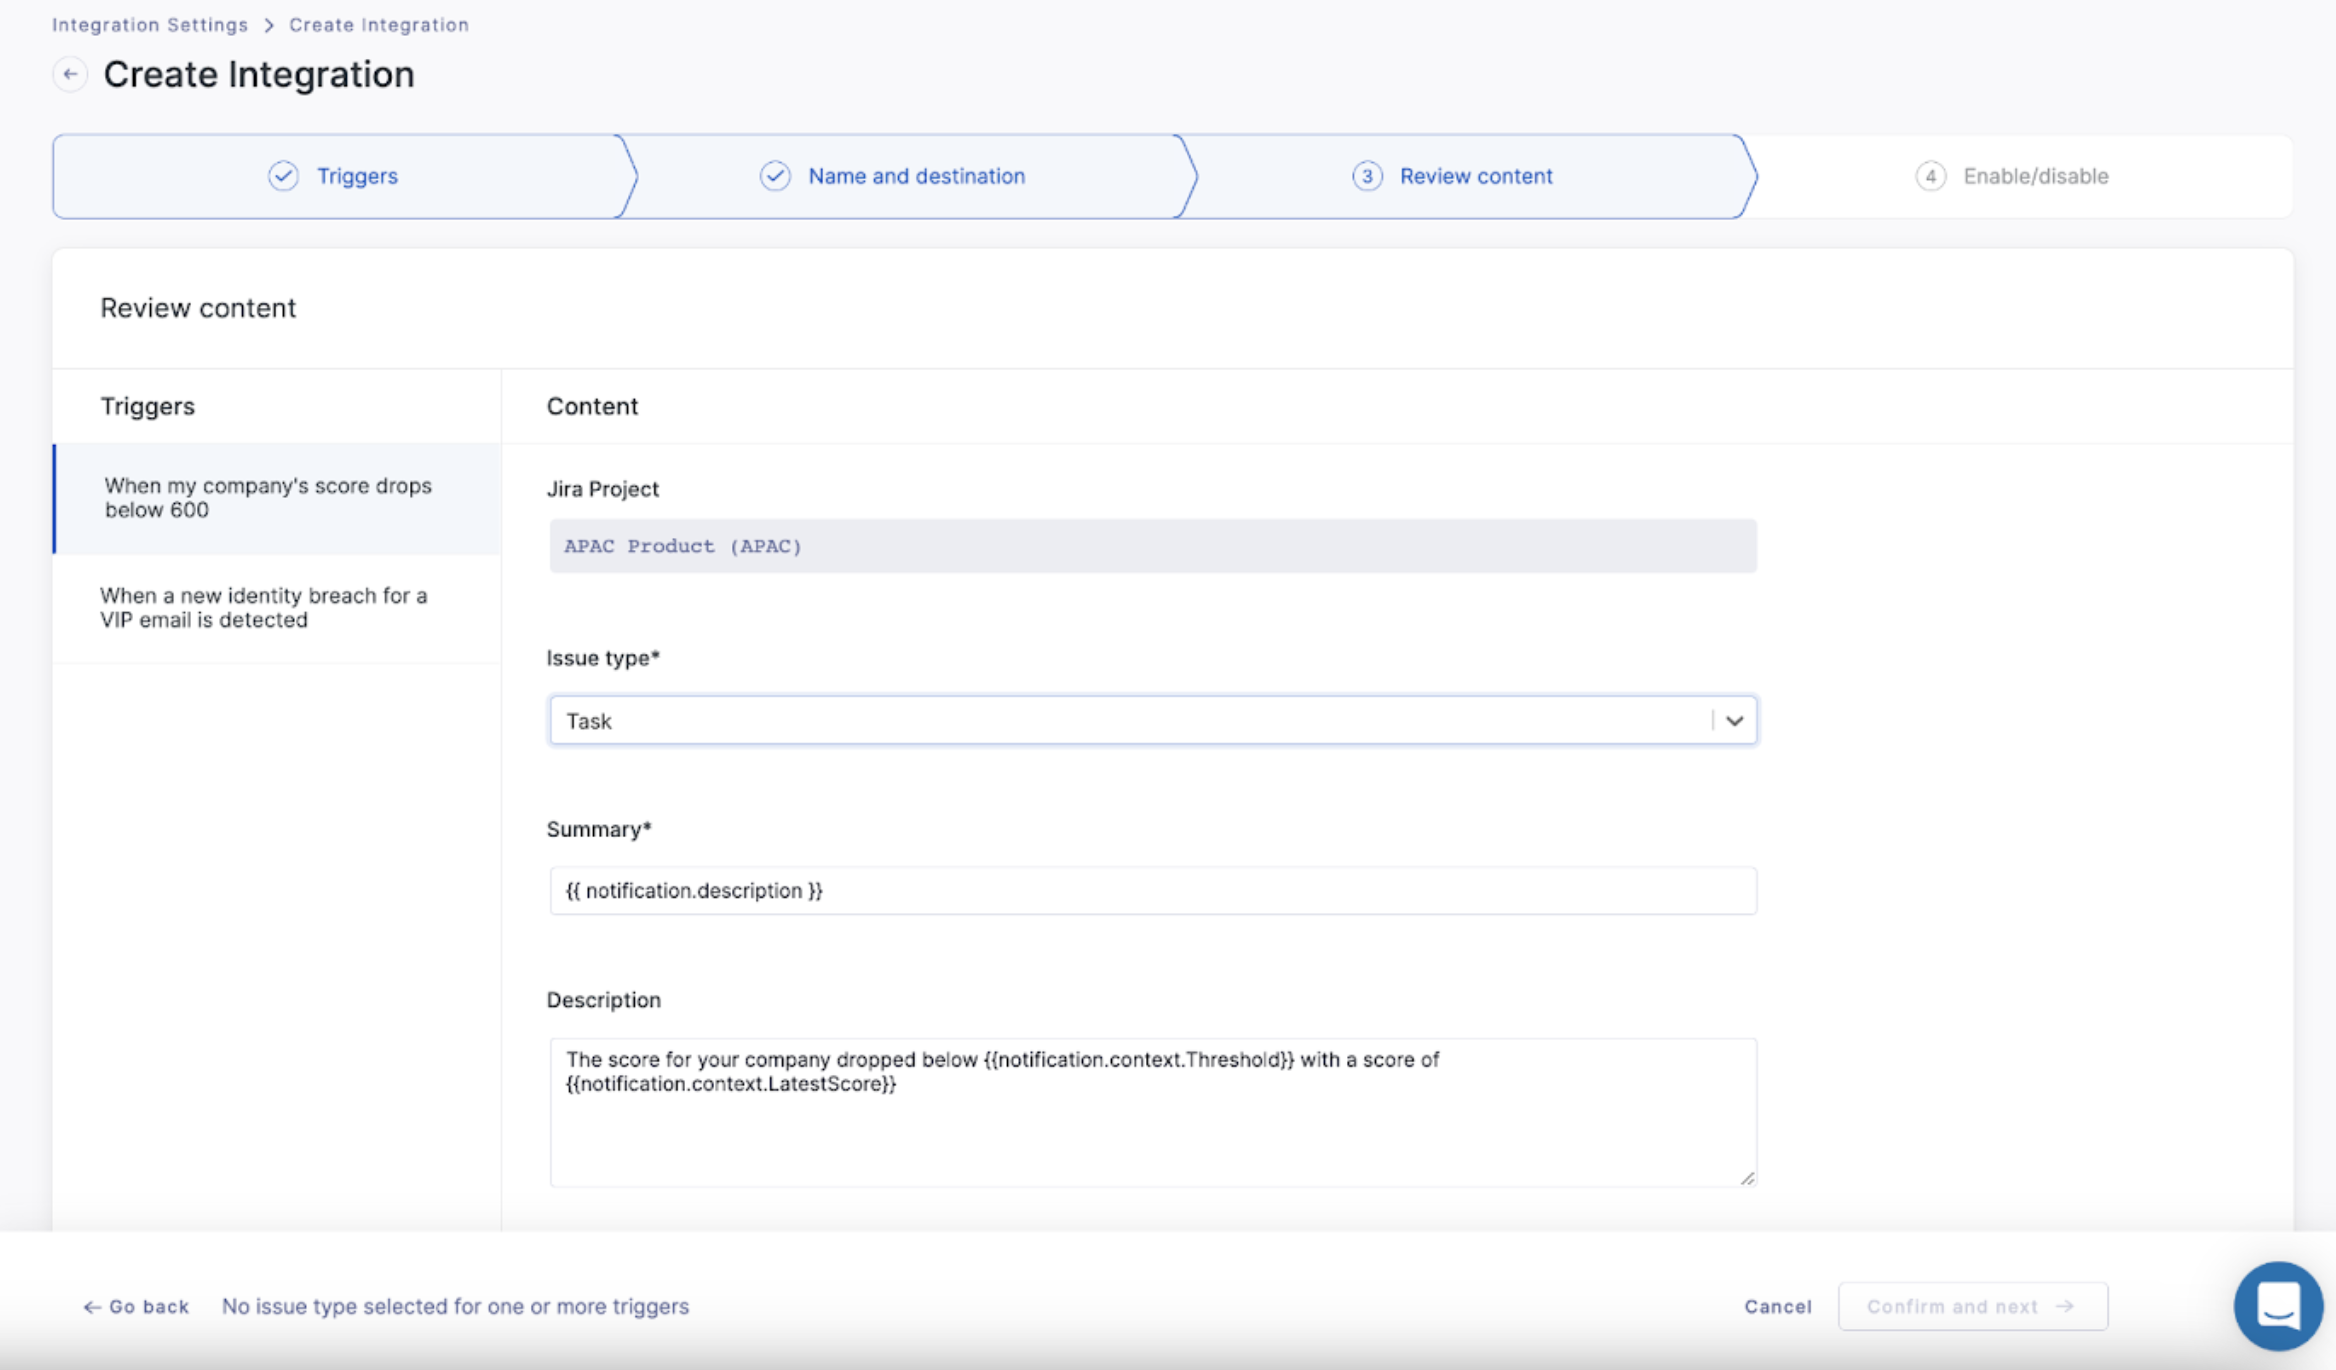
For this particular example, I’ve chosen to create a Task from these notifications and have opted to leave the default Summary and Description.
You will then find the other custom attributes that you have set up for your Jira project and a button to Test Create Issue which you can click to trigger a simulation of the Issue creation. The Jira issue will populate into your backlog (or wherever your standard-issue creation regularly happens) for review.

Once you are happy with the notifications, hit Confirm and next.
4. Enable/Disable: Select the status you want for your integration upon completion, then select Finish.

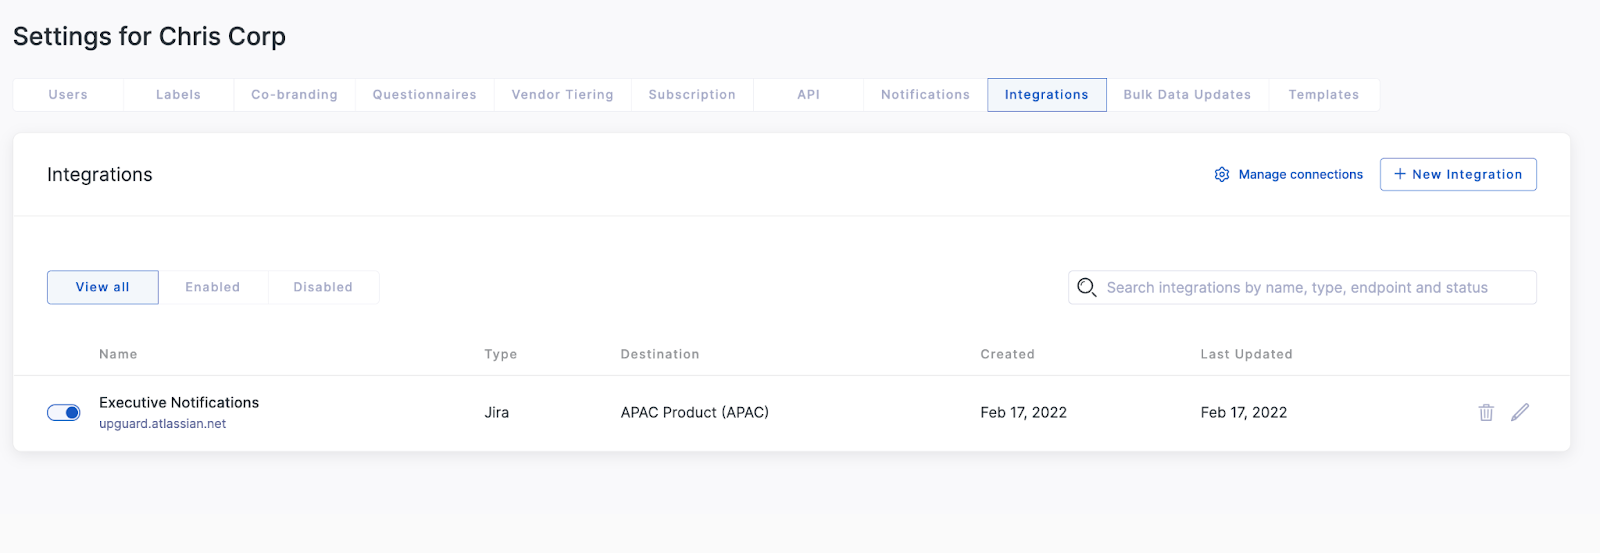
You will now find your new integration in the Integrations tab within your settings, which can be enabled/disabled, edited, or deleted.
Customizing your notification messaging
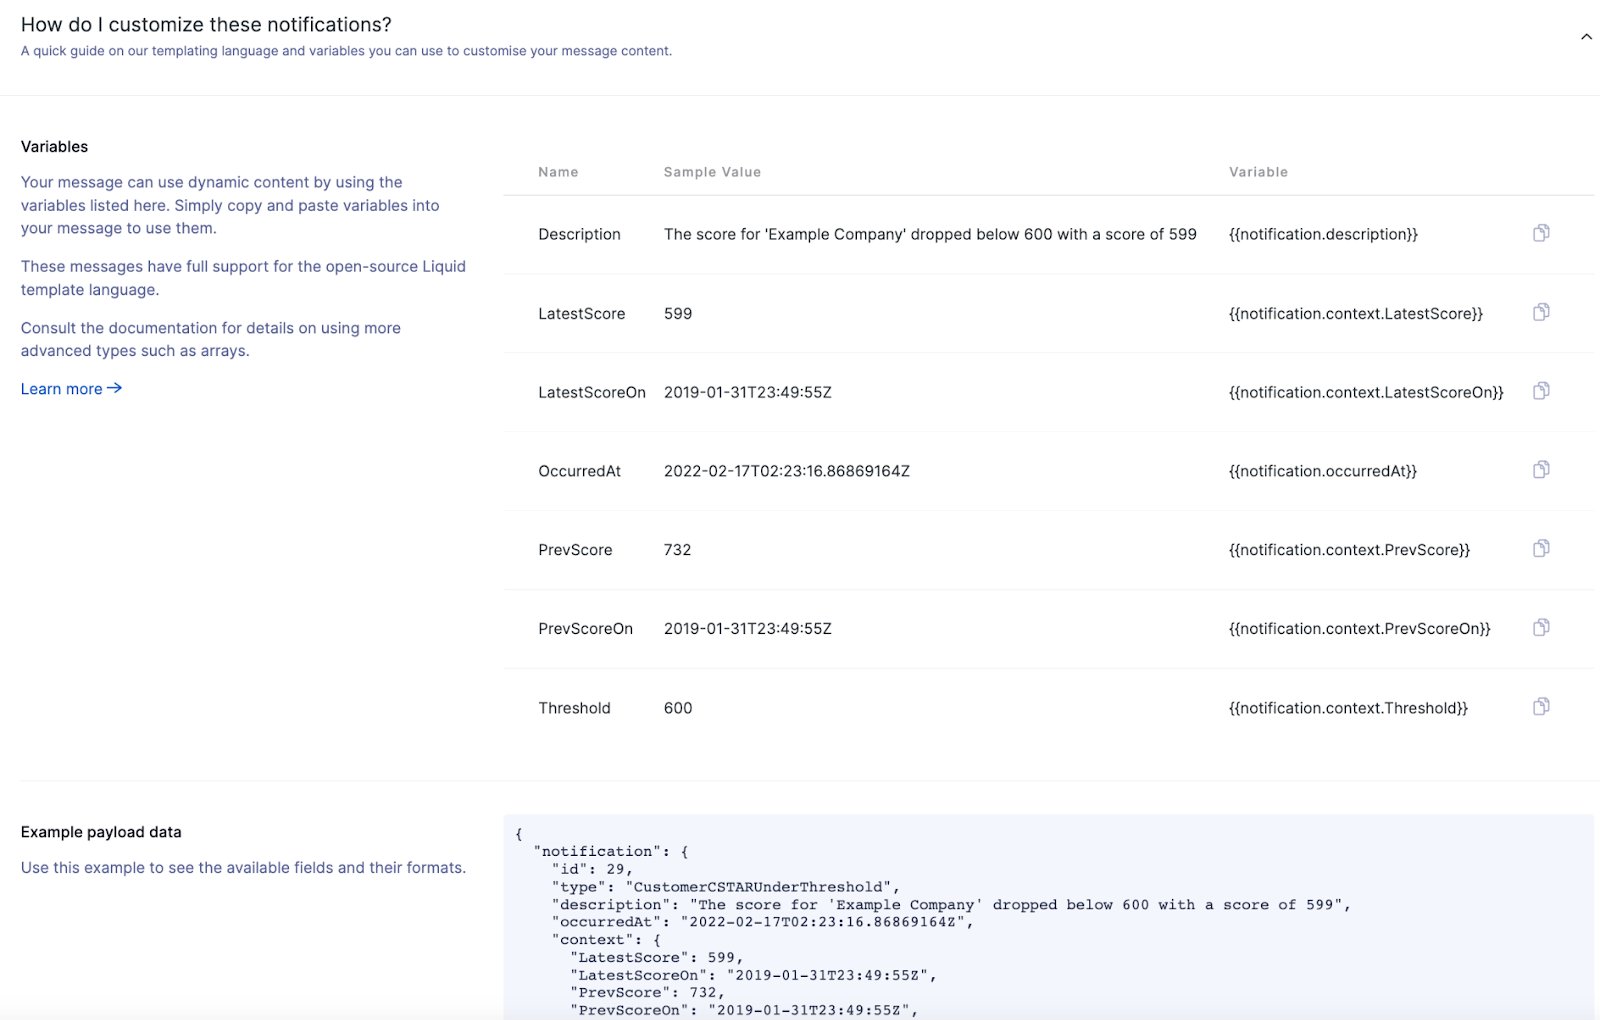
We've created a set of default variables for you to use with each trigger type (example below). You can click on the copy button on the right-hand side of each row to copy that text. The messaging variables using Liquid syntax are extremely flexible - for more information on how to configure these, check out this article - “Using Liquid syntax to customize your integration”. The JSON payload data is at the bottom of this page for advanced users also.
See also: