Email integrations allow you to direct notifications as emails to any specific email address. To set up an email integration, you'll need to select which notifications you want to send, choose the destination email address which you want the notification to be sent to and customize the message.
Create an email integration
- Click the Settings cog in UpGuard's top-right corner.
- Click the Integrations tab.
- Select + New Integration.
- Select Email.
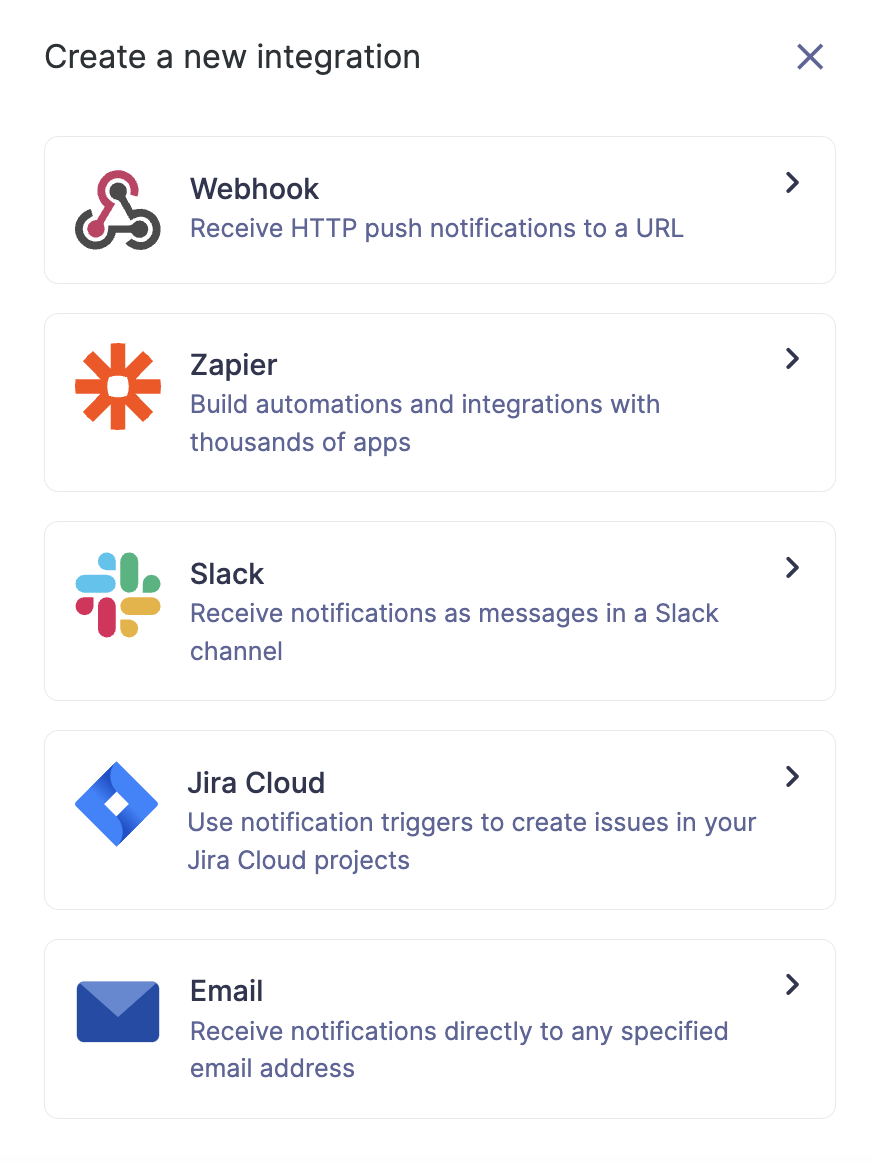
You will see the Create Integration workflow:
1. Triggers. Enable the triggers you would like to integrate. For this example I’ve chosen to enable triggers for when my company’s score drops below 600, and for when a VIP identity has been breached. Click Next.

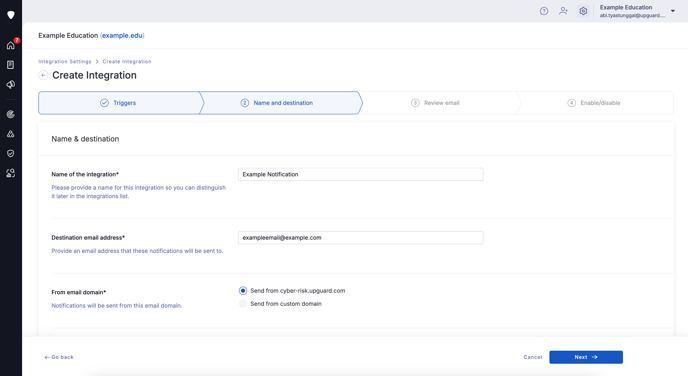
2. Name and destination:
-
Create a name for your integration
-
Select the destination email address for the notifications to be delivered to
-
Enter the 'from' name
-
Select whether you want the emails sent from cyber-risk.upguard.com, or from a custom domain if you have it set up.
-
Hit Next
Create a name for your integration
Select the destination email address for the notifications to be delivered to
Enter the 'from' name
Select whether you want the emails sent from cyber-risk.upguard.com, or from a custom domain if you have it set up.
Hit Next.
3. Review content:
-
Set the Email subject line
-
Customize the messaging for each notification by selecting it in the left hand panel under triggers and editing in the 'edit message' box below the preview.
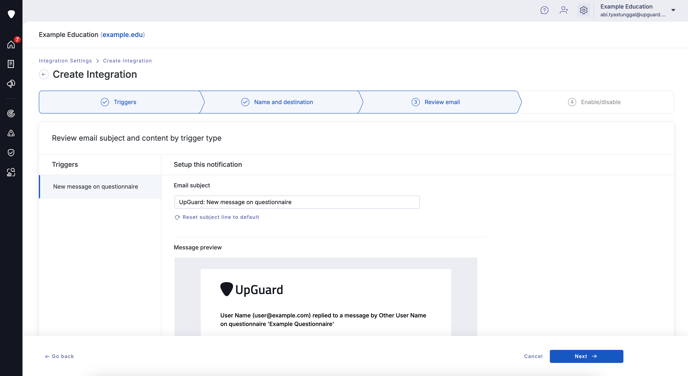
You can choose to 'Send a test email' to see how it will look, and when you are happy hit Next.
4. Enable/Disable: Select the status you want for your integration upon completion, then select Finish.
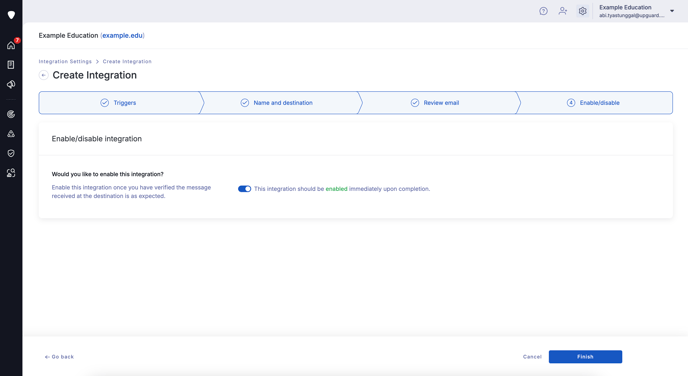
Your new integration is listed on the Settings>Integrations tab and can be enabled/disabled, edited or deleted from there.
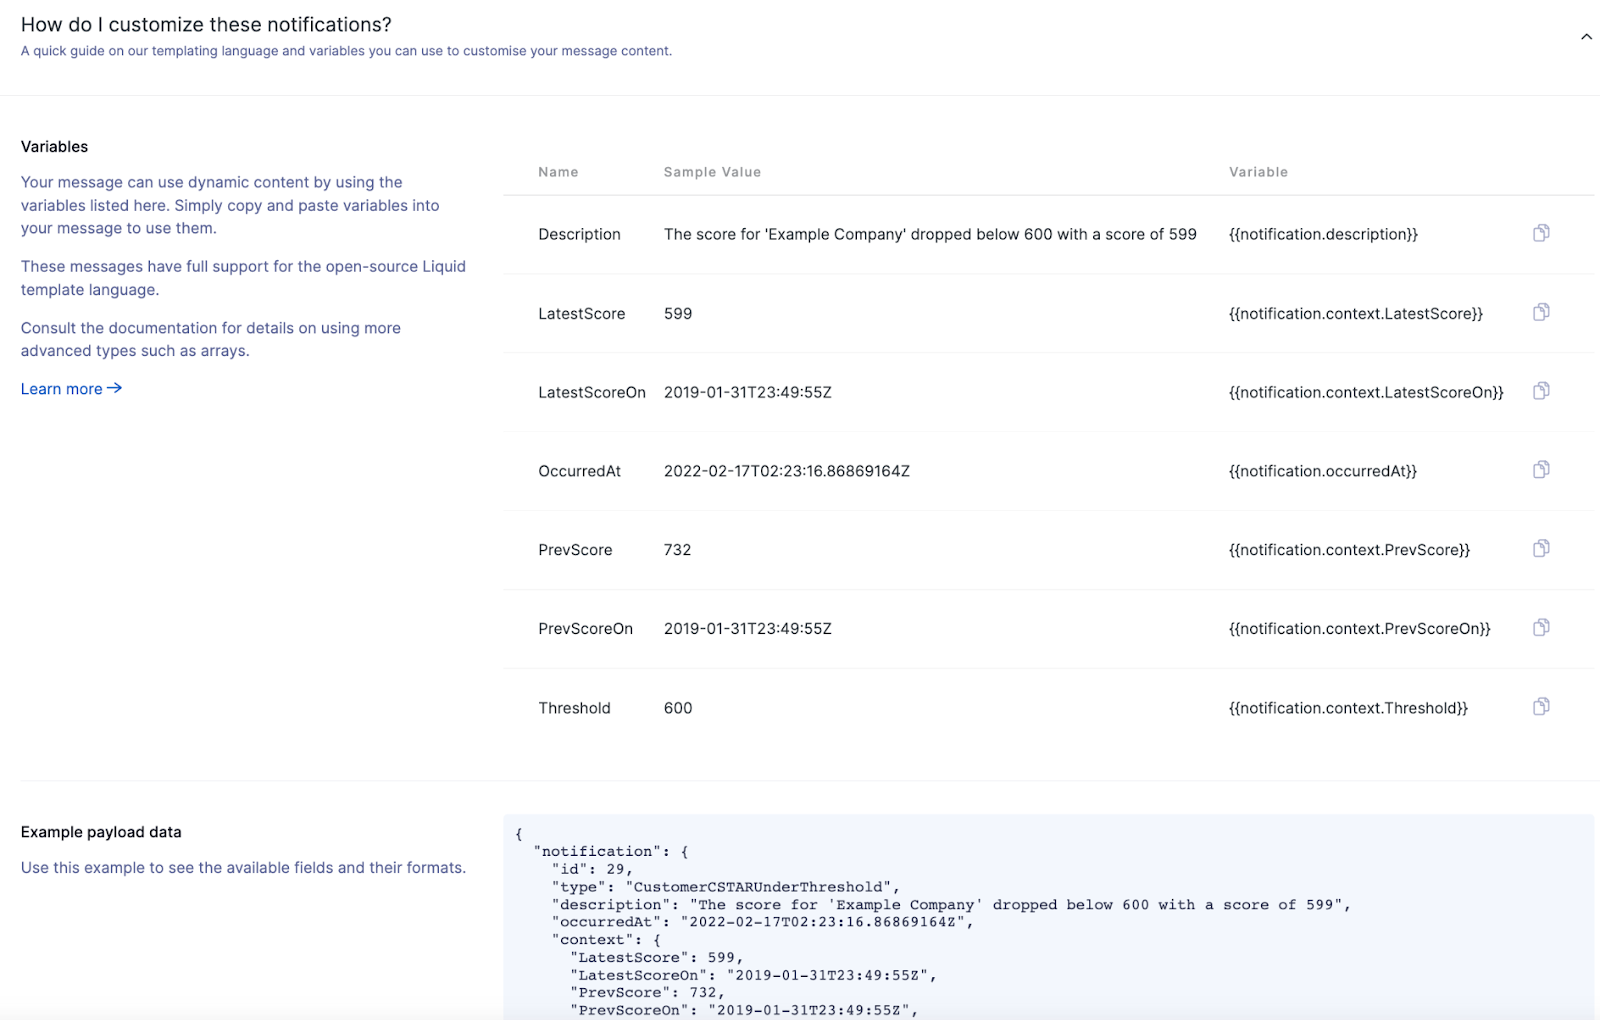
Customizing your notification messaging
We've created a set of default variables for you to use with each trigger type (example below). You can click on the copy button on the right hand side of each row to copy that text. The messaging variables using Liquid syntax are extremely flexible - for more information on how to configure these, check out this article - “Using Liquid syntax to customize your integration”. The JSON payload data is at the bottom of this page for advanced users also.
See Also