Request remediation for shared questionnaire risks
Request remediation for risks identified from Trust Center questionnaires
With UpGuard Vendor Risk, you can gather evidence, assess risks, and request remediation in a single workflow. You can streamline your assessment and remediation process from a central location.
In this guide, you will move through the risk remediation workflow for a risk identified in a questionnaire that has been shared with you. To complete this process, you will also enable the Include in Risk Profile option for the selected questionnaire.
Creating a remediation request for risks associated with a shared questionnaire
- Navigate to Vendor Risk > Vendors.
- Select the specific vendor from your list.
- Click Questionnaires from the subheadings under the named vendor.
- You'll see a page with the questionnaires that the vendor has made available through a Trust Center.

In the example above, the vendor example.com has made one questionnaire available. The Status is Shared, which means that you have requested and been approved to access this questionnaire by a member of the example.com organization.
Select the appropriate questionnaire from the list, which will open a new page with more information about that questionnaire.
To continue with the remediation process, you will need to opt in to this questionnaire's inclusion in your Risk Profile. In the Details box, enable the Include in Risk Profile option and press Confirm when prompted by the modal. This option is turned off by default.

This page will update with the shared questionnaire score as well as the attached supporting documentation, risks, and compensating control information from the questionnaire. Any associated findings and compensating control information will now be included in the vendor’s risk profile and reflected in their score.
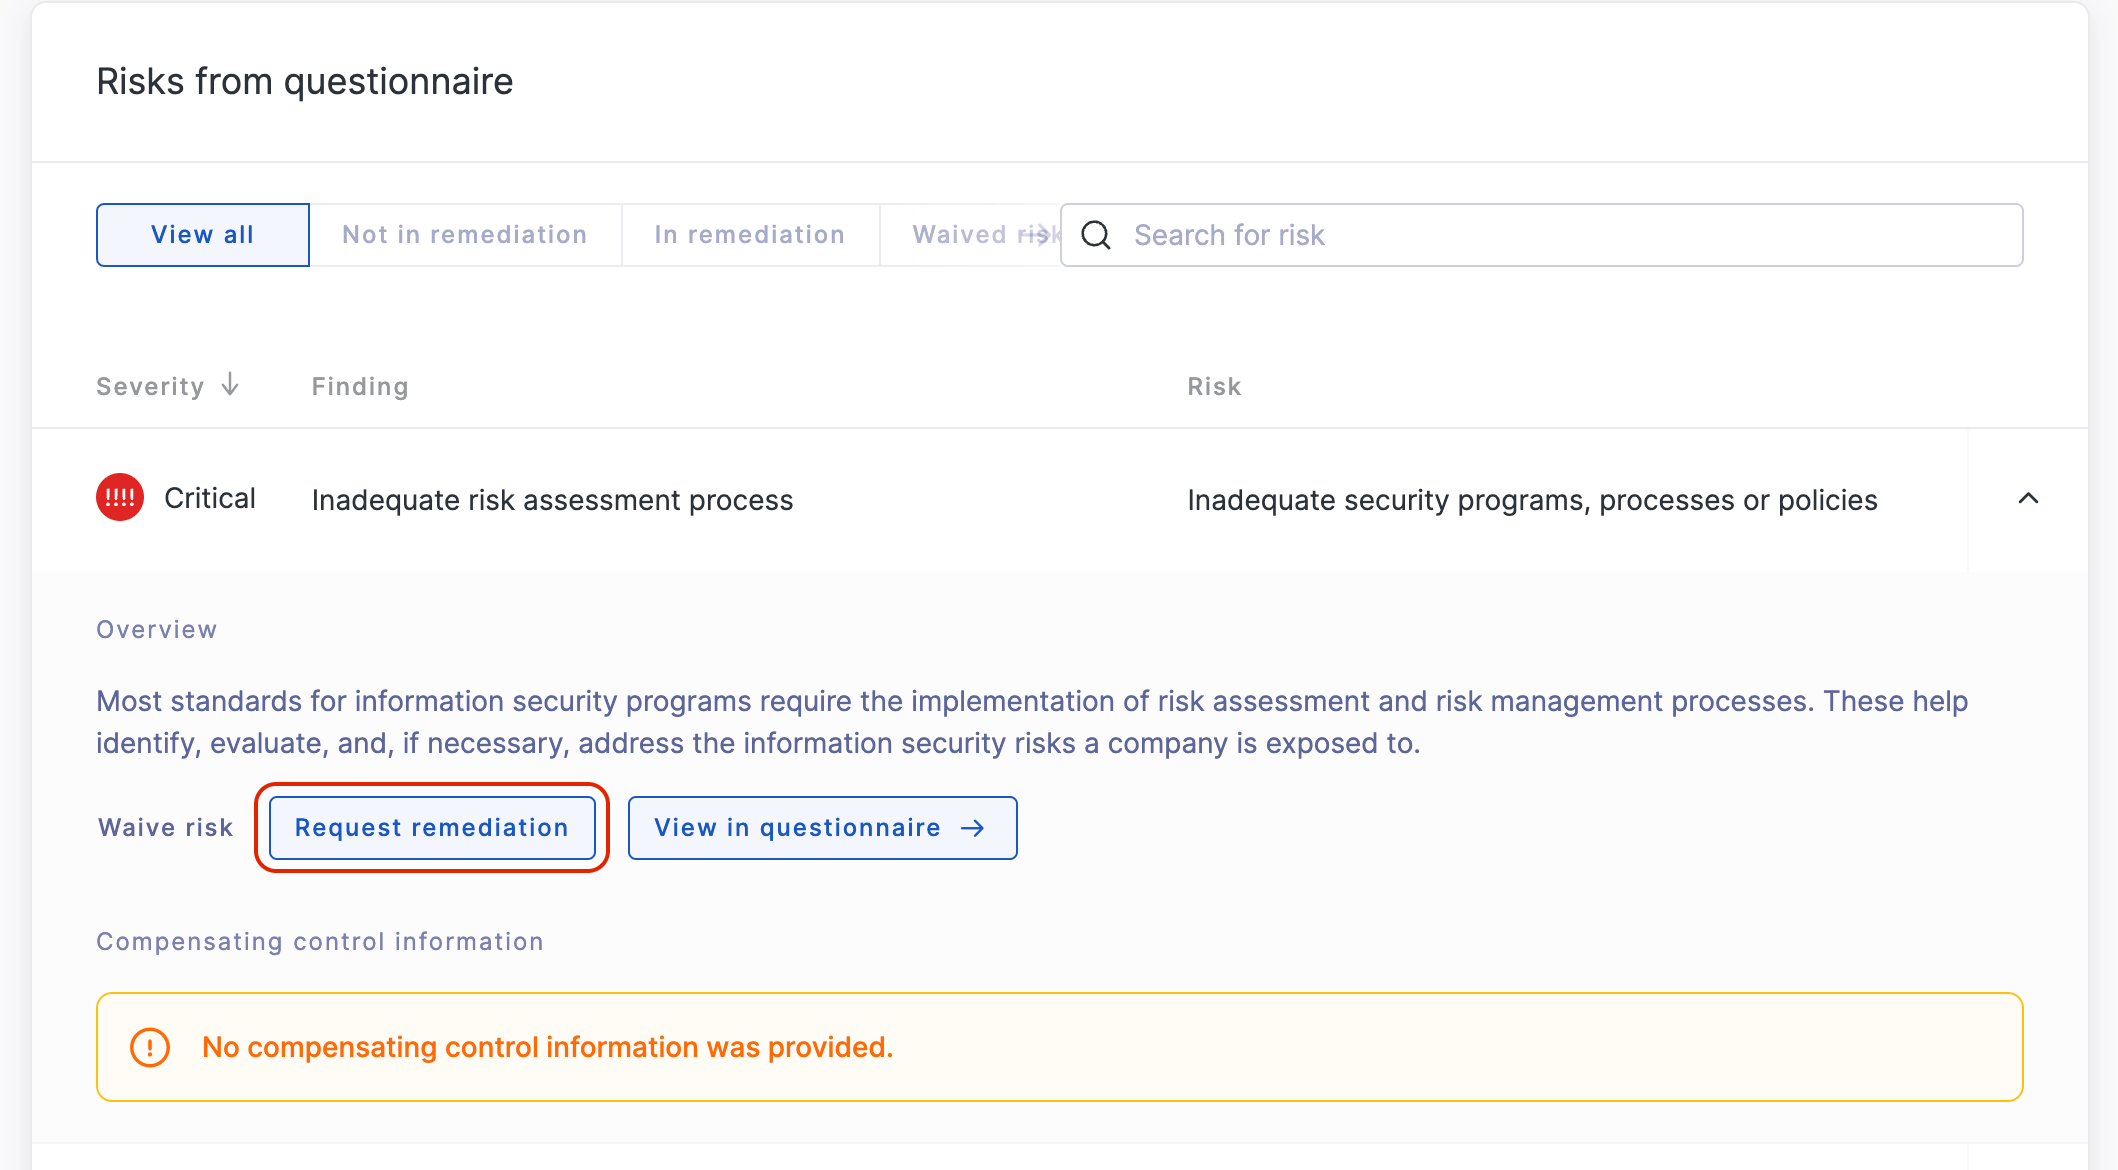
Then move to the Risks from questionnaire section, which will provide a list of risk findings associated with the questionnaire. The findings are organized as a list of all risks, with the highest severity first by default, though you can adjust the order of findings in the list. You can also use the tabs to view subsets of the overall risk findings.

Identify the risk you wish to remediate and expand the view, then press the Request remediation button to begin the remediation process.

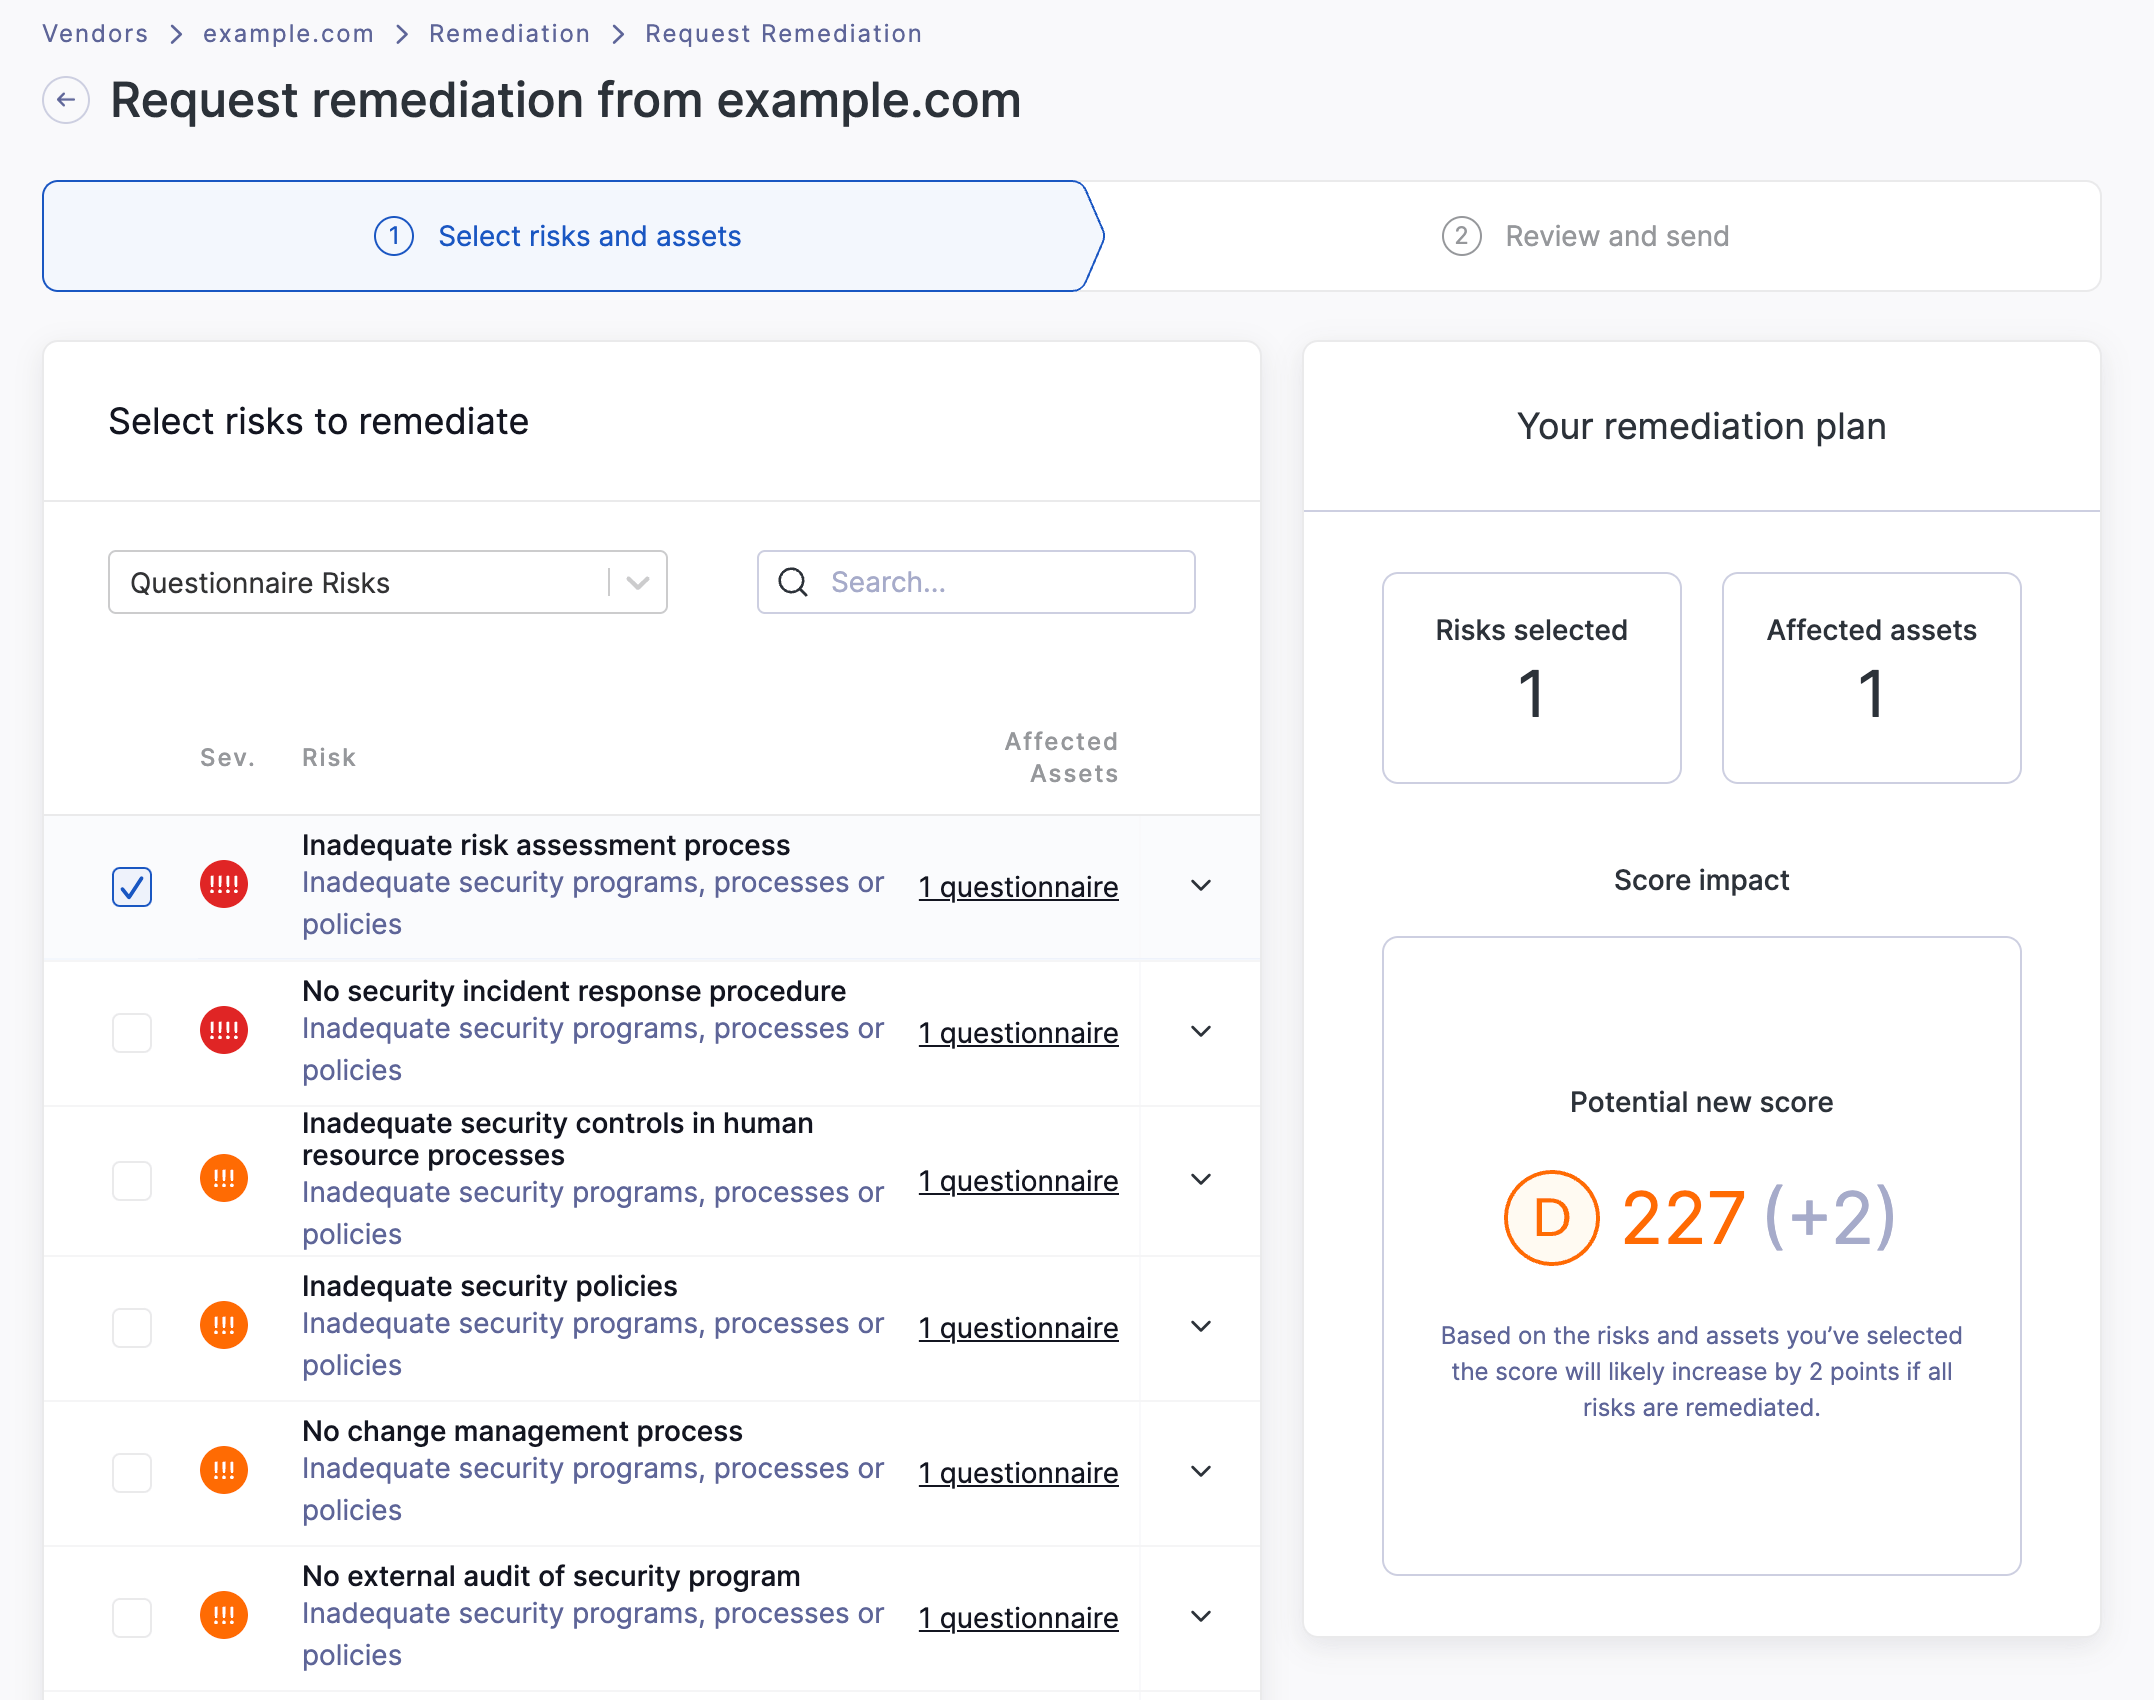
The remediation planner will open with the risk you have selected for this particular questionnaire. You can expand the remediation request by selecting additional risks identified for the vendor. Your remediation plan will provide an approximate update for the vendor's security rating after these risks have been mitigated.

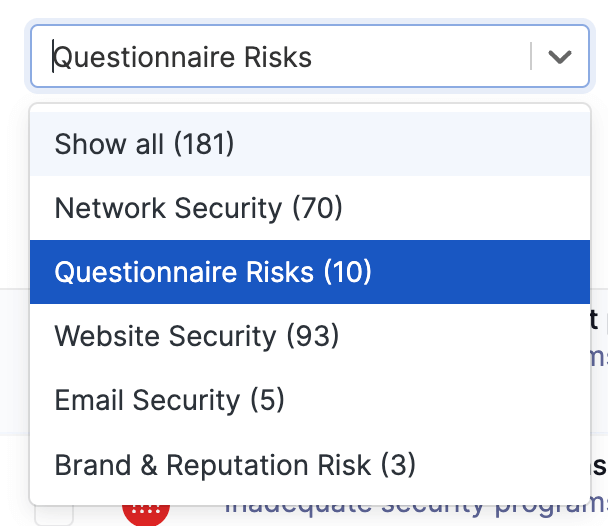
You can also use the dropdown options to switch to another risk category and select findings associated with that category for this remediation request.

When you have selected the relevant risks, click Confirm and next to proceed to the next page, where you can assess the overview for your remediation request and provide recipients who will need to respond to the request. You can add recipients by email address, set a scheduled deadline by which you would like these risks remediated, and customize the message to send with this request. You may also want to inform the recipient in advance of the remediation request so that they will know it is coming via email.
Once you have provided the recipients and are satisfied with the message, you can either Save draft or Submit request. If you save the draft, you can access it from the Remediation page for that vendor in the Drafts tab. Otherwise, the remediation request will be sent via email to the specified recipient.
See also
For more information on Trust Centers, read these articles next:
For more information on vendor questionnaires, read these articles next:
For more information on the risk remediation process, read these articles next:
