As your list of vendors expands, it can become more important to store additional information to help manage the relationship with your vendors and easily sort and group vendors by common characteristics.
Custom vendor attributes allow you to store additional structured information to give you a more comprehensive view of your vendors, enabling more effective vendor management within the UpGuard platform. You have the flexibility to define the vendor attributes you need, allowing you to store the information that’s important to your organization and how you manage your vendors. For example, you could use custom attributes such as Internal Owner, Contract End Date and Cost Center to help you manage your vendor relationships within the UpGuard platform.
On this page, you can learn how to:
-
Instantly populate custom attributes using automation rules
Create and edit custom attributes
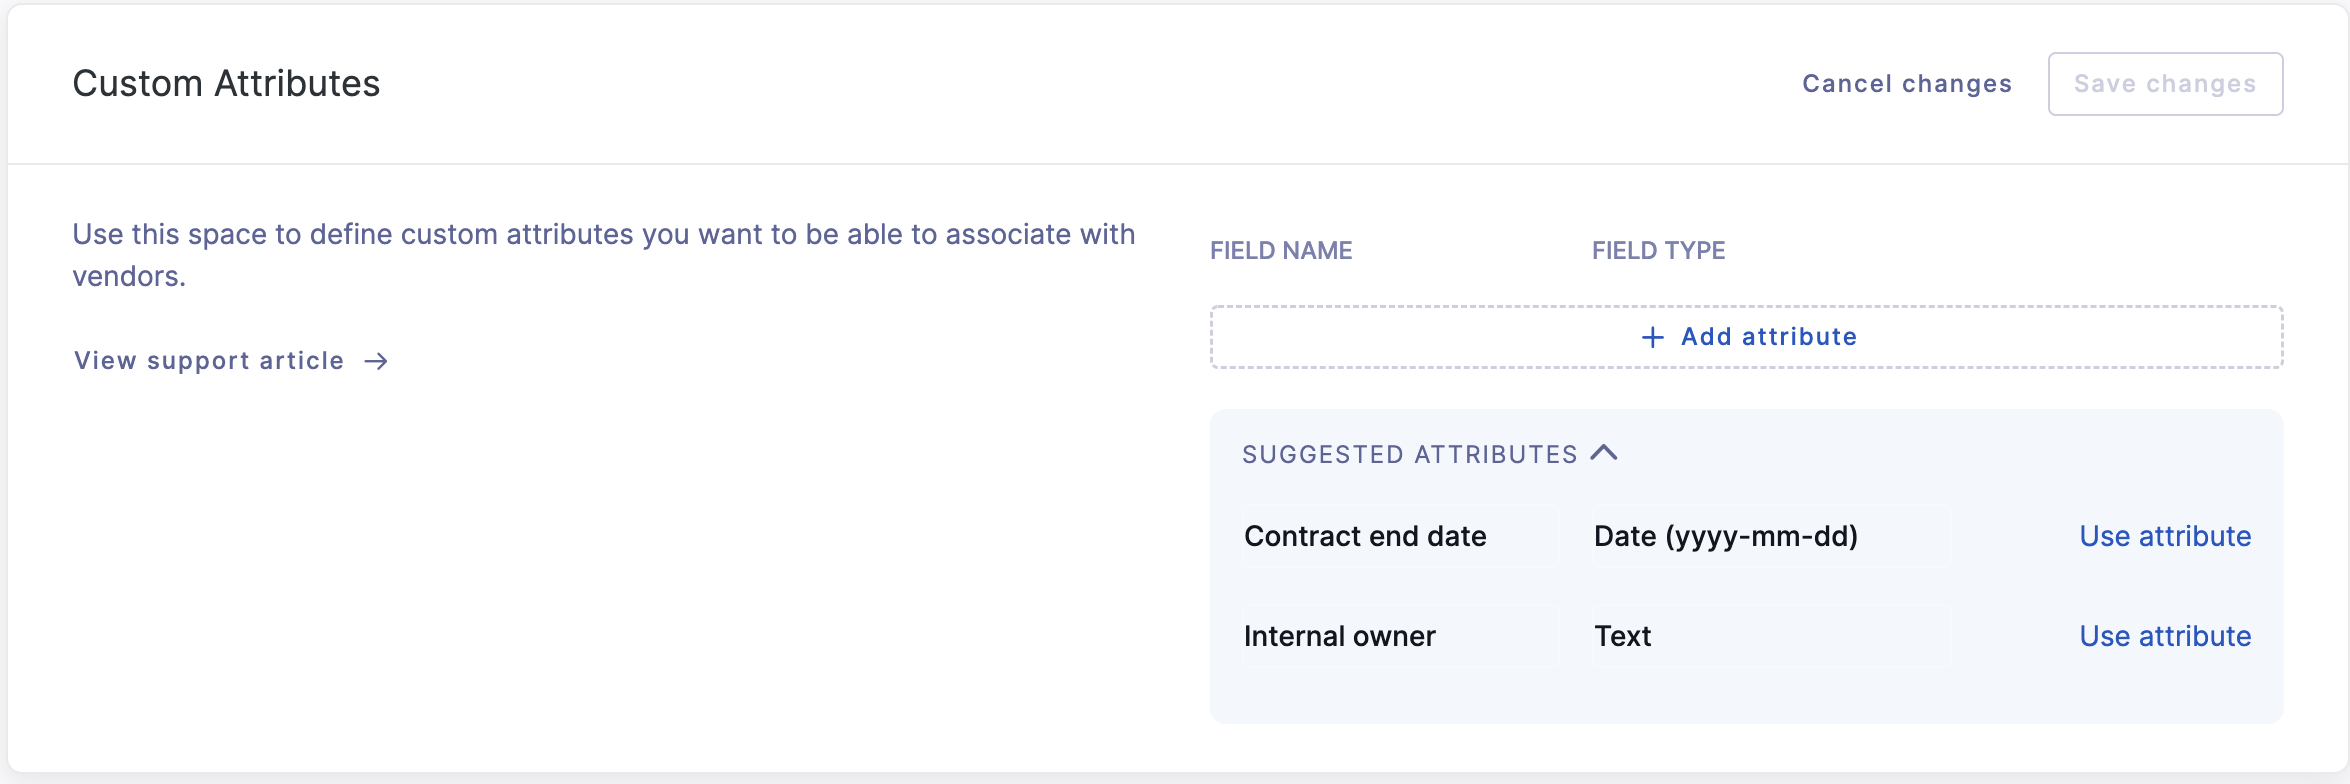
To set up and manage custom attributes go to the Vendor Management tab in Settings. To get started click Edit. You will notice we have 2 suggested custom attributes there to get you started, contract end date and internal owner, which are common attributes you might need to help you manage your vendor relationships.
You can choose to add these custom attributes by selecting use attribute and they will be added along with any other custom attributes you create when you hit Save. If you do not select them when you hit Save these suggested attributes will be removed.
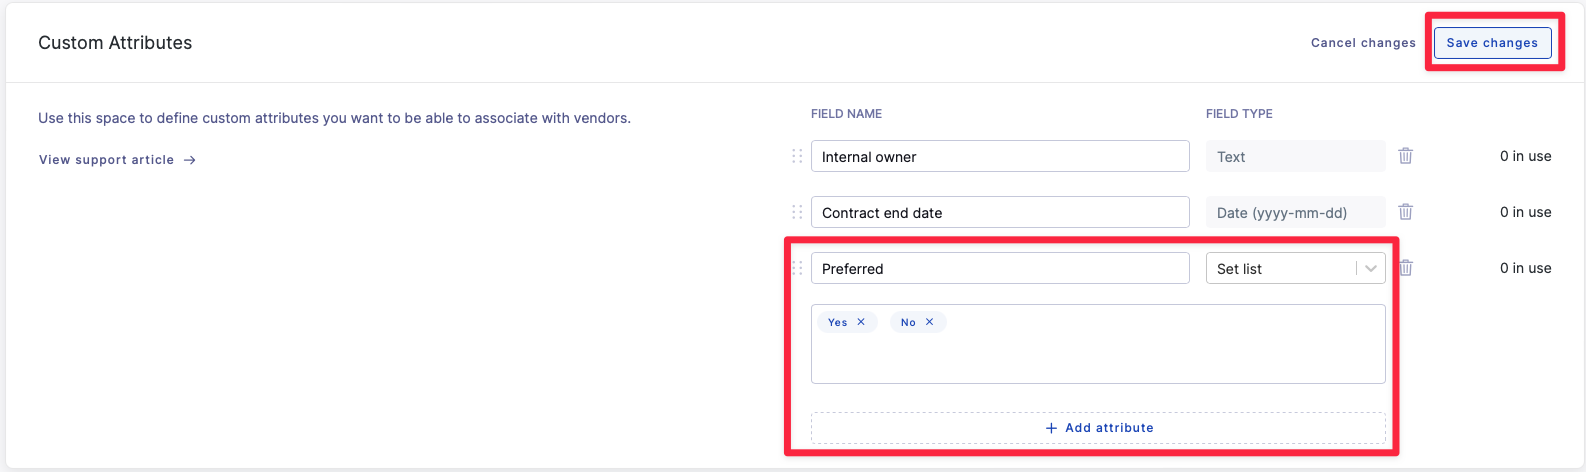
To add a new custom attribute, click + Add attribute while in Edit mode, where you can set the field name and field type, which can be text, date, numeric or set list (single or multi-select). Set list allows you to add pre-defined values for users to choose from. To do this, simply type the values, separate by a comma, in the box that appears below the relevant attribute once you select the field type Set List.
In edit mode you can also edit attributes by changing the name and type, as well as delete them using the trash can icon. Once you have completed any attribute changes including addition, edits and deletions, select Save changes and the changes will be applied to the attribute list available for your vendors.
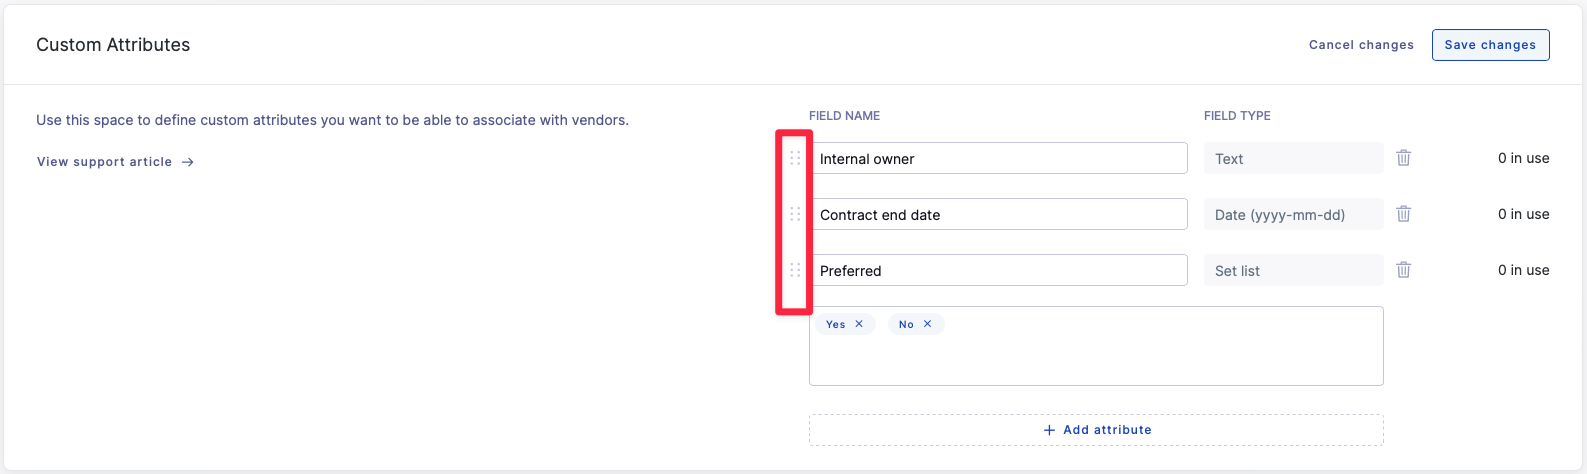
The order the attributes appear in the Settings area will determine the order that they appear on the vendor summary page, the vendor list and in the export. You can change the order in the settings area by dragging and dropping the attribute using the dots icon to the left of the attribute while in edit mode.
Custom attributes can only be managed by Admin users. You can add as many custom attributes as you need. Note, that custom attributes values have a 1000 character limit. This applies for single value attributes and also as a cumulative total for multi-select attributes.
Assign attribute values when monitoring a new vendor
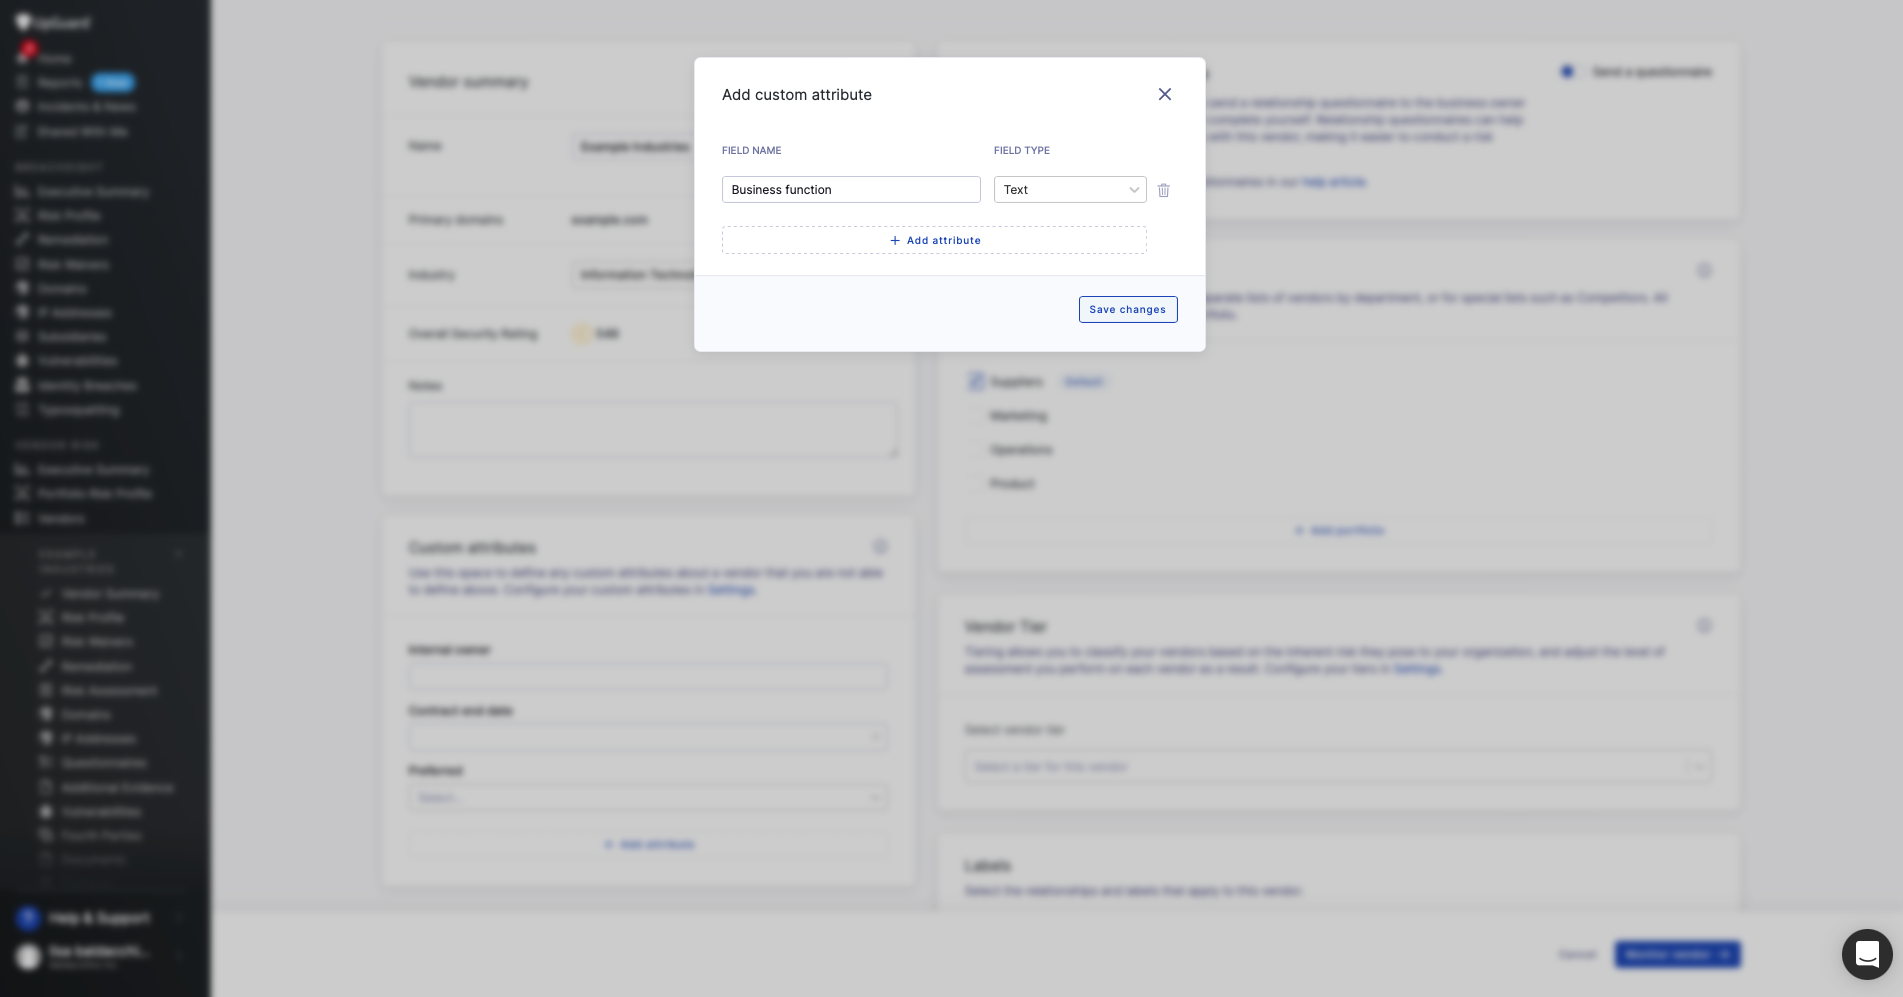
When you monitor a new vendor you will be able to assign attribute values as part of the vendor set-up process in the Custom attributes tile. Admin users can also add new attributes as part of the vendor setup using the +Add attribute icon. Editing and deleting existing attributes can only be done in Settings > Vendor management as described in the previous section.
View and assign attribute values on the Vendor Summary page
You can view, add and edit attribute values on the individual Vendor Summary page. Attributes are included in the Vendor Summary tile in accordance with custom attributes set up in Vendor Management Settings. In addition to custom attributes, a Notes field is provided to store any special notes or instructions related to the vendor.
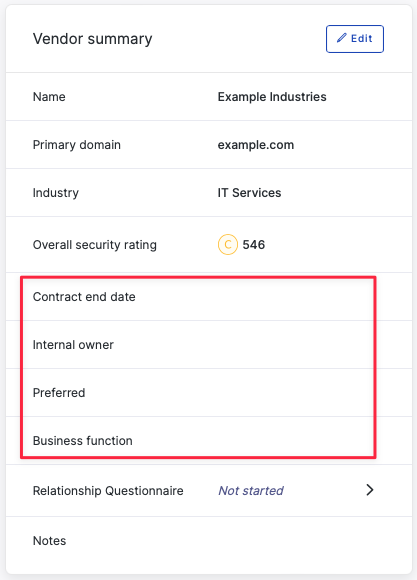
To assign or edit attribute values, select Edit to enter edit mode. Select Save changes once you have finished editing the attribute values.

Admin users can also add new attributes from this page using the + Add attribute icon. Edit and deletion of existing attributes can only be done via Settings > Vendor management as described earlier in this article.
Change Vendors view to include custom attributes
You can customize your Vendors table view to only include the columns that you need in a given session by clicking the Show Fields button. This allows you to select and deselect columns including custom attributes to be included in the Vendor table view.
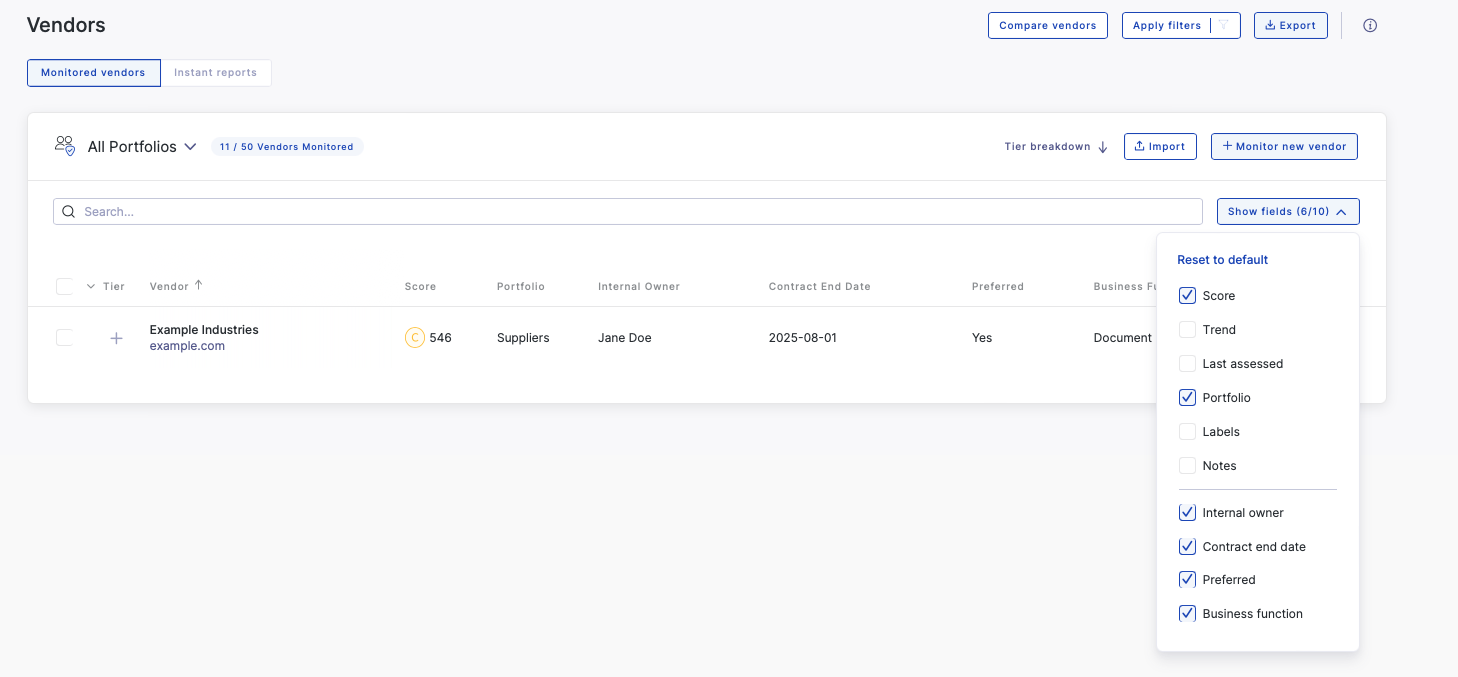
This selection will be retained for your current session even if you leave the Vendors page.
Filter by custom attributes
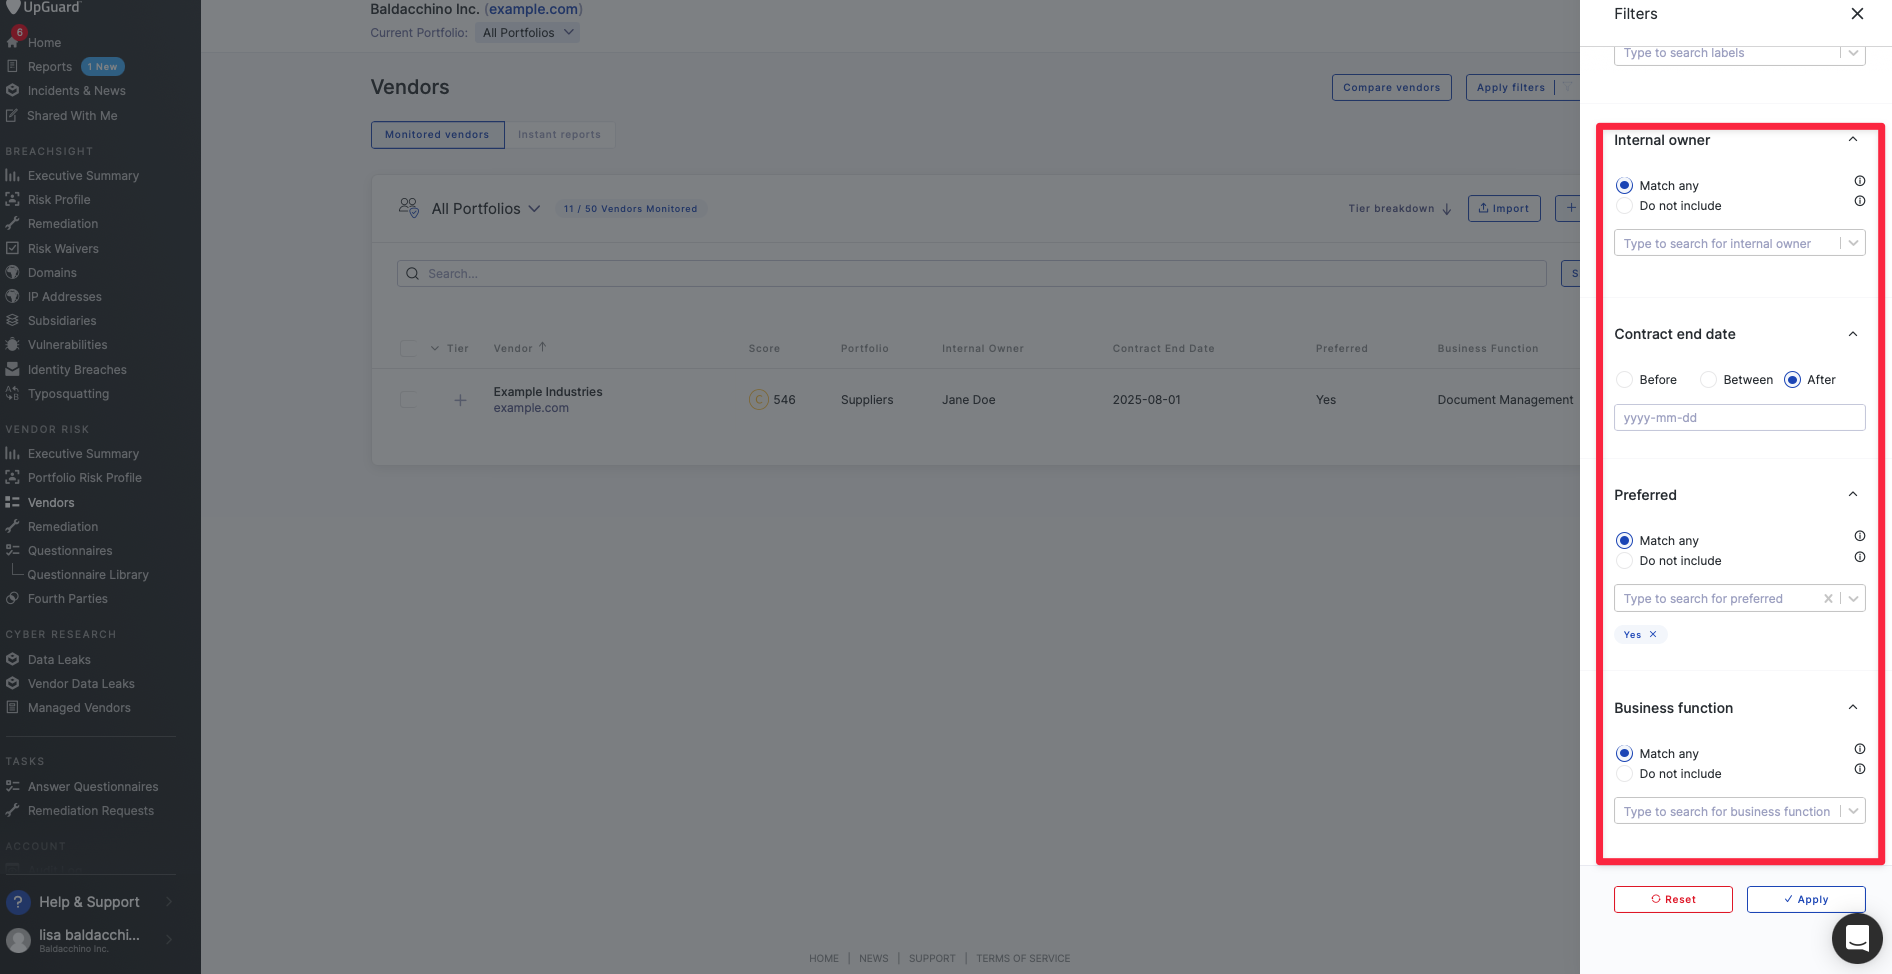
You can filter the Vendors list by individual custom attributes using the Apply Filters button on the Vendors screen. Filters will allow for multiple selection and include match any and do not include options with the exception of date type attributes which will allow for before, between and after options.
Bulk update custom attributes from the Vendors page
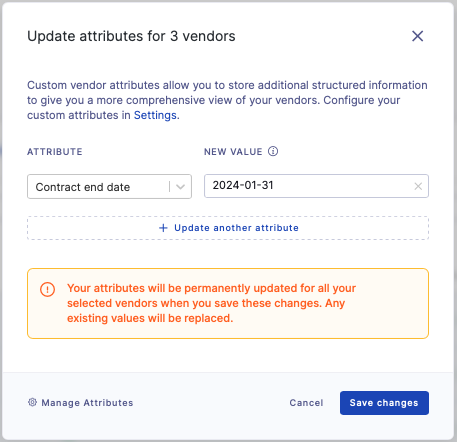
If you have previously assigned custom attribute values and you need to edit for multiple vendors you can do this using the bulk selecting the vendors' attributes you want to update and select edit attributes.

You will see any existing custom attributes that you have created previously in the Attribute drop down. Select the attribute(s) or attributes that you want to update and enter the new value(s) for the selected attributes. When you save changes, the new value(s) you have entered will replace any existing values for the selected vendors.
Create notifications for date-type attributes
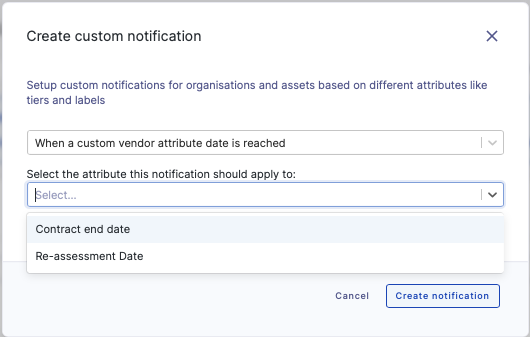
If you have date-type attributes you can create custom notifications to help you keep track of these dates, and prompt you to take action. To do this go to the Custom Notifications tab in Settings, and select to create a custom notification for When a custom vendor attribute date is reached, and select which attribute you want the notification to apply to (from the list of date-type attributes you have previously created for your organization).
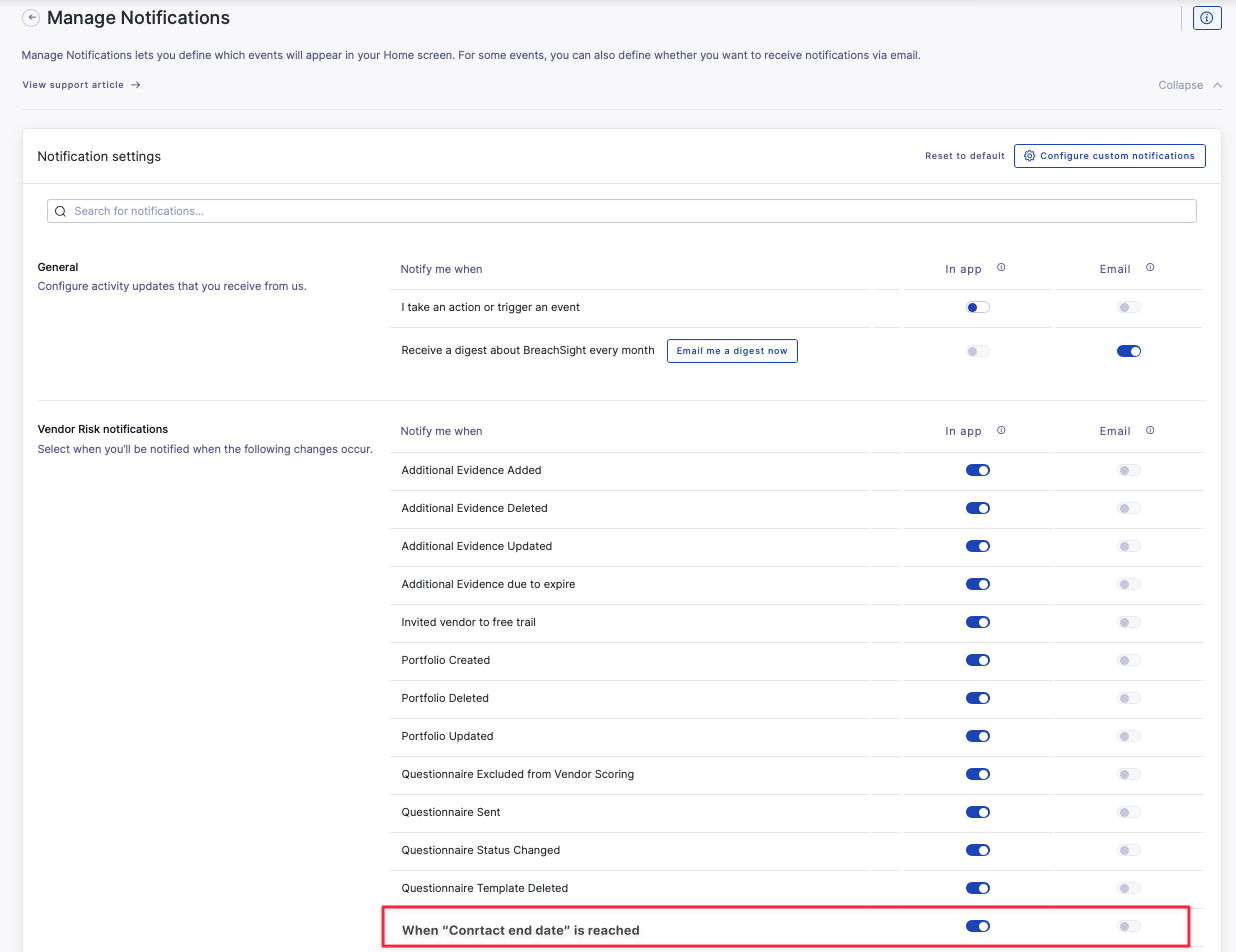
This notification will be added to your VendorRisk notifications list, access via the Manage Notifications link on your Home Screen where you can set how would like to receive these notifications, either in app or via email or both.
Import a vendor list with custom attributes
When you have custom attributes set up, you can include attribute values against vendors when uploading a vendor list in CSV format.
Attributes should be included in the last columns after any other Vendor information including Tiers, Portfolios and labels. For further information refer to Importing Vendors, Tiers, Labels, Portfolios and Custom Attributes in UpGuard.
Export a vendor list with custom attributes
When you have custom attributes set up, these will be included in the Excel Export from the Vendors page. Select Export and then Export Excel in the Format section and custom attributes will be included by default, with each attribute stored in a separate column. This export will include all your Custom attributes.
Access custom attributes via the UpGuard API
Custom vendor attributes are available via the UpGuard API.
The vendor details and list monitored vendors API endpoints return custom attribute values for vendors. For example, fetching the details for example.com:
returns the following payload:
You can also set the attributes for a vendor using the new vendor update attributes endpoint. For example to set the Contract end date and Internal Owner issue the following PUT request:
The API will validate the provided values for the attributes, e.g. for a date attribute it will ensure it matches the format YYYY-MM-DD, and if invalid it will return a 422 response with an error message highlighting the issues.To reset an attribute value for a vendor, null can be used as value for the attribute in the API call above. For example if you want to remove the internal owner you would make the following call.
For further information refer to Where can I find the UpGuard API documentation
Using custom attributes with other vendor classification tools
There are a number of other classification tools the UpGuard platform can help streamline your risk assessment and vendor management workflows, namely Tiers, Portfolios and Labels. To understand how these tools work together and to help you optimize your experience and get the most out of the platform refer to How to manage and classify your vendors using tiers, portfolios, labels and custom attributes
Instantly populate custom attributes using automation rules
To save time and ensure consistency, you can create automation rules to assign custom attributes to vendors, based on onboarding request responses. Visit How to use automation to apply tiers, labels, portfolios and custom attributes to your vendors to learn more.