Risk waivers that you create for your organization can be shared publicly. This means that users in other organizations can see details of risk waivers created by your organization when viewing your profile in Vendor Risk. This includes the scope of the waiver and the justification you’ve provided. Vendor Risk users can review your risk waivers and choose to accept that waiver against your profile.
This makes it easy for you to share information about compensating controls with your partners and customers in other organizations so that they can easily get an accurate picture of your risk profile.
In this article, you'll learn how to
Create a new public risk waiver
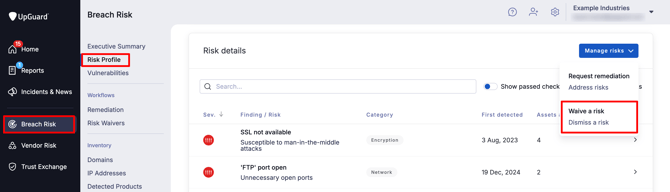
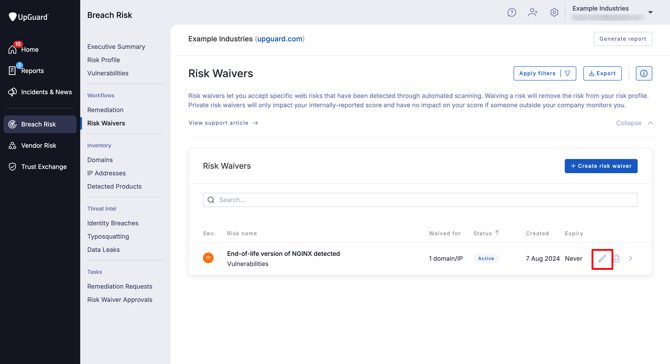
New public risk waivers can be created from both the risk profile screen and risk waivers screen within Breach Risk. From the risk profile screen select Manage risks > Waive a risk.
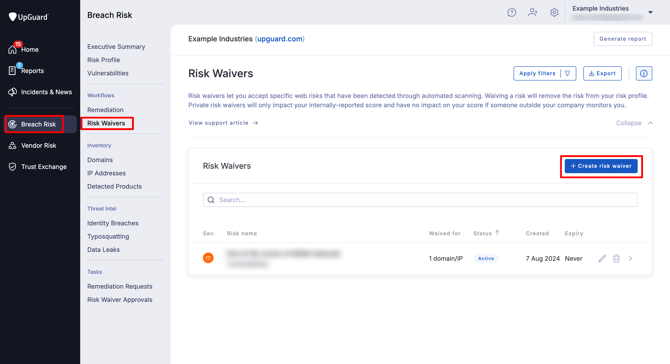
Or, from the risk waiver screen, select Create risk waiver.
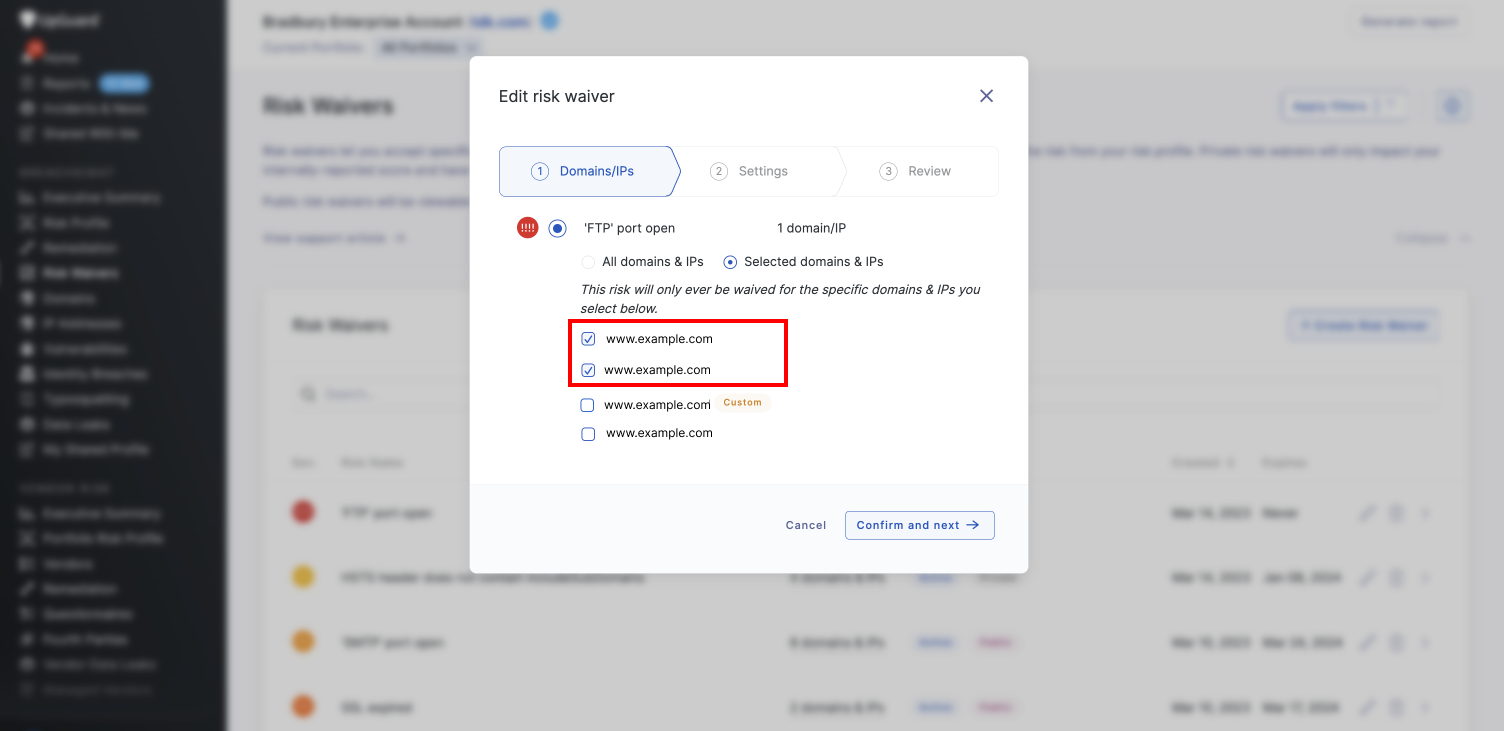
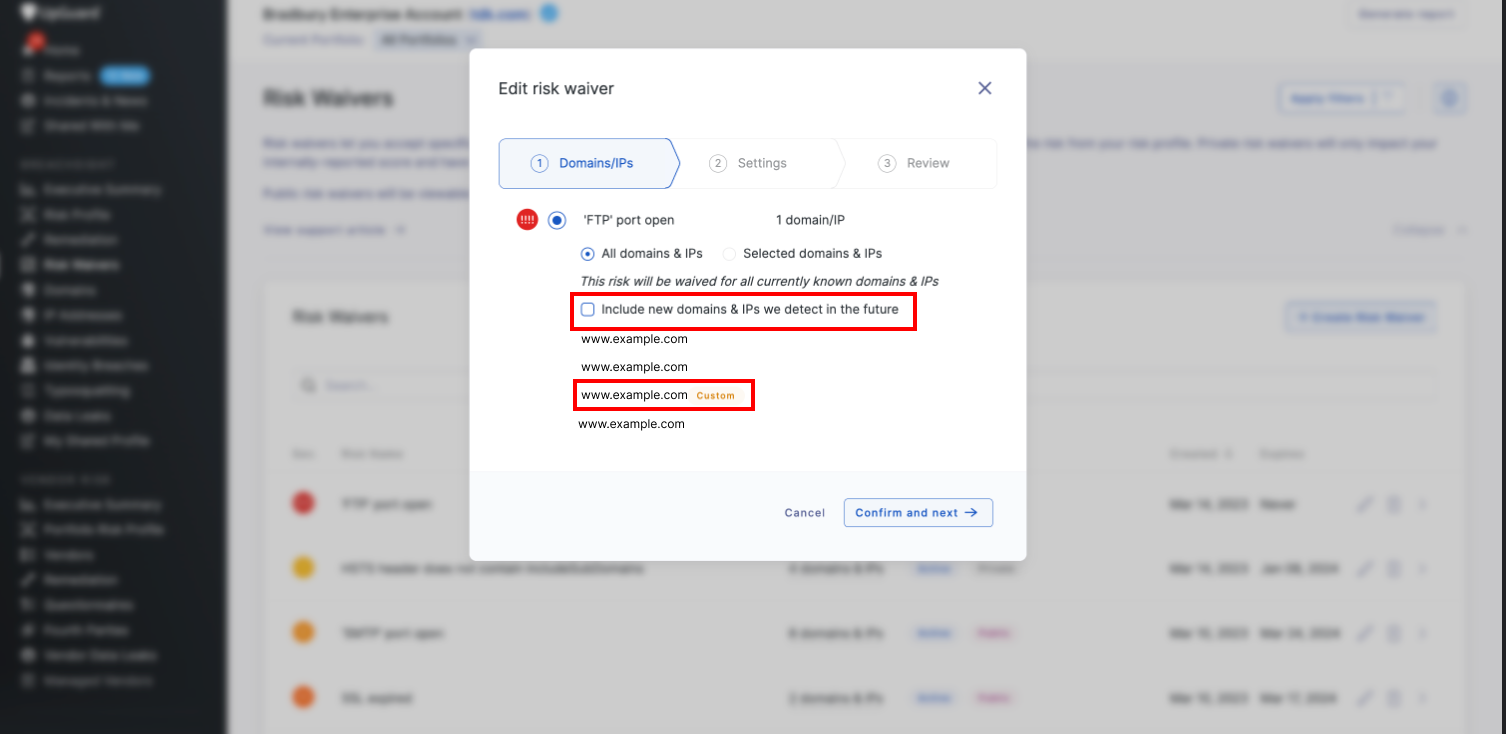
Once you have selected the risk that you want to waive, you will need to select which domains and IPs you want to include in your waiver. Note that public risk waivers can only include domains and IPs which are visible users outside of your organization and therefore cannot include custom domains or domains and IPs detected in the future.
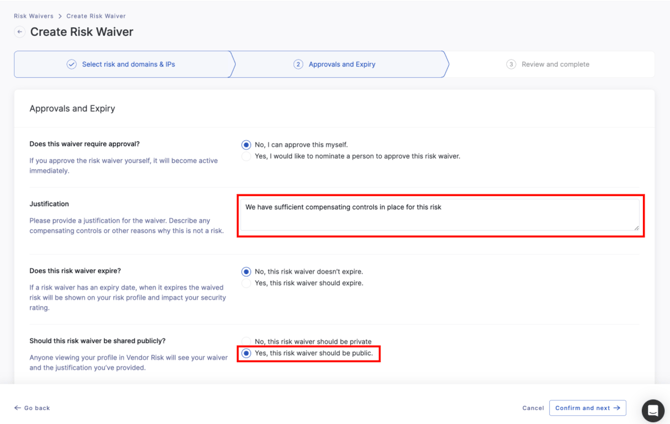
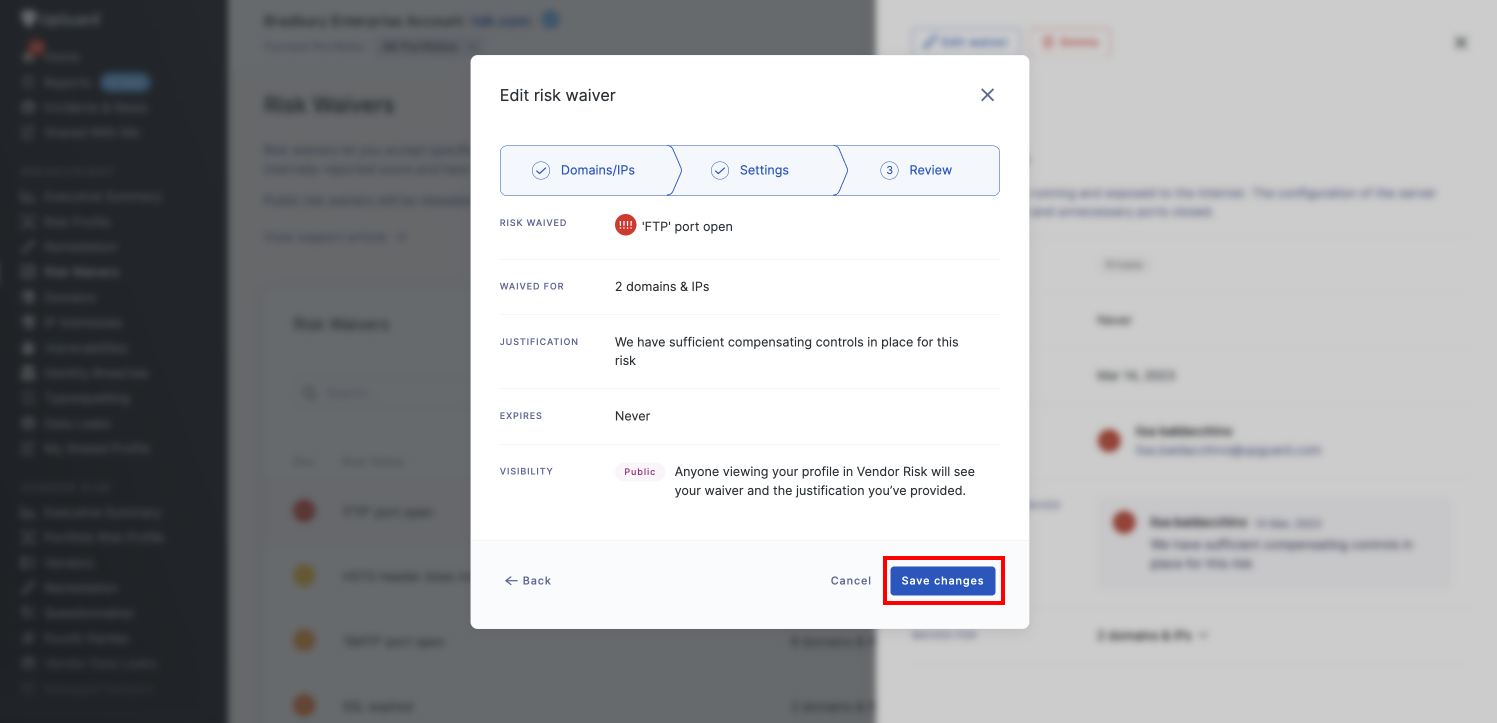
Once you have selected the domains and IPs you will be able to enter further information and set parameters for your risk waiver, and be able to nominate if you want to make a risk waiver public. If you choose this option, any user viewing your organization's profile in Vendor Risk will see your waiver and the justification you’ve provided, so you should make sure the justification is clearly worded and only includes information you want users outside of your organization to see.
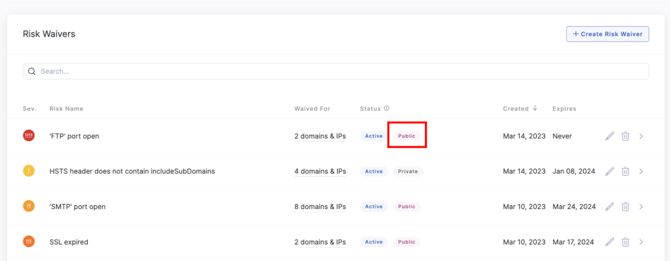
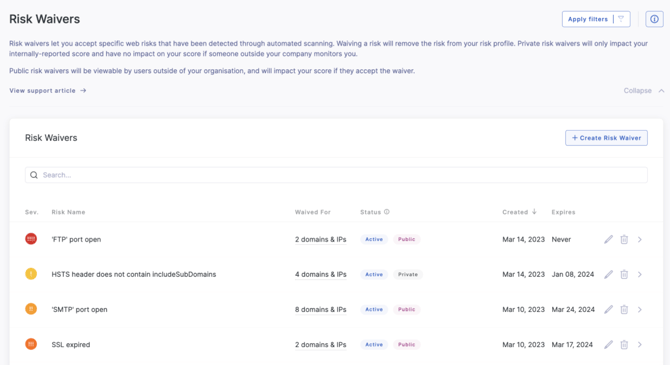
Once you have created a new public risk waiver you will be able to see a public label in the status column of the risk waivers section in Breach Risk. Waivers which have not been made public will be labelled as private.
Update visibility of an existing public risk waiver
You can update the visibility of an existing risk from private to public (and vice versa) at any time. To do this go to the Risk Waivers section in Breach Risk and select the edit icon for the risk waiver you want to update.
You will then be presented with the Domains/IPs screen in the Edit risk waiver modal with the existing inclusions pre-selected. You can edit the included domains & IPs in you waiver, noting that for waivers that you wish to make public, you can only include domains and IPs which are visible to the user and therefore cannot include custom domains or domains and IPs detected in the future, so you will need to remove these domains to proceed.
You will then be able to update the other parameters for your risk waiver:
-
Check, and if needed update, the existing justification to ensure that it is clearly worded and only includes information you want users outside of your organization to see.
-
Change the visibility of the waiver to make it public
-
Confirm you are happy with the expiration date

You will then be able to preview the updated waiver. Select Save Changes to accept the waiver.
When you return to the Risk Waivers screen you will see that the status of the updated risk waiver is changed from private to public.
See how to use public risk waivers in Vendor Risk to understand how vendor risk users will be able to see and apply these risk waivers to your profile and adjust your organization's score.
See also: