You can always work directly within the UpGuard platform, but there are some tasks that you might wish to complete via the command line. You can access a variety of information programmatically with our API, using the API key associated with your organization's account. To accomplish tasks like bulk importing or bulk exporting vendors, setting up integrations, and downloading questionnaire attachments, you can work directly with UpGuard's API.
In this guide, you will create an API key and authenticate with your UpGuard account from the command line. You'll run a sample command to transform the information directly within the command line terminal.
❗Your UpGuard API key is sensitive: never share it publicly. New scams (leveraging MCPs) create fake, but credible-looking sites, built to get you to input your API key. Only use your API key with software from verified, trusted providers to safeguard your UpGuard account.
Prerequisites
To complete the tasks in this guide, you will need the following:
-
An UpGuard account with administrator access.
-
jQuery installed on your machine, which you will use to run the sample script in Step 2.
Step 1 — Authenticating with your UpGuard account
To use the UpGuard API, you must create an account with UpGuard and have administrator access. Only administrators can access the API token within the UpGuard platform.
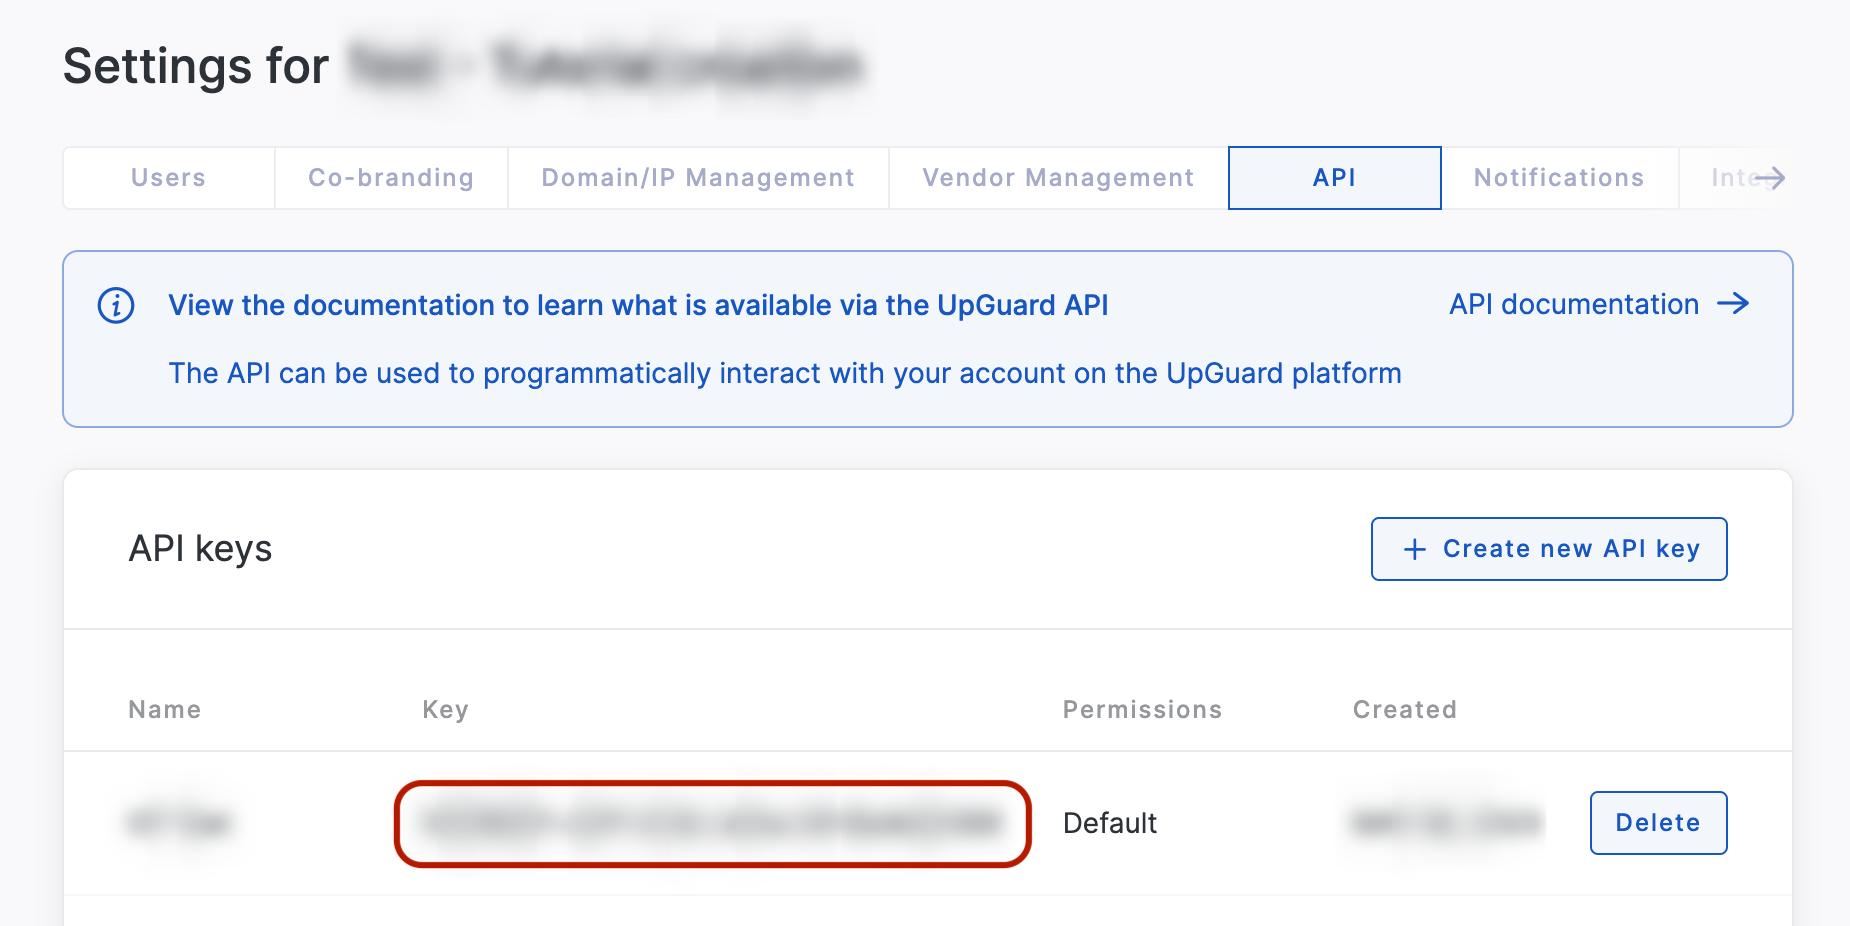
- Click the Settings icon in UpGuard's top-right corner.
- Click the API tab.
- Any existing API keys will be listed, or you can create a new one with the Create new API key button. You can delete keys from this tab as well.
After creating an API key, open a terminal window and set the API key, providing the alphanumeric string where the sample below reads your_api_key:
$ API_KEY=your_api_key
Setting the API_KEY variable ensures that you can call it directly in future commands without providing the unique key in every command.
Test that you can access your UpGuard account by running curl to pull information from your account:
$ curl -H "Authorization: $API_KEY" "https://cyber-risk.upguard.com/api/public/vendors"
You set a custom header with the -H flag, specifying that your shell is authorized with the API key you provided earlier. Because you have already set the API_KEY variable with your unique key, you call the variable directly.
You then provide an endpoint within the UpGuard platform to generate a response. The /vendors path will return a list of your monitored vendors, but you can use any of the options available in our API documentation to test this feature. The base URL for all public endpoints is https://cyber-risk.upguard.com/api/public.
You'll receive a response in the form of a comma-separated value (CSV) list with all of the vendors you currently monitor and a variety of information related to each vendor, which you can then apply transformations to sort. Your output may be quite lengthy, depending on your list of vendors.
In the next section, you will apply a sample transformation to the vendor data from this example.
Step 2 — Using the data from your UpGuard account
Once you can access the information associated with your UpGuard account, you can use it for your company's needs, whether that is bulk exporting vendor information, assigning labels to a domain, integrating with your data analysis tooling, or other tasks that can be facilitated directly via the UpGuard API. In this section, you will transform the data you just retrieved by applying a JSON transformation with .
In this example, you will run the same curl command but you will pipe the output into an array:
$ curl -H "Authorization: $API_KEY" "https://cyber-risk.upguard.com/api/public/vendors" | jq '.vendors[] | [.name, .primary_domain, .score, .labels]'
With this sample jq command, you create an array for the vendor information that is sorted by the name, primary_domain, score, and label properties. With this jq command, you can export your monitored vendor information directly from the command line.
You'll receive an output that follows this format:
[
  "UpGuard",
  null,
  942,
  []
]
In this sample output, the vendor is UpGuard. There is no associated domain, so the response is null, while the current security rating follows (in this example, 942). If you have applied labels to your vendor, those will appear in the last line; because there are no labels applied to UpGuard in the sample account, the empty brackets ([]) load instead.
You ran a sample jq command to organize this information from the command line, but you can also build Python scripts or write Ruby scripts to customize the structure of information.