How it works
Onboarding request automations are rules that update vendor information based on responses in vendor onboarding request submissions. Automations run when you assess or monitor a vendor from the submitted onboarding request.
Onboarding request automations are available on: Professional, Corporate, Enterprise and Enterprise+ plans. If you're on a Starter plan and would like access to this feature, contact your Customer Success representative or UpGuard support for more information.
🎵Onboarding request automations are different from Risk Automations.
Available automations
Use onboarding automations use responses from onboarding requests to automatically update vendor attributes. Attributes you can update with automations:
- Tiers
- Labels
- Portfolios
- Custom attributes (all except date type attributes)
Can I apply automations to existing onboarding requests?
If you implement automations and have a set of existing onboarding requests against your vendors, you can apply these automations by resubmitting each request. Note that if you've made extensive changes to your onboarding request questions between versions, you may need to answer new questions in order to resubmit.
Simple and advanced automations
There are two types of automations:
1. Simple automations
These can be used to automatically apply labels, tiers, portfolios or custom attributes (with the exception of date type attributes) to your vendors. These automations use ‘and’ and ‘if’ rules to turn question and answer combinations into outputs.
For example, you could set up rules like this:
|
Question |
Answer |
Output |
|
Which department is procuring this vendor? |
Marketing |
Apply “Marketing” portfolio |
|
Has this vendor provided proof of ISO 27001 compliance? |
Yes, attached |
Apply “ISO 27001” label |
|
Who is the main contact point for this vendor? |
John Smith |
Apply “John Smith” as “Owner” attribute |
You can also set up nested "and/or" rules, where multiple questions determine the output. For example:
|
Question |
Answer |
Output |
|
Which department is procuring this vendor? |
Marketing |
|
|
(AND) |
|
|
|
What location is procuring this vendor? |
EMEA |
Apply “Marketing EMEA” portfolio |
2. Advanced automations
Advanced automations can be used to tier vendors using more sophisticated rules. You set a weight for each onboarding request's answer, define a formula to calculate a combined final weight value and define tier ranges to determine which tier will be assigned when the automation runs.
For example, you can set weights for answers like this:
|
Question |
Answer |
Weight |
|
Will this vendor have access to physical or electronic assets or data belonging to our organization? |
Yes |
100 |
|
|
No |
0 |
|
|
Unanswered |
100 |
|
Will the vendor host data on behalf of our organization? |
Yes |
100 |
|
|
No |
0 |
|
|
Unanswered |
100 |
|
Does the service support Single Sign-On (SSO)? |
Yes |
0 |
|
|
No |
100 |
|
|
Unanswered |
50 |
Then define a formula to determine the final weight value, and a score range for each of your tiers. This allows you to define a more complex set of factors that together represent your approach to vendor tiering.
Keep reading for more information on how to configure both simple and advanced automations.
How do I configure and enable automations?
Configuring this feature for the first time begins with setting up your onboarding request. Onboarding requests are how you gather the information used to power the automations. This part of the process is covered in Vendor onboarding requests.
When you're ready to configure automation rules:
- Click the Settings icon in UpGuard's top-right corner.
- Click the Vendor Onboarding tab.
- Click View details.
- Select Automation rules.
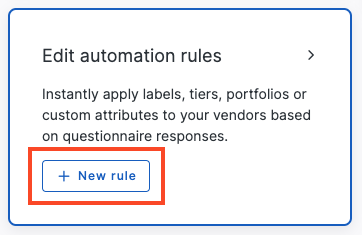
This will show you any rules you have published (and a link to your draft rule set if you have one). To create new rules or edit draft rules, select Create draft or Edit draft from the info box at the top of the page:
This will take you into draft mode, where you can edit existing draft rules and create new ones. Select + New rule to start a new automation rule.
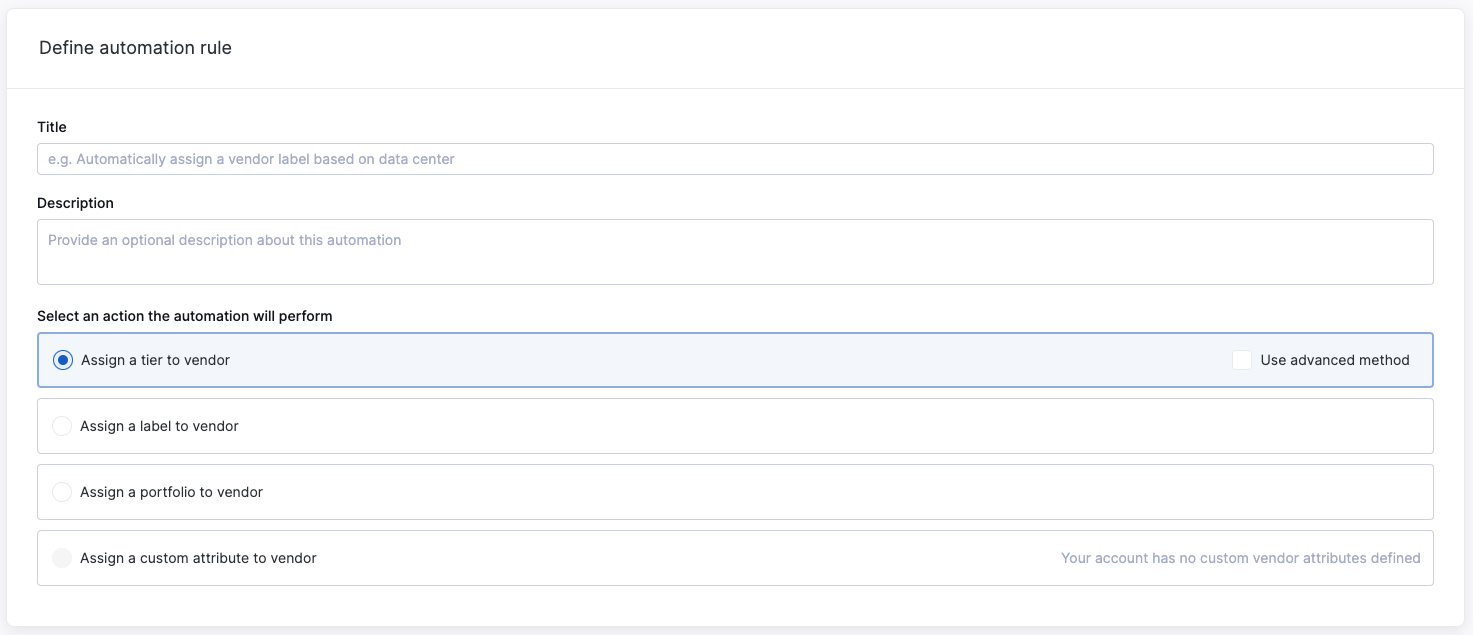
Step one: Define automation rule
Enter a title, description, and action for the new automation rule. The action you select in this step will determine the options you see in step two.
Step two: Configure rule logic (simple)
For simple automations, the next step is to set up the logic for your rule. Let's use the following example:
To create this simple automation rule, you would enter this information as follows:

Tip: Where possible, we recommend using single-select or multi-select questions over free text fields, as this makes it easier to define your rules. If you find that your onboarding requests lacks the right questions or could be simpler, edit it and then return to your automations.
You can also create multiple actions within a rule, and organize them into a nested structure. For example, if there are two questions that should together determine the portfolio, you could create something like this:

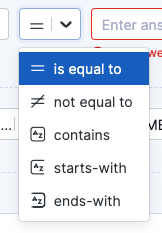
You can choose between AND and OR operators to define the relationship between nested actions, and choose between is equal to and not equal to when your active question is a single or multi-select question.

Free text field questions come with additional options: contains, starts-with, and ends-with, so you can customize how the answer should be treated.
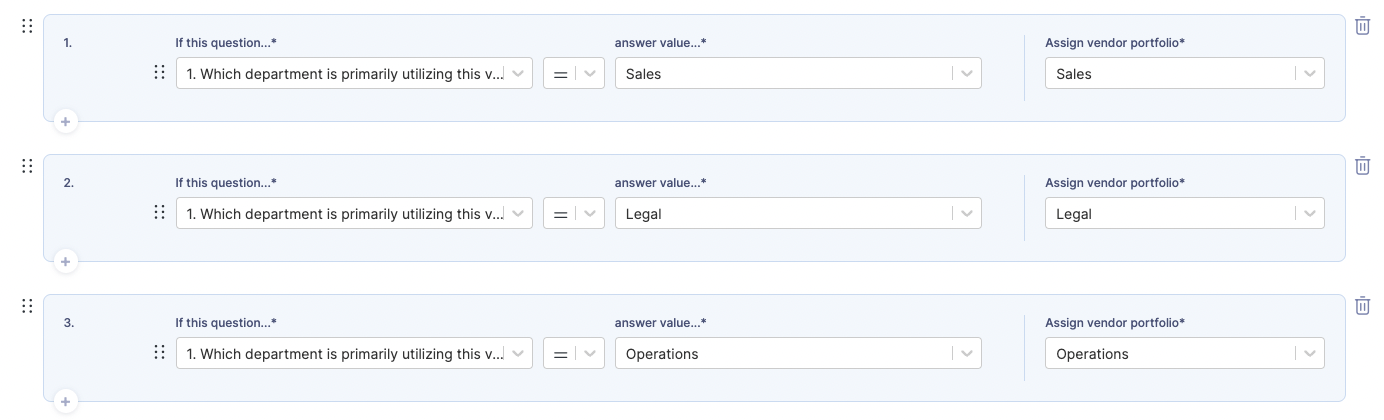
Continue to add new actions until you have a complete set of defined rules. In the example below, my organization has three portfolios relating to internal departments, so I've created three actions, one for each portfolio.
Step two: Configure rule logic (advanced)
There are three parts to configuring an advanced automation:
-
Add weights to each relevant answer in your onboarding request.
-
Define a formula to calculate the total weight value for each response.
-
Define ranges that correspond to your tiers.
Adding weights to each answer
First, add weights to each possible answer that relates to your organization's definition of risk. You might consider factors such as the systems the vendor will have access to, the customer or business data they will have access to (as well as the volume and sensitivity of that data) the nature of the project or service they are providing, and other criteria.
The weights represent the level of risk inherent in each possible answer.
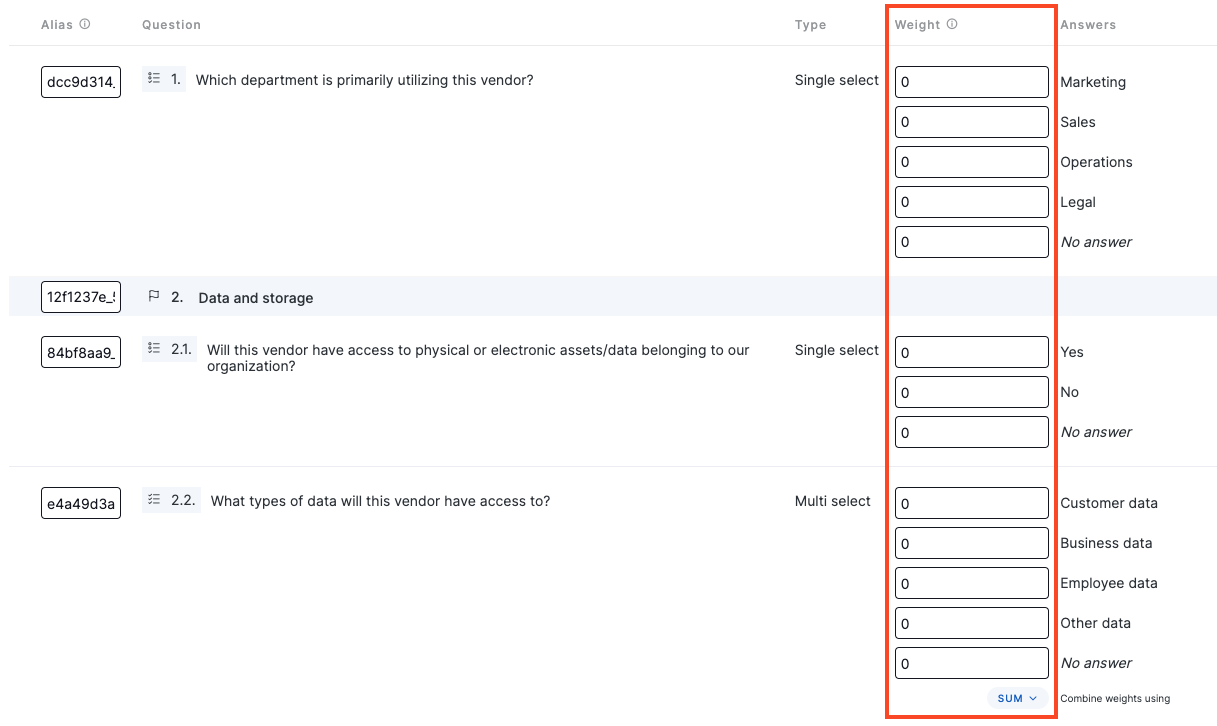
Some additional configurable sections pictured in the screenshot above are:
Alias: This is the name of each question or section within the questionnaire. By default, this will be a string of characters. You can choose your own naming structure if needed. This is used when creating a custom formula in the next step of the process.
SUM (shown bottom right): When configuring weights for multi-select questions, you can choose how multiple answers should be treated: SUM, AVG, MAX, or MIN.
Calculate the total weight value for each response
When it comes to calculating the total weight value, you can use the default SUM formula which adds each weight to give you a total weight value. Alternatively, you can create a custom formula:
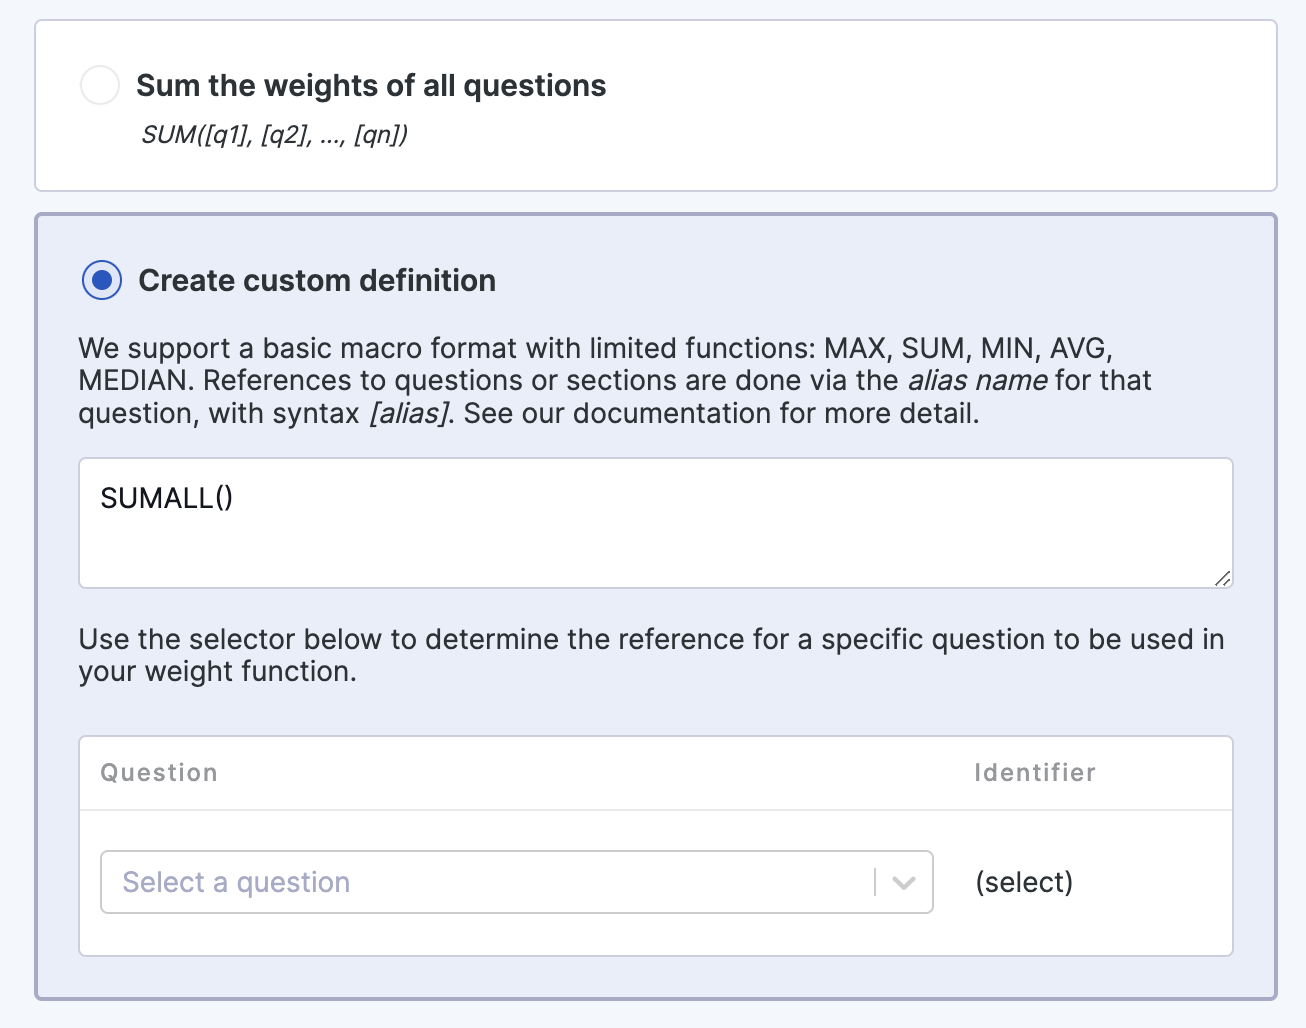
A formula is an arithmetic expression that results in a final weight. It can be built using arithmetic operators (such as +, -, /, *, %) to combine the weights of answers provided in onboarding requests.
For example, to calculate a weight by adding the answer weight of Question 1 with the answer weight of Question 2, the resulting formula could be:
[question1] + [question2]
Alternatively, you could define the final weight to be the average of the first three questions' weights, for example:
([question1] + [question2] + [question3])/3
To make the process easier, we’ve included a set of built-in functions that cover many of the standard statistical calculations you might need. For example, the above calculation could be easily achieved using the average function:
AVG([question1], [question2], [question3])
The built-in functions can be used as part of any arithmetic expression, for example:
MAX([q1], [q2]) + AVG([q3], [q4], [q5])
The full range of built-in functions currently supported
-
SUMALL(): Adds weights for all questions. Use this when you want a total score that includes all questions.
-
SUMSECTION([sectionID]): Adds weights for all questions in a specific section. Great for focusing on a particular area of the questionnaire.
-
SUM([questionID], ...): Adds weights of all named questions. You can also manually add them together like: [questionID1] + [questionID2] + [questionID3] and so on.
-
AVG([questionID], ...): Calculates the average weight of all named questions. Use this to get a mean score from a group of questions.
-
MEDIAN([questionID], ...): Calculates the median weight of all named questions. This helps you find the middle value among a group of questions.
-
MAX([questionID], ...): Calculates the max weight of all named questions. Use this to identify the highest-scoring question in a set.
-
MIN([questionID], ...): Calculates the min. weight of all named questions. Use this to identify the lowest-scoring question in a set.
A quick guide to using formula syntax
-
Normal arithmetic syntax and operators are supported (+, -, /, *, %, ^)
-
Normal precedence control is also supported using brackets (, )
-
Use square brackets ‘[questionID]’ to target the weights of specific questions
-
Configure aliases to make complex IDs readable e.g. [234234-2435532-2323] + [6784-345456-234] could be reduced to [access] + [location].
Set your range to assign a tier
To complete the advanced method calculation, you'll need to configure your tier ranges to assign a tier based on your resulting weight value, for example:
|
Tier |
Total weight range |
|
1 (Critical risk) |
300+ |
|
2 (Medium risk) |
100-299 |
|
3 (Low risk) |
0-99 |
Testing automations
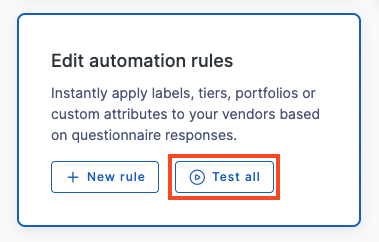
At any time you can test your automations to ensure they're producing the results you expect. This is useful particularly when you have configured multiple or complex automations. There are several ways to enter test mode:
Via the Test all button in the main questionnaire and automations view.
Via the Test button in the footer when editing a draft automation.

Via the Test icon in the list view of automations.

When in test mode, you'll be shown a preview of your onboarding request. You can choose to either test all automations or a single automation, via the Automation rule dropdown on the right-hand side.
Simulating the experience of answering a real onboarding request, add your answers and then select Run test. The results of your automations will populate in the Final result and Results log sections in the right-hand section.
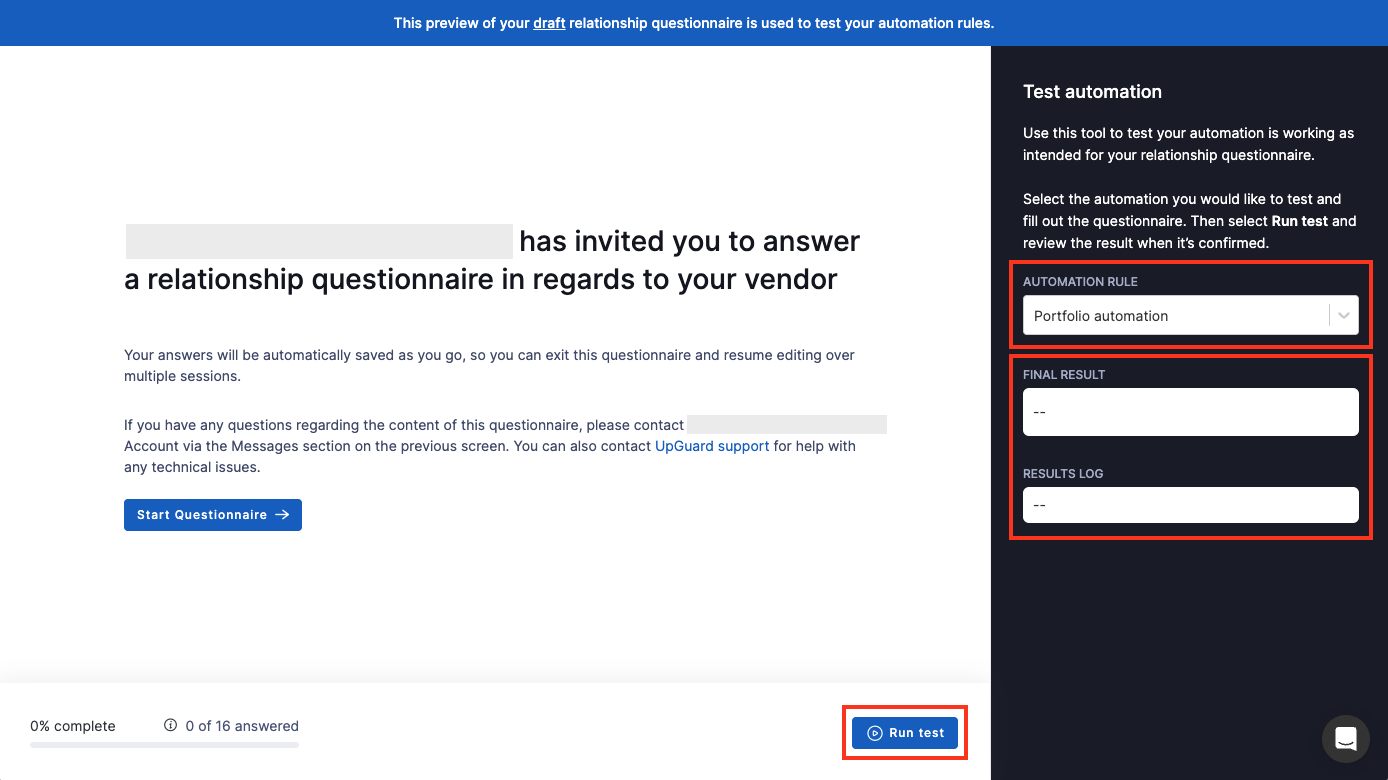
This allows you to verify that your expected outcome matches your automation logic.
Saving and publishing automations
Finally it's time to save, test and publish the automations. Draft automations are auto-saved. Additionally, at any time you can select Save automation to finish editing your automation.

This will return you to the Draft questionnaire template page, where you can view your draft questions and automation rules side by side. Rules will be executed from the top of the list to the bottom of the list when an onboarding request is submitted; if needed you can define the order in which they should be executed by rearranging the list.
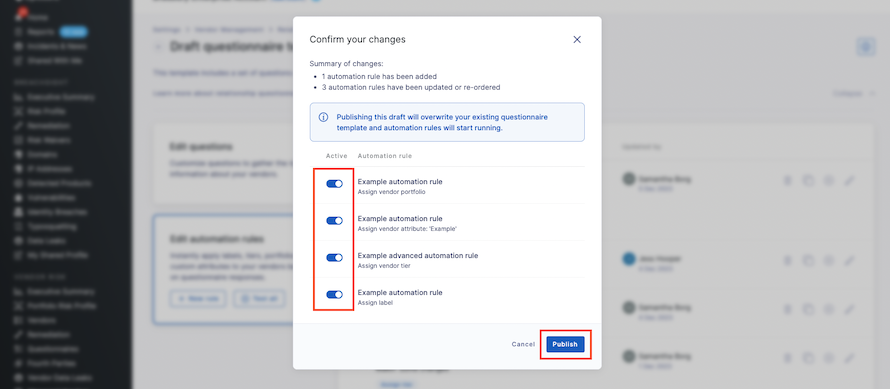
When you're ready to publish your changes (overwriting the current set of questions and any associated automations) choose Publish from the options at the bottom of the screen.

Confirm your changes, and select Publish one more time in the modal that appears. Note that the toggles define whether the automation is paused or running—any rules that are toggled on at the time of publishing will begin to run when an onboarding request is next returned.
You can pause automations at any time via the main automations view, or create a new draft to edit your published automations. Customers with access to the audit log will be able to see when changes to attributes are made via automation.