Power BI is a data analytics and business intelligence tool that you can use to generate insights about your data. You can use Power BI to create data models that visualize your data. You can create a workflow that integrates UpGuard data with Power BI processing so that you can generate insights for your key stakeholders.
In this tutorial, you will set up an integration between UpGuard and Power BI to send data from UpGuard to your Power BI instance.
Prerequisites
To follow this guide, you will need the following:
-
An UpGuard account with an API key that you can authenticate with. Follow our tutorial on How to authenticate with your UpGuard API key to set one up. If you don't already have an account, sign up for a free trial.
-
A Power BI account with the ability to run Power BI. This tutorial uses the Power BI Desktop client.
-
Familiarity with the UpGuard API.
Adding UpGuard as a data source in Power BI
In this step, you will set up the intake flow for Power BI by adding the base URL for UpGuard's API endpoints and a specified endpoint as a data source. For this tutorial, the example endpoint will return a list of risks detected for your account, which is https://cyber-risk.upguard.com/api/public/risks, but you can select any of the available endpoints in the UpGuard API specifications.
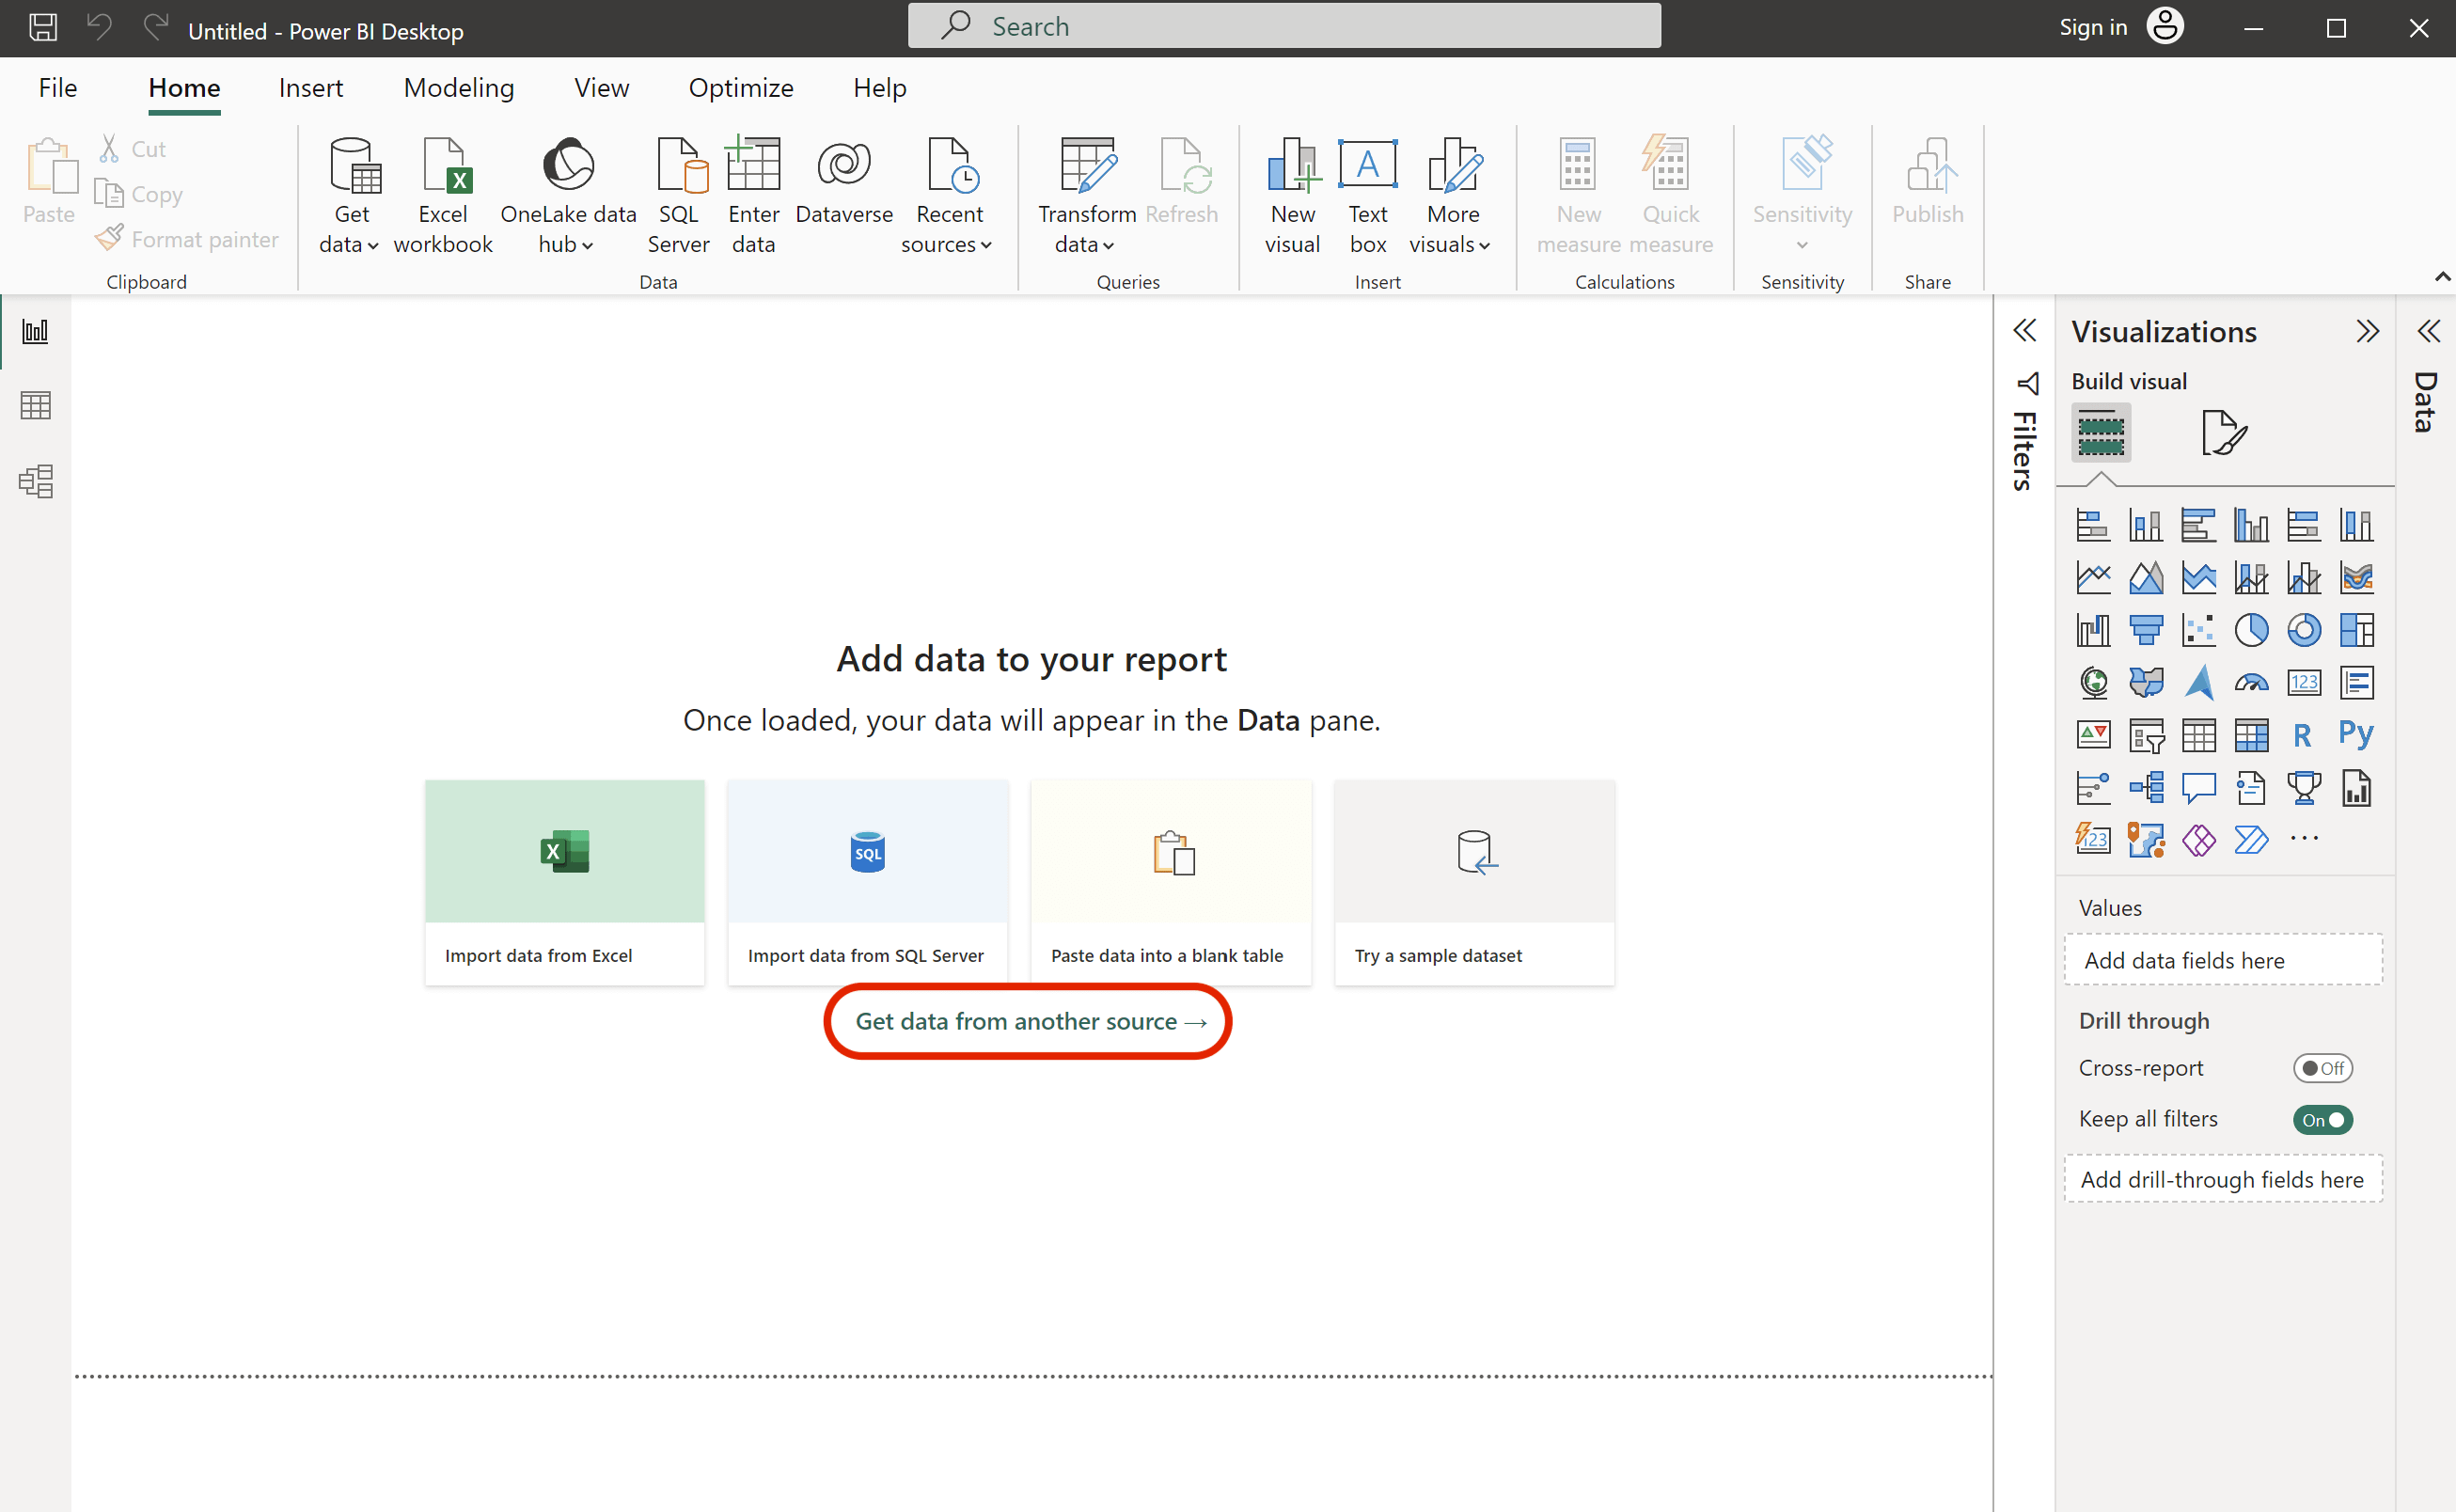
Open your PowerBI client and select the option to Get data from another source.
Select the Web option. You can either search "web" in the search field or select Other then Web from the nested options.
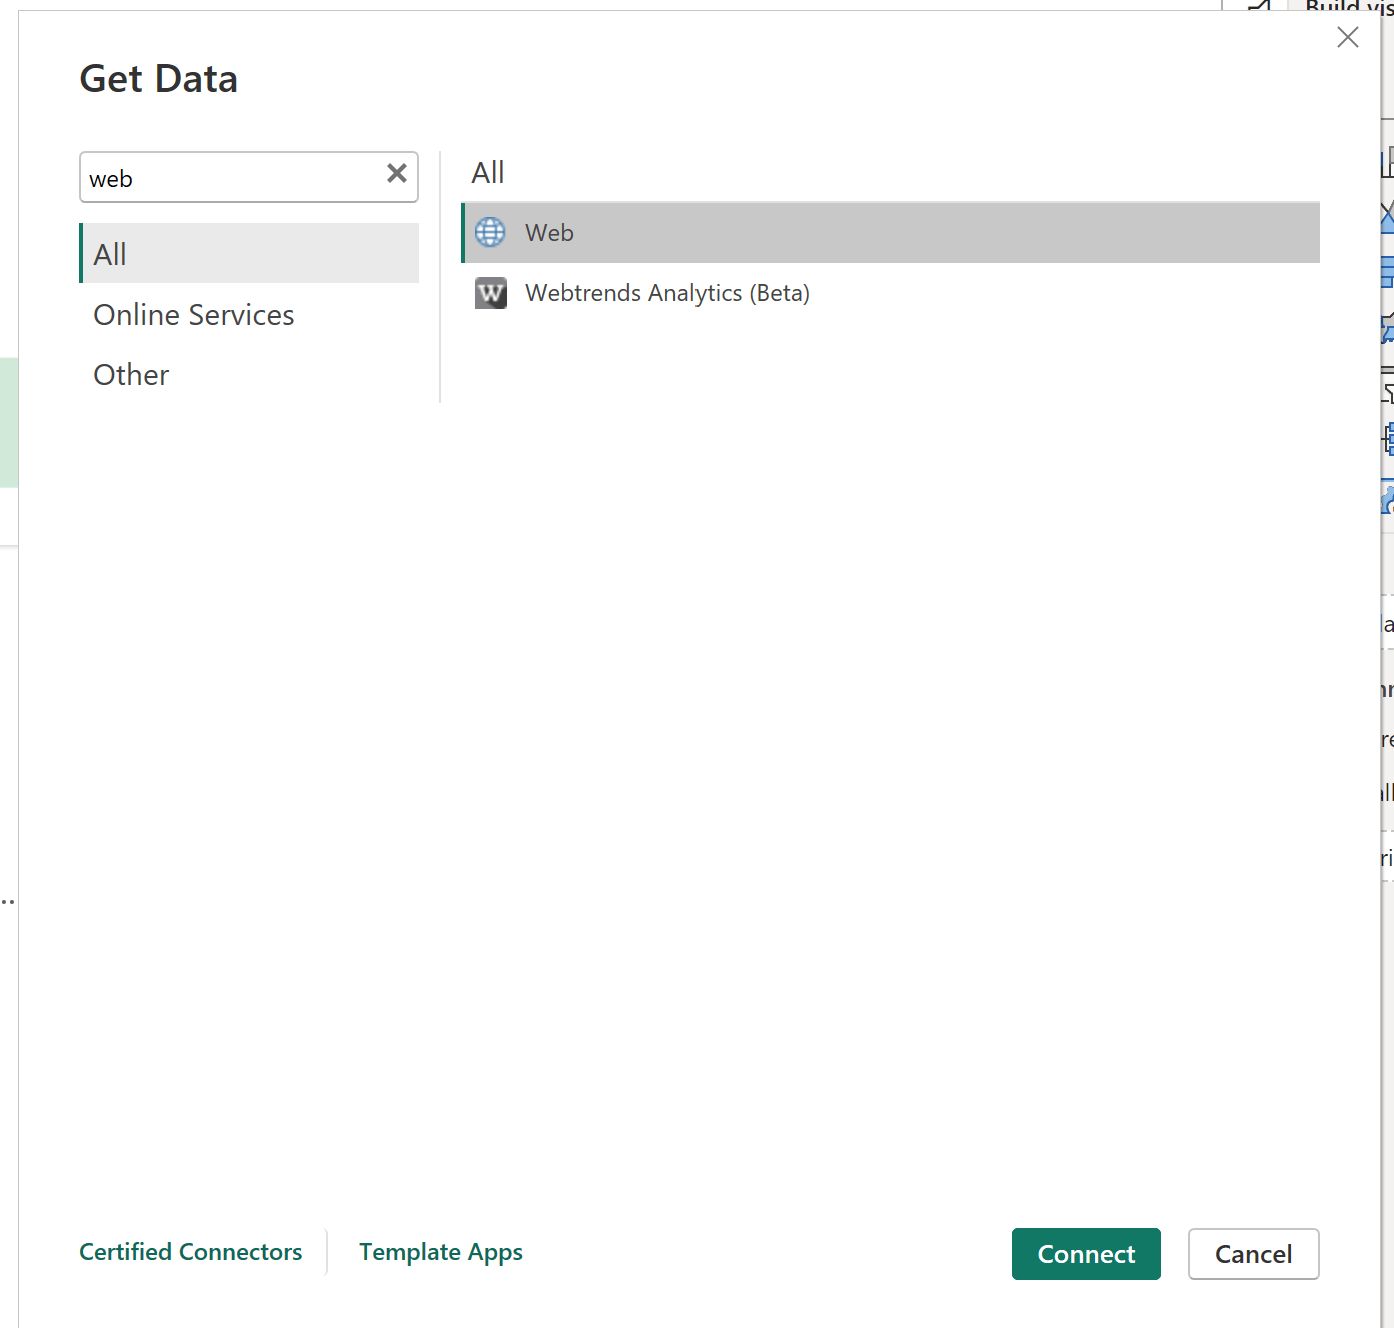
Press Connect to continue, then select the Advanced option. You will be able to add URL parts, a command timeout, and any header parameters required.
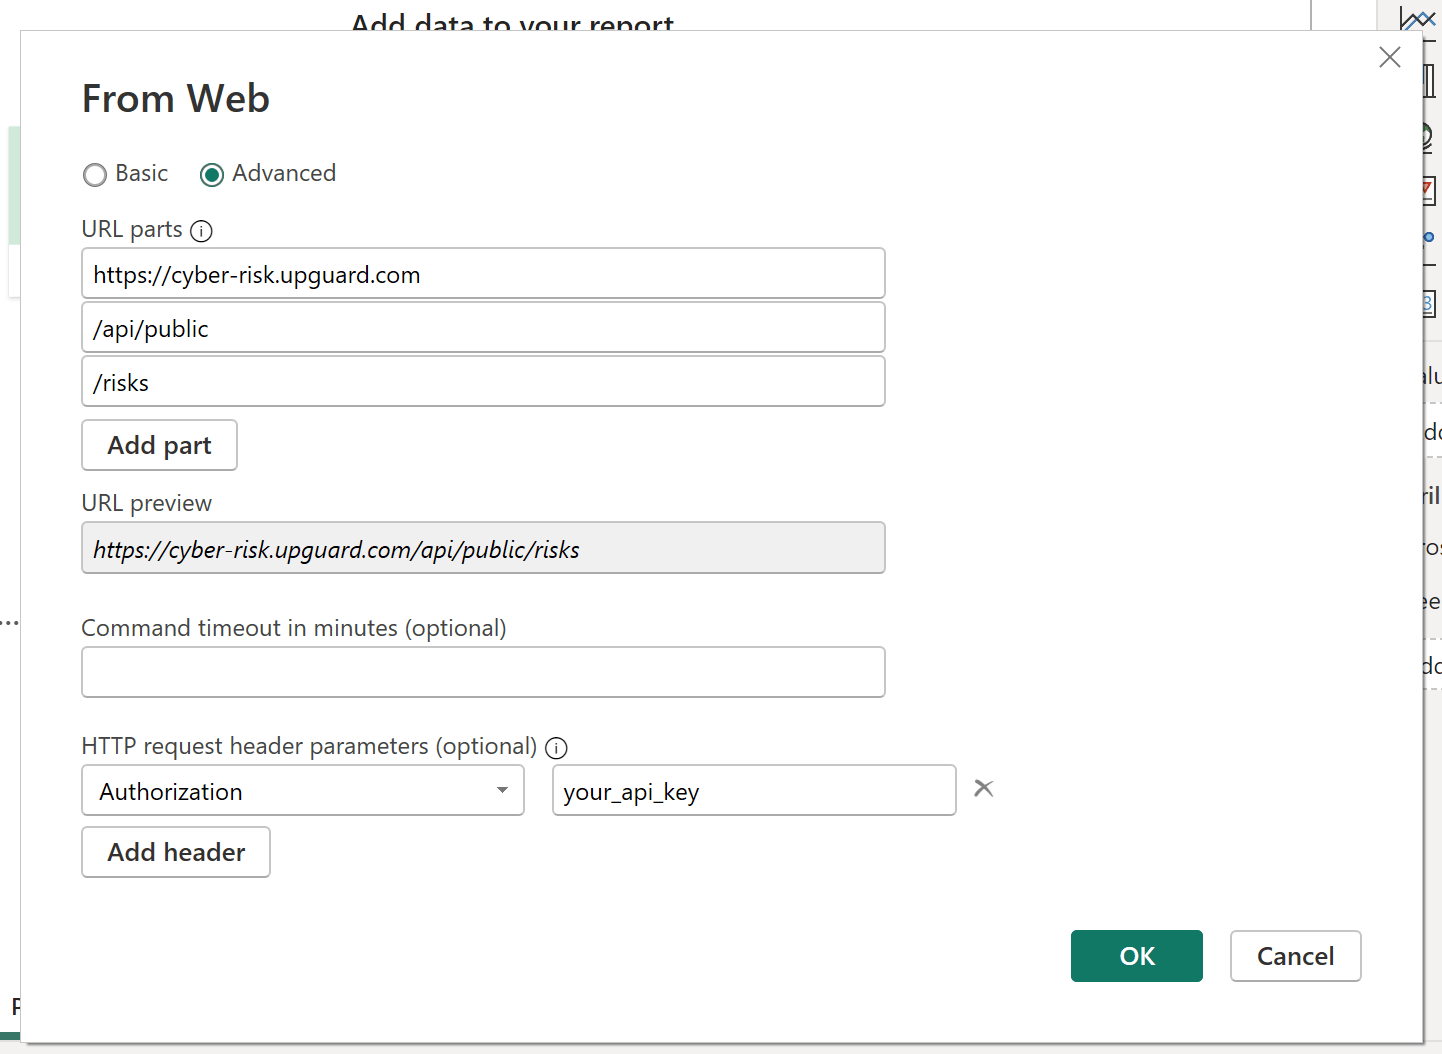
Add parts so that you have three URL parts available, then supply the base URL and necessary query parameters to return risks detected for your account:
-
In the first box, supply the base URL for UpGuard:
https://cyber-risk.upguard.com -
In the second box, add the path for all public endpoints:
/api/public -
In the third box, add the specific endpoint for your request, which is
/risksfor the example in this tutorial
In the first box, supply the base URL for UpGuard: https://cyber-risk.upguard.com
In the second box, add the path for all public endpoints: /api/public
In the third box, add the specific endpoint for your request, which is /risks for the example in this tutorial
You can provide a command timeout as desired, but this tutorial will skip that.
To ensure that data for your account can route into Power BI, you will need to supply your API key as an authorization parameter. In the HTTP request header parameters section, use the button to Add header. In the first box (which readers Enter or select a value), add the parameter name Authorization. In the second box, add your unique API key (where the image reads your_api_key).
Then press OK to connect the data source. A new window will open in the Power Query Editor with the risks detected for your account, as well as all relevant details from the response schema. Close and apply this data source to load it into Power BI.
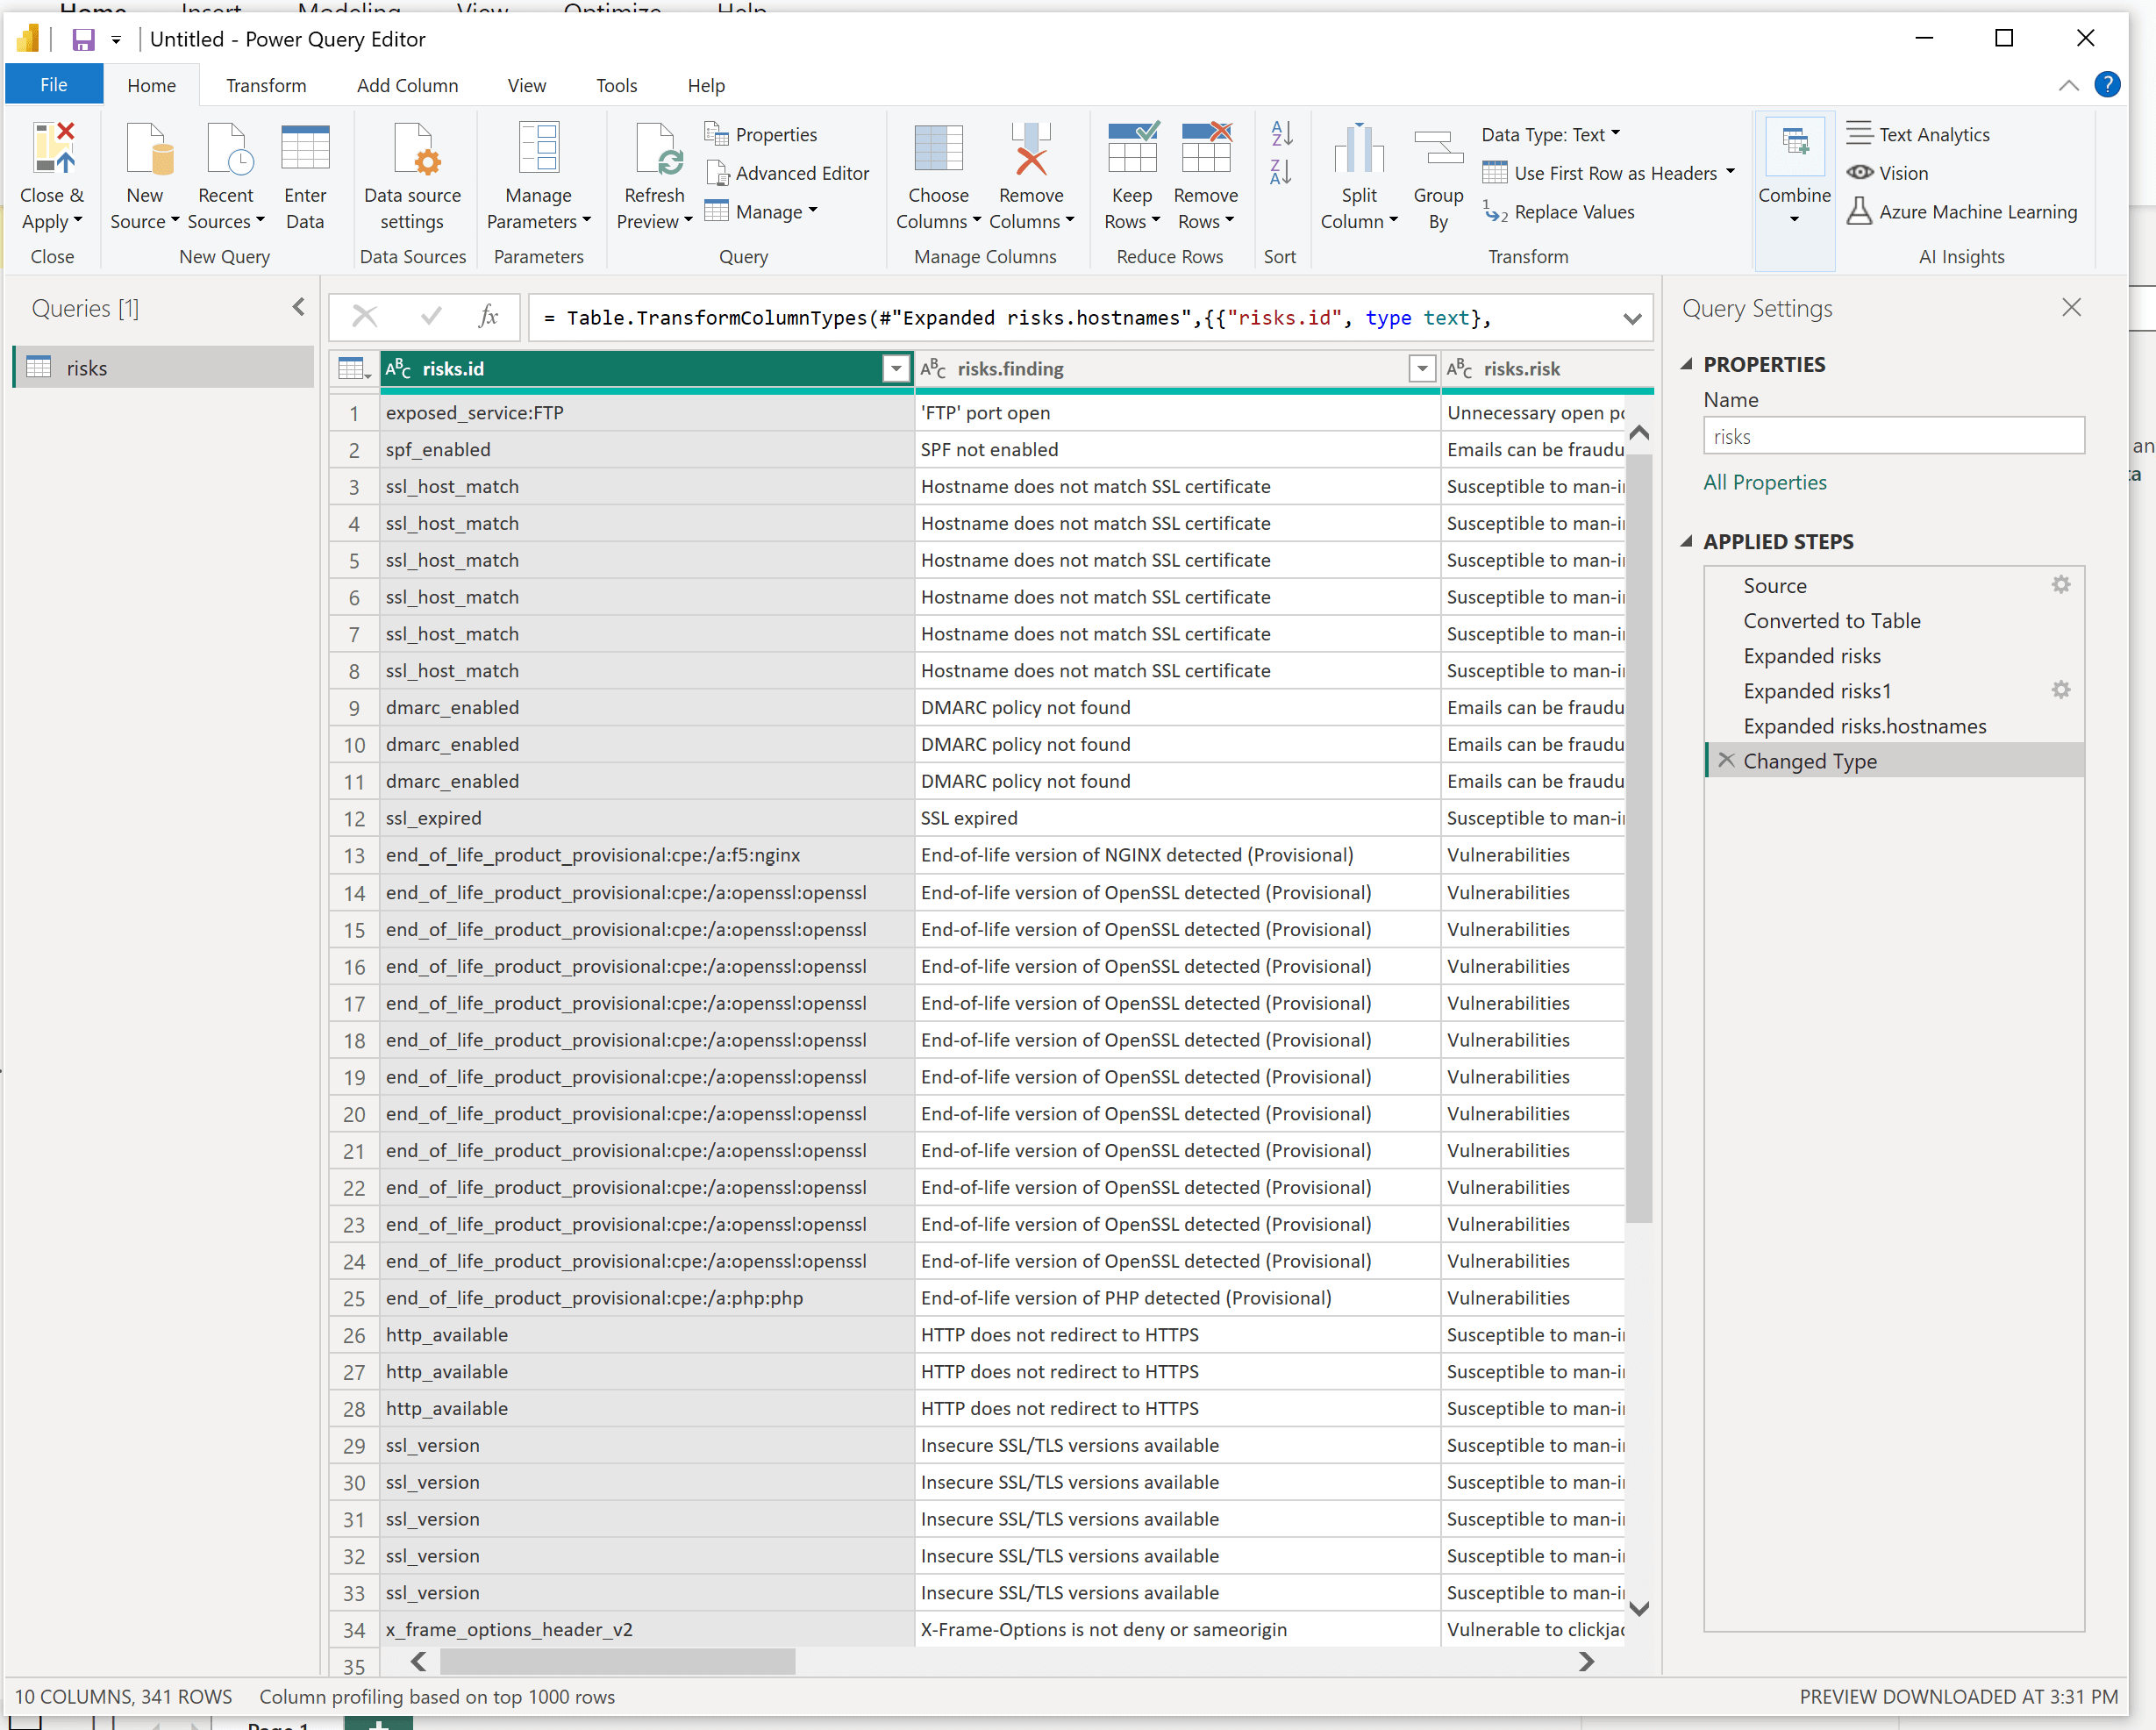
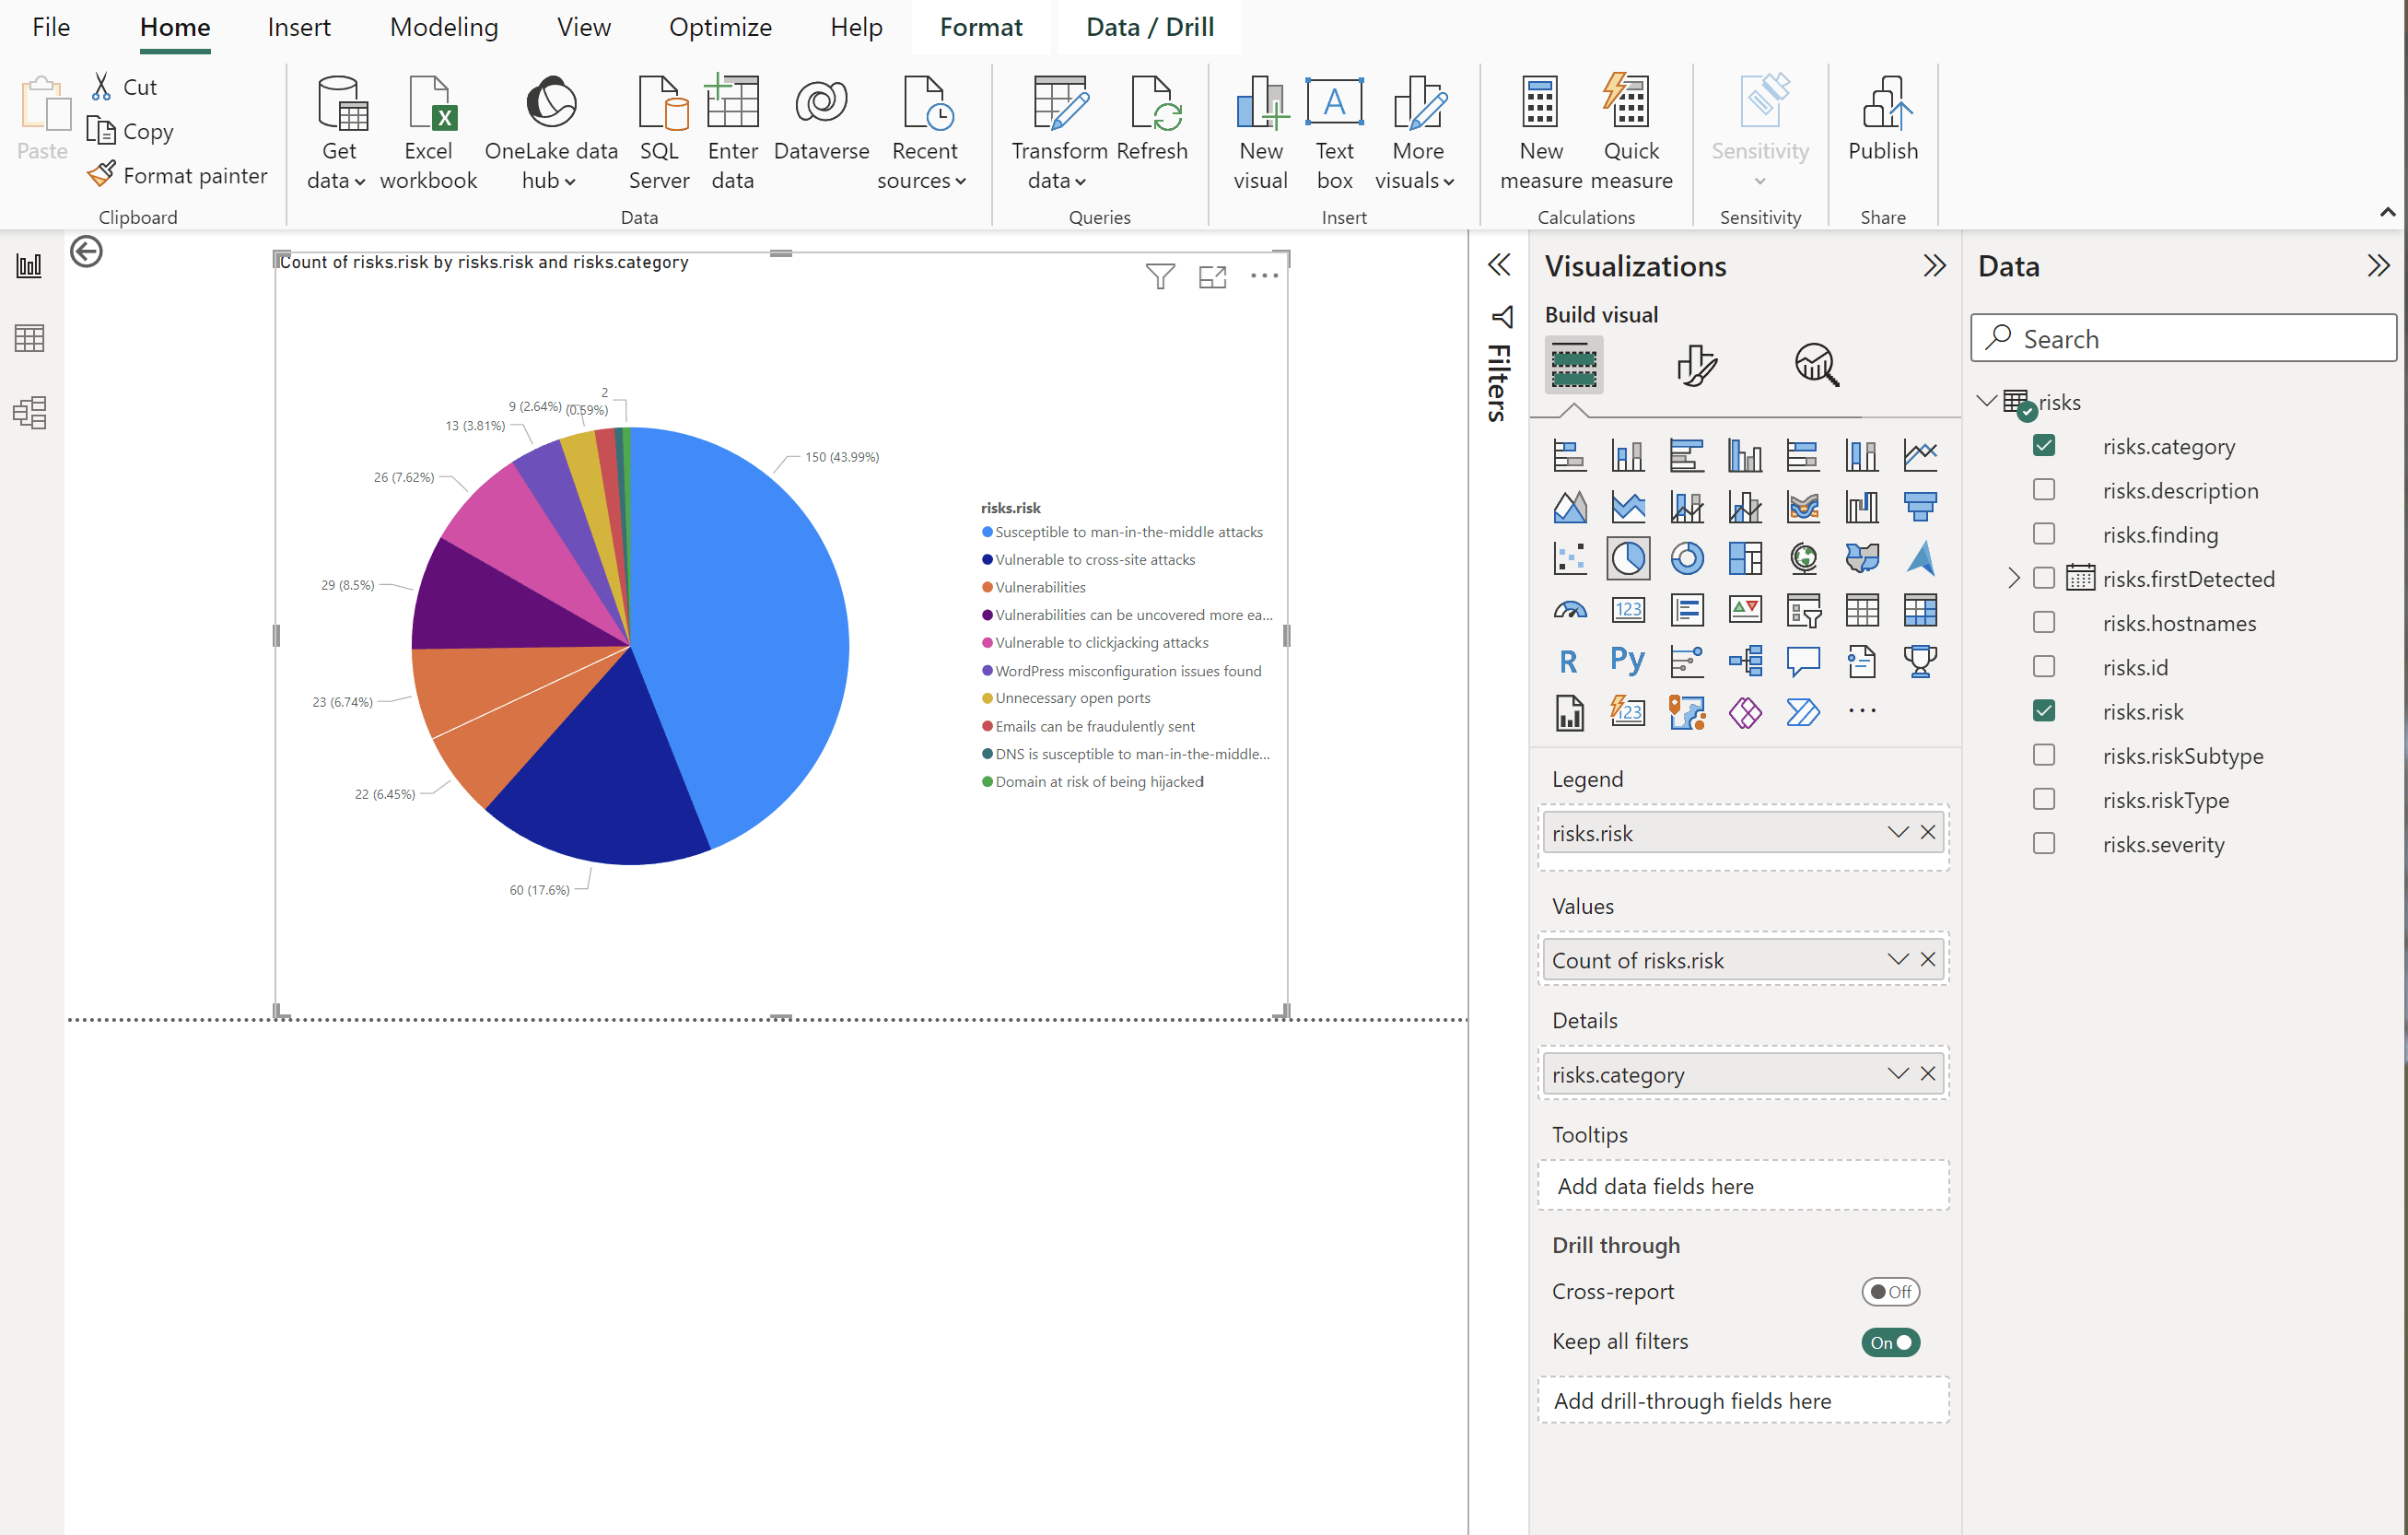
The risk data from your UpGuard account will now be available as a data source in your Power BI instance. You can proceed to use Power BI to build data visualizations or other analytical frameworks.
For example, you might create a pie chart identifying the types of risks and risk categories currently impacting your account.
You can also review UpGuard's API docs at any time to supply a different endpoint as a data source for Power BI.
See Also
For more information about using the UpGuard API, you can review these articles next:
Read these articles to generate reports directly from your UpGuard account: