If a vendor provides compensating control information, or other information that indicates that the risk level of a particular finding differs from the inherent risk, you may want to adjust the severity level of the risk to reflect the residual risk level.
UpGuard allows you to adjust the severity level of vendor risks within the platform, and record a justification for that severity adjustment. This functionality is available for risks raised in questionnaires and additional evidence. There are a number of places you can use as the starting point for adjusting risk severity.
There are several other places within the platform where you can create a severity adjustment:
-
The individual vendor's portfolio risk profile
-
The portfolio risk profile
-
In the Manage risks step of a risk assessment
-
From the Adjusted risks tab in the Modified risks section for a selected vendor.
-
From within a remediation request
-
From the questionnaire details page
Irrespective of where you initiate the request, the process for creating the request is the same. In this case we will run through the case where the request is initiated from the individual vendor's portfolio risk profile.
Adjusting risks from the Risk Profile
If you are exploring a vendor’s Risk Profile and identify a risk for which you want to adjust the severity, select the risk to see more information. You’ll see an option to Manage risk, which lists the various actions you can take to manage the risk. In this case, select Adjust this risk.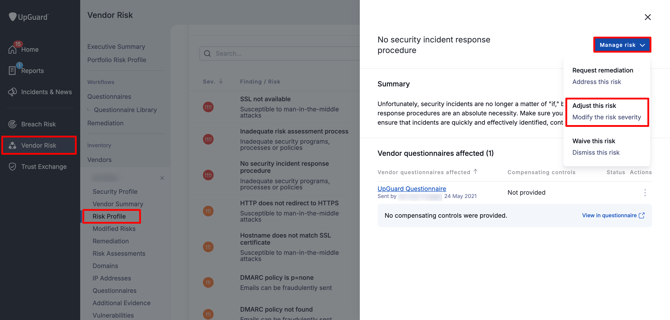
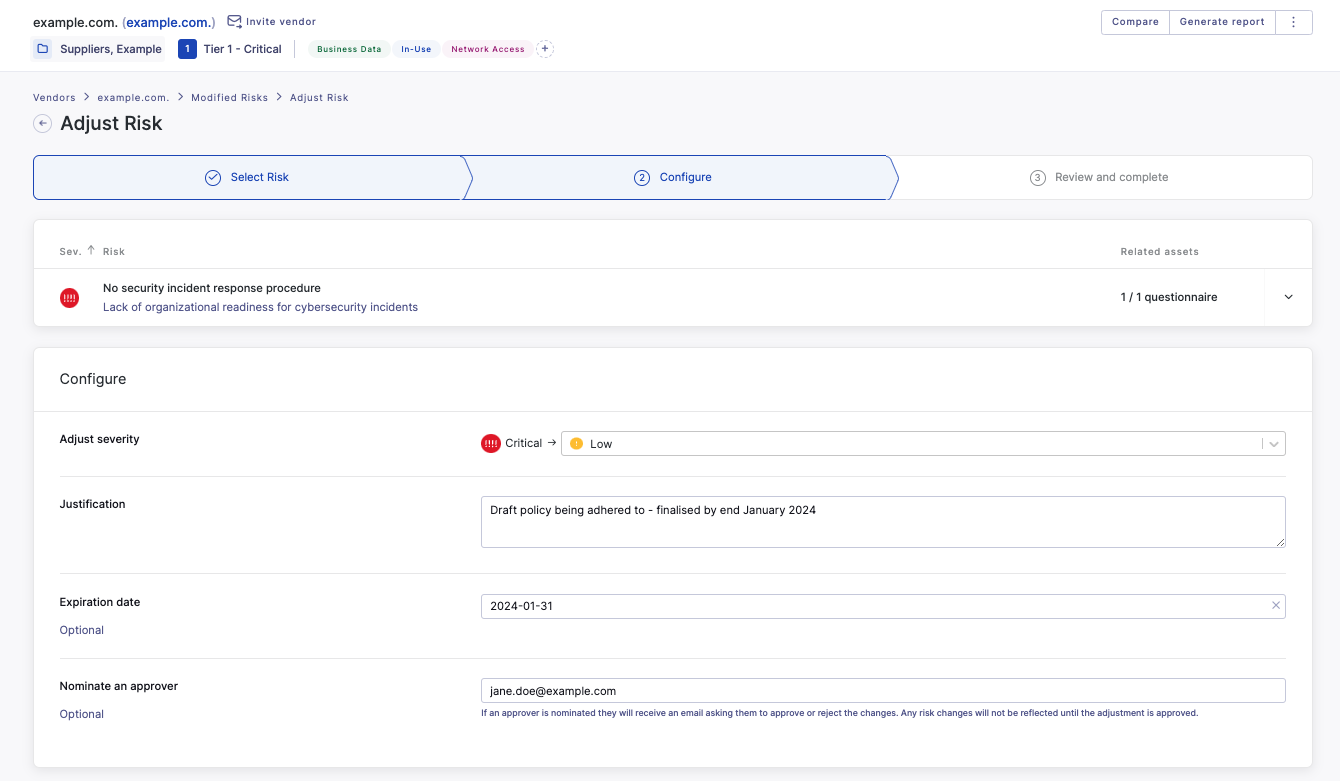
You’ll be taken to the second step of the risk adjustment process, where you can configure the risk severity adjustment by indicating the new (adjusted) risk severity and entering the justification for the severity adjustment (generally based on compensating control information or other context provided by the vendor).
Next you can set an expiry date if applicable, and nominate an approver. If the adjustment does not require approval, it will become active immediately. Your account admin can set approval control via the Settings page, to nominate authorized approvers and institute a mandatory approval step.
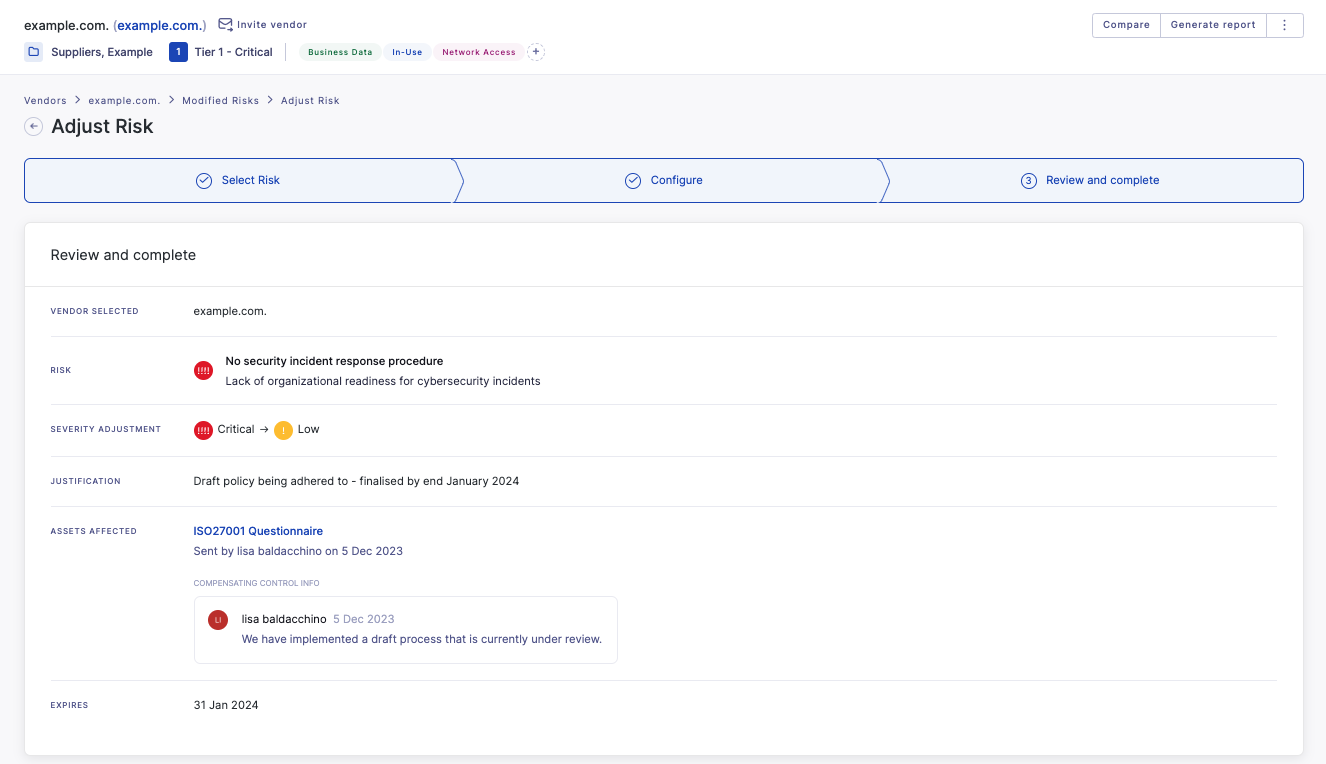
Review the details of the new risk severity adjustment. When you are happy with the details, click Submit Risk Adjustment.
Once the risk adjustment has been completed, (including approval if relevant), you will see the adjusted risks in the Adjusted risks tab in the Modified risks section for a selected vendor.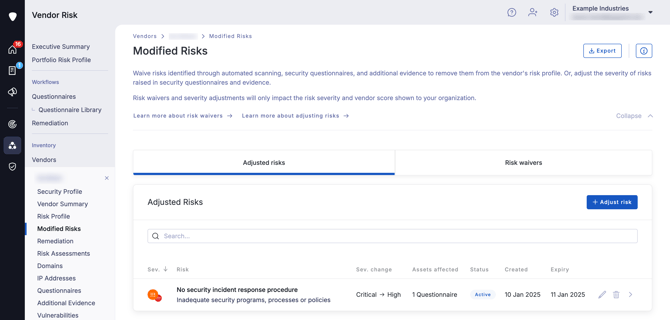
Once a risk severity has been adjusted, while it is active, it will appear throughout the platform and reports based on the new risk severity, with the original risk severity indicated by the background, smaller dot icon.

The vendor score will also be adjusted based on the new severity. Like risk waivers, severity adjustments will only impact the risk severity and vendor score shown to your organization.